
Colour Video TV Operating Instructions


12
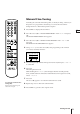
Getting Started
You need to set the clock for using timer recording and quick-timer
recording functions.
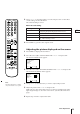
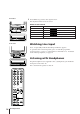
1 Press MENU to display the main menu.
2 Move the cursor (z) to “CLOCK SET” with + ◊ or – √ and press OK.
The CLOCK SET menu appears.
3 Press OK to start setting the clock.
The day section turns red.
4 Set the day with + ◊ or – √ and press OK.
The month section turns red.
5 Using + ◊ or – √ and OK, set the month, year, hour and minute in the
same way as in step 4.
6 After setting the minute, press OK.
The clock starts working.
7 Press MENU to go back to the original screen.
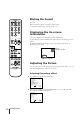
Step 4 — Setting the Clock
ON TIMER
SLEEP
TIMER REC
REC
REW
STOP PAUSE
FFPLAY
COUNTER
RESET
TIMER
ON SCREEN
ON/OFF
CLEAR
MENU
OK
123
456
789
-/--
0
PROGR
TIMER
QUICK
If you have made a mistake
Press ? to go back to the previous
position.
If power is interrupted or you
disconnect the mains lead for
more than one day
You have to re-set the clock.
CLOCK SET
1. 1. 1995 SUN 0 :00
OK
P ress
CLOCK SET
––. ––. –––– ––– ––:––
OK
P ress
OK
MENU
VISUAL MODE
ON TIMER SET
CLOCK SET
TRACKING CONTROL
LANGUAGE
PROGRAMME PRESET
DEMONSTRATION
Sape lect nd ress
CLOCK SET
4. 2. 1995 MON 5:30
OK
Sape lect nd r ess
11
CLOCK SET
4. 1. 1995 WED 0 :00
OK
Sapelect nd ress