
User Guide Digital Single Lens Reflex Camera SLR-A100
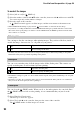

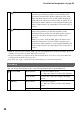
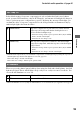
Table Of Contents
- Table of contents
- Notes on using your camera
- Basic techniques for better images
- Before your operation
- Using the shooting functions
- Using the viewing functions
- Using the menu
- Using your computer
- Printing images
- Troubleshooting
- Others
- Index

98
For details on the operation
1
page 80
Setup menu 1
Setup menu
The default settings are marked with .
You can adjust the brightness of the LCD monitor.
1 Select [Enter] in [LCDbrightness].
2 Adjust the brightness with b/B on the controller or with the control dial, then press the center of
the controller.
Selects the USB mode to be used when connecting the camera to a computer, etc., using a
USB cable.
Sets the video signal output according to the TV color system of the connected video
equipment. Different countries and regions use different TV color systems. If you want to
view images on a TV screen, check page 79 for the TV color system of the country or region
where the camera is used.
LCDbrightness
Transfer mode
Mass Storage
Used for copying images to the computer. The camera is
recognized as a USB mass storage device.
PTP
Prints the images with a PictBridge compliant printer or
copies images to PTP (Picture Transfer Protocol) compliant
devices.
• For details on printing with a PictBridge compliant printer, see
page 123.
Video output
NTSC
Sets the video output signal to NTSC mode (e.g., for the USA,
Japan).
PAL
Sets the video output signal to PAL mode (e.g., for Europe).