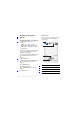
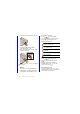
3 Insert the battery. To disconnect the charger To charge the battery • Remove the charger by tilting the plug upwards. IMEI number IMEI (International Mobile Equipment Identifier) is a 15-digit number. Your operator can use the IMEI number to enable a complete barring of your phone if it is stolen. The number is printed underneath the battery compartment. You can also view the number on the phone display. 1 Connect the charger to the mains 2 Connect the charger to the phone.
First time start-up Before you can use your phone you need to insert the SIM card, and insert and charge the battery. 1 2 3 4 5 To turn on the phone Press and hold down the On/off button. Select Phone on. Select a language. Enter your PIN, if requested. Select Done. If you make a mistake when you enter your PIN code, you can delete the number by pressing . If you enter the wrong PIN code three times in a row, the SIM card is blocked.
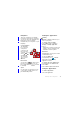
Getting to know the phone Turning the phone on and off The screen The screen is touch-sensitive. You can use the stylus or your fingertips to select items. Your phone has two modes of operation: 1 • Phone on – full functionality. • Flight mode – limited functionality with network and radio functions switched off. 2 You can use flight mode where mobile phones are prohibited, such as in hospitals and aircrafts. To turn on the phone in phone mode 1 Press and hold down the On/off button.
Navigation There are several ways to navigate menus and select items in your phone. You can use the 5-way navigation key, back button, stylus, keyboard navigation keys, touch options or your fingertips. 5-way navigation The navigation key consists of a ring and a center key. The ring is used for going up and down , left and right . The center key is used for selection. Back button You can press to return to the previous screen or menu. You can press and hold down to return to Standby.
To close an application • Press and hold down Connecting accessories . To leave an application without closing it • Switch to another application using Task manager. See Task manager on page 12. Task manager Task manager helps you switch between applications. Leaving an application via Task manager rather than closing it, lets you return to the the application in the state that you left it. This is useful, for example, when cutting and pasting text from one application to another.
Main menu overview* Organizer Internet File manager Calendar Time & alarms Tasks Notes Quickoffice Pdf+ Speed dial Video calls Converter Remote sync Timer Stopwatch Calculator Torch Business card scanner Connections mgr Entertainment RSS feeds More applications Interactive Radio PlayNow™ MusicDJ™ Track ID™ & Sound Recorder Sudoku Demo Camera Messaging Media Calls Contacts Settings Sounds & alerts General Display Calls Connectivity Messaging Security * Some menus are operator-, network-, and subscr
Status bar Status bar icons You can select an icon to get more information or to start an application. Below is a short description of the most common icons appearing in the status bar.
To access the Status bar menu • Select in the status bar. Importing phone book entries You can import contact information by: • Copying phonebook entries stored on your SIM card. • Transferring phonebook entries from a computer application using the synchronize function. • Transferring phonebook entries from another phone using Bluetooth™ wireless technology. Sound To set the ear speaker volume during a phone call • Press the volume up and volume down keys.
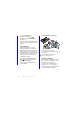
2 Insert the memory card into the slot. To create a new note 1 Press and select New. 2 Use the toolbar to create your note. 3 Select File to classify your note. Notes toolbar icons Scribble mode selected. Tap to switch to text mode To remove the memory card 1 Open the battery cover. 2 Press the edge of the memory card and then release it. Text mode selected.
To change notes view 1 Press and select More > Settings. 2 Select an option. To view different notes folders 1 Press and select More > View folder. 2 Select an option. To search for notes 1 Press and select More > Find. 2 Enter the search phrase and select Find. To synchronize your notes • Select More > Notes manager > Synchronize. Only the text part of your notes will be synchronized. You need a remote synchronization account first. For more information, see the Web guide, Synchronizing data remotely.
Editing text The text editing options are accessed by selecting More when you are in text entry mode. Text must be highlighted to get access to copy or cut functions. To highlight the text with the stylus • Hold the stylus at the end of the text for a short while then drag the stylus across the text. Keypad prediction Keypad prediction allows words to be entered by a single press of a key to input any of the letters associated with that key.
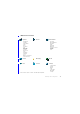
To write letters • Write lower case letters below the arrow and upper case letters in line with the arrow. a b c d e f g h 2 i 1 2 j 1 1 k l m 2 2 1 2 1 n o p q r s t 2 u v w x1 y z 2 Write the accent above the arrow to form the accented letter. . S , To write numbers • Write numbers above the arrow. ? ! & @ 1 ' " 2 Start each stroke at the dotted end. To write accented letters 1 Write the basic letter. 1 2 0 1 2 3 4 5 6 7 8 9 = + , . * / \ ( ) Text options Text options are accessed
1 2 3 4 1 2 3 4 To add words to My words dictionary Select My words. Select Add. Write the new word and select Done. Select Save. To change 1st and 2nd dictionary languages for text prediction Select More > Text options and mark the Predictive text check box. Select 1st language or 2nd language. Select a language from the list. Select Save. To activate Auto capitalization • Mark the Auto capitalization check box. To access the on-board help 1 From Standby select Main menu > More > Help.
Calling Networks To delete characters when dialling • When entering a number you can delete characters by pressing . Network coverage To make or receive a phone call your phone must be within range of a network. Hide or show your phone number When calling, you can choose in the More menu whether to show or hide your phone number to the called party. Network settings You can set how your phone should choose an available network when you are outside your operator’s coverage area.
2 Select Call. Local SOS numbers When dialling, you can find local SOS numbers in the More menu. Usually no SIM card or PIN code is required for emergency calls, but this can be operator-dependant. Contact your operator for more information. Receiving a call To answer a call • Select Yes. To reject a call with busy tone • Select No. Rejecting a call with an SMS text message This feature means that you can reject a call by sending a pre-defined SMS text message to the caller.
Video calls When you make a video call you can see the person you are talking to on the screen. To make a video call from Standby 1 Enter the number using the keypad. 2 Select Video call. To accept an incoming call • When you receive a call, select Yes. Video call demo mode If you select the Video phone application in Main menu > Organizer you can try most of the functions without making a call. For example, you can prepare a camera view before calling.
Call log You can find call information, such as the type of call, time, date, phone number and call length, in Main menu > Calls. You can also make a call or a call note directly from this application. Handsfree If you connect a handsfree or a Bluetooth™ headset to your phone, you will need to set how to answer an incoming call. From Standby select Main menu > Settings > Calls > Handsfree.
To find service numbers on the SIM card 1 From Standby select Main menu > Contacts. 2 Select More > View folder > SIM. 3 Select More > Service numbers. Creating contacts To create a new contact 1 From Standby select Main menu > Contacts. 2 Select More > New contact. 3 You can enter contact data on four tabs. 4 Select Save. If you save your contacts’ phone numbers in the international number format, starting with +, you can call directly from Contacts when you are abroad.
To add a stored picture to a contact 1 From Standby select Main menu > Contacts and scroll to a contact. 2 Select More > Edit contact. 3 Scroll to the Picture field and select Edit. 4 Choose Select and scroll to a picture you want to add. 5 Choose Select > Save. 1 2 3 4 5 6 7 To add a personal ringtone to a contact From Standby select Main menu > Contacts and scroll to the desired contact. Select More > Edit contact. Select the audio tab .
Internet Open the Configuration menu Web Add a bookmark for the current page To use Web you need an Internet connection. See Setting up Internet, email and MMS in the Web guide. To start the Web browser • From Standby select Main menu > Web. Navigation All navigation commands and settings are available from the More menu. The most common operations are also available as keyboard shortcuts.
Blog You can add feeds directly in the Web feeds reader. An easier way is to add feeds from within the Web browser. Before you use Web feeds To use Web feeds you need an Internet connection. See Setting up Internet, email and MMS in the Web guide. To subscribe to a Web feed 1 From Standby select Main menu > Entertainment > Web feeds. 2 Select More > Add feed and enter the address to the feed. 3 Select a folder to add the feed to.
Messaging Before you use Messaging Before you can send or receive any messages (except for SMS text messages) you need to set up the necessary accounts. You can use the Internet and Email wizards provided in the phone to download settings or do this manually. See Setting up Internet, email and MMS in the Web guide.
1 2 3 4 • Drafts – contains messages that are not ready to be sent. When you are creating a message, and exit the message before sending it, you will be asked if you want to save it. If you select Yes, the message will automatically be stored in this folder. • Sent – contains sent messages. • SIM – a folder located on your SIM card. Before you use MMS Before you can send and receive multimedia messages you need to download MMS settings.
2 Entry field (on the detail tab) where you can create your message 3 Playback keys 4 New page icon 5 Time view icon. Opens a view where you can adjust when and for how long your added items will be shown 6 Attachments tab. 7 Address tab for the recipient and other details To create and send an MMS 1 From Standby select Main menu > Messaging. 2 Select Create new message > MMS. 3 Add picture, text and sound as desired. 4 Select and fill in the recipient’s details.
3 Tap To: > Select contact and browse to your contact or tap to the side of To: and write the email address of the recipient. To send a message to several recipients, type a comma between each address. 4 Select Subject: and enter details. 5 Write your message and select Done. 6 Select Send. You will have the option to send the message immediately, or to save it to Outbox. Receiving email Email messages are downloaded from the email server on the Internet or at your office.
4 Select Save. To view messages in full screen 1 From Standby select Main menu > Messaging > your email account. 2 Select More > Settings > Always fullscreen. Viewing attachments To view an attachment you need a viewer for that type of file. Your phone comes with pre-installed viewers for Microsoft® Word, Microsoft® Excel®, Microsoft® PowerPoint®, and Adobe™ Acrobat™ files. More about Messaging Deleting email You can delete a message both locally and on your email server.
Invitations If you receive an invitation to an appointment via an email message, and you accept, your calendar will be updated automatically. You can also reply to and forward an invitation. Push email With push email, email messages received in your ordinary mailbox will automatically be sent to your phone. You can send messages from your phone, and also use Calendar and Contacts as if you were using the ordinary email application in your computer.
Media With the Media application you can handle all your media files, such as photos and pictures, music, other audio tracks and video clips. From Standby select Main menu > Media to select either of these main functions: • Photo – view, edit, send or blog your photos and pictures. • Music – categorize and play your music files, or other audio tracks. • Video – play and handle your video clips. • Settings – change application orientation, update your libraries or use the encoding function.
2 Select View > Start to run an automatic slide show. 3 Select one of the pre-defined sounds or choose your own by selecting Edit. To send a picture 1 From Standby select Main menu > Media > Photo and select one of the four viewing options. 2 Select a picture. 3 Select More > Send as and choose to send the file by Bluetooth™, in an MMS message, or to a blog. Remote screen You can use a compatible Bluetooth™ accessory to view pictures on a remote screen, such as a TV.
2 Browse for music/tracks by Albums, Artists, Tracks, Compilations, Auto playlists, Playlists, Audiobooks and Podcasts. 3 Scroll to the desired track and select Play. Playback controls Play Stop Skip to previous track Skip to next track To adjust the volume • Press the Volume keys. To minimize the music player • When the music player is open press and hold down . The music will continue to play. To return to the music player, press in the Status bar.
To play a video clip 1 From Standby select Main menu > Media > Video. 2 Navigate to the clip you want to watch and select Play. Playback controls During playback, you can use the playback controls. See Playback controls on page 37. To move within a video clip • Tap on the progress bar. To change screen orientation • During playback, tap the screen in the video playback area to switch between landscape and portrait view.
Camera The 5 megapixel camera can take both still pictures and video clips. You can store them in the phone or send them as MMS. Exposure control is automatic and in poor light conditions you can use the camera light. To take a picture or a video clip 1 Press the camera key to activate the camera. 2 Change the settings if necessary. 3 Press the camera key half way to focus the lens. Then fully press to capture the picture. 6 7 1 2 Focus area 3 Press once to change the most often used settings.
Changing the camera settings Press to see how you can use the keypad keys as shortcuts for some of the most frequently used settings. Press the key again to remove the description. Most of the settings you make will remain until you change them, even if you have switched the camera or your phone off. To change the most used settings 1 Press once to open the list of settings. 2 Select the required setting to see the options for this setting. 3 Select an option to change the setting.
• Auto review - show the picture or video clip automatically after it has been taken • Save to - select if pictures and clips will be saved to the memory card or the phone memory. If you select Memory Stick preferred they will be stored on the phone memory when there is no room left on the memory card.
Entertainment PlayNow™ PlayNow™ is an entertainment download service. You can preview content before purchase. This service is not available in all countries. Before you use PlayNow™ To use PlayNow™ you need an Internet connection. See Setting up Internet, email and MMS in the Web guide. Previewing content You can download a preview sample for most content available at PlayNow™ before deciding to purchase. To preview PlayNow™ content 1 From Standby select Main menu > Entertainment > PlayNow™.
To minimize the radio • When FM radio is open press the back key. The radio will continue playing in the background. To return to the radio • Select in the status bar. To turn the radio off • When the FM radio is open select Off. Tuning and memory presets To search for radio channels • When FM radio is open select . or To tune manually 1 When FM radio is open select More > Set frequency. 2 Enter the frequency using the keys. You can also press and hold down or to change the frequency in 0.1 MHz steps.
artist, the album and the title of the song. The TrackID™ service is free, but your service provider may charge for the data traffic. This service is not available in all countries. Before you use TrackID™ To use TrackID™ you need an Internet connection. See Setting up Internet, email and MMS in the Web guide. To identify a song using the microphone 1 From Standby select Main menu > Entertainment > TrackID™. Hold the phone close to the speaker and select Start.
Connectivity To exchange information between your phone and another device you can use, for example, a USB or a Bluetooth™ connection. PC Suite When connecting your phone to a computer it is for certain tasks a requirement to have Sony Ericsson PC Suite installed on your computer. Install it from the CD delivered with your phone or go to www.sonyericsson.com/support for the latest version.
4 Use Windows Explorer as usual to transfer files between phone and computer. To disconnect the phone safely from your computer 1 Computer: Right-click the removable disk icon in Windows Explorer and select Eject. 2 Phone: Remove the USB cable from your phone. Phone mode In phone mode you can use your computer to synchronize contacts and calendar items, transfer files, use the phone as a modem and more.
2 Select the Settings tab and mark the Bluetooth On check box. Pairing For all tasks, except for a single file transfer, it is necessary to set up a permanent and trusted relationship between your phone and the other device. This is called pairing (or bonding). 1 2 3 4 To pair with another Bluetooth device From Standby select Main menu > Settings > Connectivity > Bluetooth. Select the Devices tab > New device. Select the device in the list. If you are asked to, enter the passcode (also called passkey).
To set up a WLAN account 1 From Standby select Main menu > Settings > Connectivity > WLAN. 2 Select More > New account. 3 Enter required data and save. For more information, see Settings in the Web guide or Help in the phone. Connections manager Connections manager is where you control your Internet connections – open and close connections and also reset the logs for the connections. To open Connections manager • From Standby select Main menu > Organizer > Connections mgr.
More features Managing files and applications File manager With File manager you can view, rename, copy, move and delete files and folders in the phone memory and on the memory card. The File manager view has two tabs – the tab for the phone memory and the tab for the memory card. To open File manager • From Standby select Main menu > Organizer > File manager. Protected files Downloaded or received files may be copyright-protected.
unavailable when the phone is connected to a computer. In Main menu > Entertainment > More applications there are links to additional applications for your phone. Some of the applications are free of charge or free to try out. To install an application 1 From Standby select Main menu > Settings > General > Install. 2 Select the application and choose Details to view information about the certificate. 3 If the certificate details are OK, select Install and follow the instructions in the phone.
Screen saver You can use a picture as a screen saver. To set a screen saver • From Standby select Main menu > Settings > Display > Screen saver. • Select Open and choose a type.
Important information Sony Ericsson Consumer Web site On www.sonyericsson.com/support there is a support section where help and tips are only a few clicks away. Here you will find the latest computer software updates and tips on how to use your phone more efficiently.
Hungary India Indonesia Ireland Italy Lithuania Malaysia Mexico Netherlands New Zealand Norway Pakistan Philippines Poland Portugal Romania Russia Singapore Slovakia South Africa Spain Sweden Switzerland Taiwan Thailand Turkey Ukraine United Arab Emirates United Kingdom United States Venezuela +36 1 880 4747 questions.HU@support.sonyericsson.com 1800 11 1800 (toll free number) questions.IN@support.sonyericsson.com 39011111 (from mobile phone) 021-2701388 questions.ID@support.sonyericsson.
Guidelines for Safe and Efficient Use Please follow these guidelines. Failure to do so might entail a potential health risk or product malfunction. If in doubt as to its proper function, have the product checked by a certified service partner before charging or using it. Recommendations for care and safe use of our products • Handle with care and keep in a clean and dust-free place. • Warning! May explode if disposed of in fire. • Do not expose your product to liquid or excess humidity.
and voice or data transmissions. Avoid danger by using appropriate Sony Ericsson batteries and chargers. Personal medical devices Mobile phones may affect implanted medical equipment. Reduce risk of interference by keeping a minimum distance of 15 cm (6 inches) between the phone and the device. Use the phone at your right ear. Do not carry the phone in your breast pocket. Turn off the phone if you suspect interference. For all medical devices, consult a physician and the manufacturer.
minimum of 15 mm from the body without any metal parts in the vicinity of the phone or when properly used with an appropriate Sony Ericsson accessory and worn on the body. For more information about SAR and radio frequency exposure go to: www.sonyericsson.com/ health. Malware Malware (short for malicious software) is software that can harm your mobile phone or other computers. Malware or harmful applications can include viruses, worms, spyware, and other unwanted programs.
WARNING: If your device requires an adapter for insertion into the mobile phone or another device, do not insert the card directly without the required adapter. Precautions on memory card use • Do not expose the memory card to moisture. • Do not touch terminal connections with your hand or any metal object. • Do not strike, bend, or drop the memory card. • Do not attempt to disassemble or modify the memory card.
In the event Software accompanying or provided in conjunction with your device is provided with additional terms and conditions, such provisions shall also govern your possession and usage of the Software.
4 5 6 7 8 accident, software or hardware modification or adjustment, acts of God or damage resulting from liquid. A rechargeable battery can be charged and discharged more than a hundred times. However, it will eventually wear out – this is not a defect and corresponds to normal wear and tear. When the talk-time or standby time is noticeably shorter, it is time to replace your battery. Sony Ericsson recommends that you use only batteries and chargers approved by Sony Ericsson.
** In some countries/regions additional information (such as a valid warranty card) may be requested. Declaration of Conformity for G900 FCC Statement We, Sony Ericsson Mobile Communications AB of Nya Vattentornet SE-221 88 Lund, Sweden declare under our sole responsibility that our product Sony Ericsson type FAD-3022019-BV and in combination with our accessories, to which this declaration relates is in conformity with the appropriate standards EN 301 511:V9.0.2, EN 301 908-1:V2.2.1, EN 301 908-2:V2.2.
Index Numerics H 5-way ....................................................11 Handsfree settings ................................24 Handwriting recognition .......................18 B Back button ..........................................11 Backup of phone data ..........................45 Battery ....................................................7 Blog ......................................................28 Bluetooth™ wireless technology ..........46 I IMEI number ..................................
O On/off ................................................... 10 On-screen keyboard ............................ 18 Status bar ............................................. 14 stylus .................................................... 11 Symbols ............................................... 19 Synchronization .................................... 46 P Pairing .................................................. 47 PC Suite ............................................... 45 Phone book ......................