User’s Guide for xMac mini Server ™ PCIe 2.
Contents 1 Introduction and Package Contents.............................................................................................................................................. 1 Introduction Package Contents 2 xMac mini Server Description....................................................................................................................................................... 2 3 PCIe Cards, Computer, and xMac mini Server Installation Steps..................................
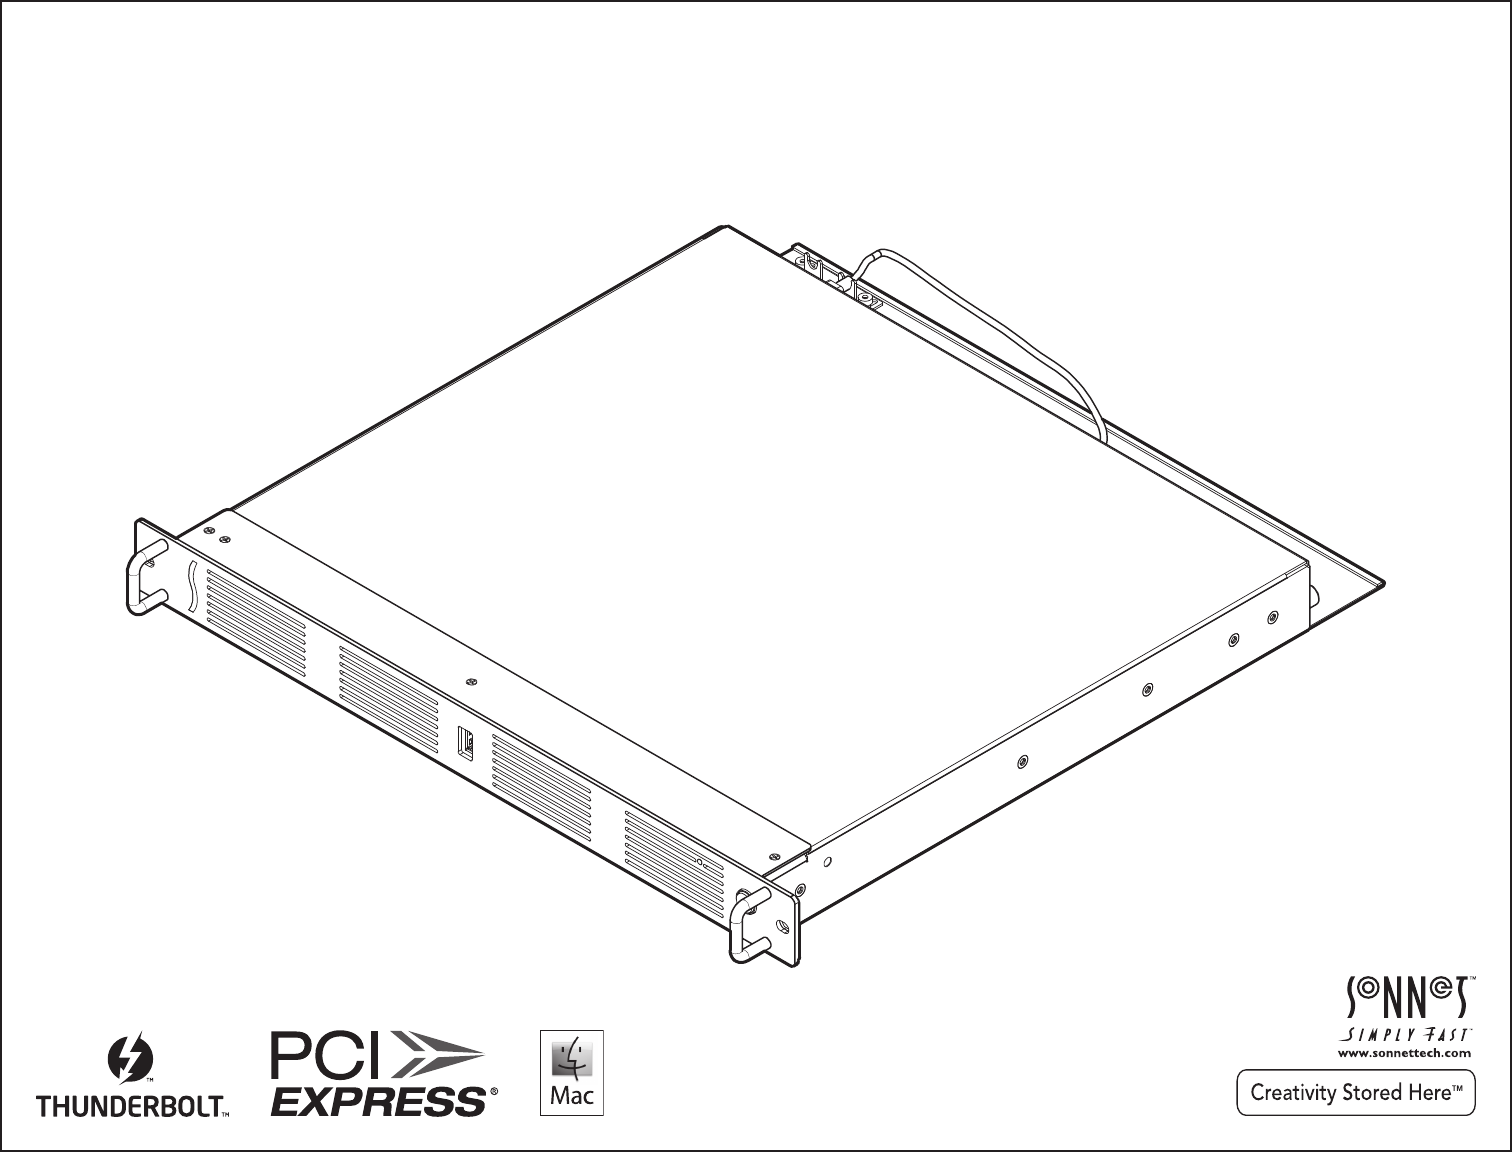
Chapter 1 – Introduction and Package Contents Congratulations on your purchase! xMac mini Server is a PCIe 2.0 expansion system and 1U Rackmount Enclosure for Mac mini and Mac mini Server with Thunderbolt Ports. Through its two PCIe slots, you may connect two expansion cards to your Mac mini to expand its capabilities in ways never before possible! xMac mini Server has numerous thoughtful design touches. The power supply and fans are user-replaceable.
Chapter 2 – xMac mini Server Description 1 – USB 2.0 Port This port connects to the Mac mini through a cable attached to the front panel C US 2 – Power Indicator Opening This hole allows the Mac mini’s power indicator to shine through HDMI 4 – Power Input Socket Connect the included AC power cable here 5 – HDMI Port This port connects to the Mac mini through a cable attached to the back panel 6 – USB 2.
Chapter 2 – xMac mini Server Description 1 – PCIe Slot 1 This slot accepts up to an x16 mechanical, full-length, fullheight, single-width PCIe 2.0 card, and is also compatible with PCIe 1.1 cards 2 – PCIe Card Guide When installing full-length card, use this guide to support and secure the card ➊ 3 – Power Hub This hub routes power to the Mac mini and to the xMac mini Server’s power supply ➋ 4 – PCIe Slot 2 This slot accepts an x8 mechanical, half-length, lowprofile PCIe 2.
Chapter 3 – Computer, PCIe Cards, and xMac mini Server Installation Steps A – PCIe Cards Installation Steps 1. Remove the xMac mini Server from its packaging, and then set it on a flat, level surface. 2. Loosen the two captive thumbscrews securing the top cover to the rest of the enclosure (Figure 1). 3. Slide the top cover back and up to remove it (Figure 1).
Chapter 3 – PCIe Cards, Computer, and xMac mini Server Installation Steps A – PCIe Cards Installation Steps (continued) 5. If you are installing a card into PCIe Slot 1, remove and set aside the screw securing its port access cover, and then remove the cover. If you are installing a card into PCIe Slot 2, remove and set aside the nut securing its port access cover, and then remove the cover (Figure 3). 6.
Chapter 3 – PCIe Cards, Computer, and xMac mini Server Installation Steps B – Mac mini Installation Steps 1. Remove the Mac mini from its packaging. 2. Carefully insert the Mac mini under the top edge of the enclosure, push it against the gasket behind the enclosure’s face plate, and then lower the computer onto the floor behind the small plastic posts (Figure 5). 3. Loosen the thumbscrews securing the Thunderbolt connector lock, and then slide it away from the xMac mini Server’s Thunderbolt ports. 4.
Chapter 3 – PCIe Cards, Computer, and xMac mini Server Installation Steps B – xMac mini Server Rackmount Installation Information You may mount xMac mini Server into any standard 19-inch EIA compliant equipment rack at least 19 inches deep. It is recommended that you mount xMac mini server using rack slides or a rack shelf. Sonnet offers rack slide sets for purchase separately; please visit the site at www.sonnettech.com/product/ xmacminiserver.html and click on the Accessory tab for more information. 1.
Chapter 4 – Verify Connections Using System Information A – Verify the xMac mini Server is Recognized 1. Power on the computer. 2. From the Apple menu, select About This Mac; the System Information application will launch. 3. When the About This Mac window opens, click More Info; a summary of specifications will appear. 4. Click System Report; a full report window will appear. 5. In the System Information window, click Thunderbolt under the Hardware header in the left column (Figure 7). 6.
Chapter 5 – Tips and Known Issues TIPS KNOWN ISSUES Cooling xMac mini Server and Everything Inside It With its optimized airflow design and four temperaturecontrolled fans providing adequate cooling at all times, xMac mini server may be installed anywhere in a rack. Do not block any of the vents! Otherwise, the Mac mini, installed cards, and xMac mini Server’s components may overheat Not all PCIe Cards Will Perform at 100% Thunderbolt’s PCIe bandwidth is limited to 10 Gb/s.
Chapter 6 – Specifications, Precautions, FCC Compliance, and Support Information Specifications External Connectors (Front Panel) USB 2.0 External Connectors (Back Panel) Two Thunderbolt Two USB 2.0 RJ-45 HDMI Power (C14-type) Internal Connectors Expansion Slots Three USB 2.0 RJ-45 HDMI Power (C7-type) • x16 mechanical, x4 electrical PCIe 2.0 •x 8 mechanical, x4 electrical PCIe 2.
This page left intentionally blank
©2012 Sonnet Technologies, Inc. All rights reserved. Sonnet, the Sonnet logotype, Simply Fast, the Simply Fast logotype, Echo and xMac, are trademarks of Sonnet Technologies, Inc. Mac, and Mac OS are trademarks of Apple Inc., registered in the United States and other countries. Thunderbolt and the Thunderbolt logo are trademarks of Intel Corporation in the U.S. and/or other countries. Other product names are trademarks of their respective owners. Product specifications subject to change without notice.