
User's Manual


Table Of Contents
- Using This Guide
- Virtual Office Overview
- Using Virtual Office Features
- Importing Certificates
- Using Two-Factor Authentication
- Using One-Time Passwords
- Using NetExtender
- User Prerequisites
- User Configuration Tasks
- Installing NetExtender Using the Mozilla Firefox Browser
- Installing NetExtender Using the Internet Explorer Browser
- Launching NetExtender Directly from Your Computer
- Configuring NetExtender Properties
- Configuring NetExtender Connection Scripts
- Configuring Proxy Settings
- Configuring NetExtender Log Properties
- Configuring NetExtender Advanced Properties
- Viewing the NetExtender Log
- Disconnecting NetExtender
- Upgrading NetExtender
- Changing Passwords
- Authentication Methods
- Uninstalling NetExtender
- Verifying NetExtender Operation from the System Tray
- Using the NetExtender Command Line Interface
- Installing NetExtender on MacOS
- Using NetExtender on MacOS
- Installing and Using NetExtender on Linux
- Installing and Using NetExtender for Windows Mobile
- Passwords in NetExtender Mobile
- Installing NetExtender on Android Smartphones
- Using NetExtender on Android Smartphones
- Related Documents
- Using Virtual Assist
- Understanding Virtual Assist
- Installing and Launching Virtual Assist
- Configuring Virtual Assist Settings
- Selecting a Virtual Assist Mode
- Launching a Virtual Assist Technician Session
- Performing Virtual Assist Technician Tasks
- Using Virtual Assist from the Customer View
- Using Virtual Assist in Unattended Mode
- Enabling a System for Virtual Access
- Using the Request Assistance Feature
- Using File Shares
- Managing Bookmarks
- Using Bookmarks
- Logging Out of the Virtual Office
Using Virtual Assist
85
SonicWALL SSL VPN 5.0 User Guide
Inviting Customers by Email
Step 1 To invite a customer to Virtual Assist, use the email invitation form on the left of the Virtual
Assist window. If it is not displayed, click the Invite button in the toolbar.
Note Customers who launch Virtual Assist from an email invitation can only be assisted by the
technician who sent the invitation. Customers who manually launch Virtual Assist can be
assisted by any technician.
Step 2 Enter the customer’s email address in the Customer E-mail field.
Step 3 Optionally, enter Technician E-mail to use a different return email address than the default
technician email. Some mail servers require that an email address be entered, and that it be on
a valid domain.
Step 4 Optionally, enter an Additional Message to the customer.
Step 5 Click Invite. The customer will receive an email with an HTML link to launch Virtual Assist.
Customers requesting assistance will appear in the Assistance Queue, and the duration of time
they have been waiting will be displayed.
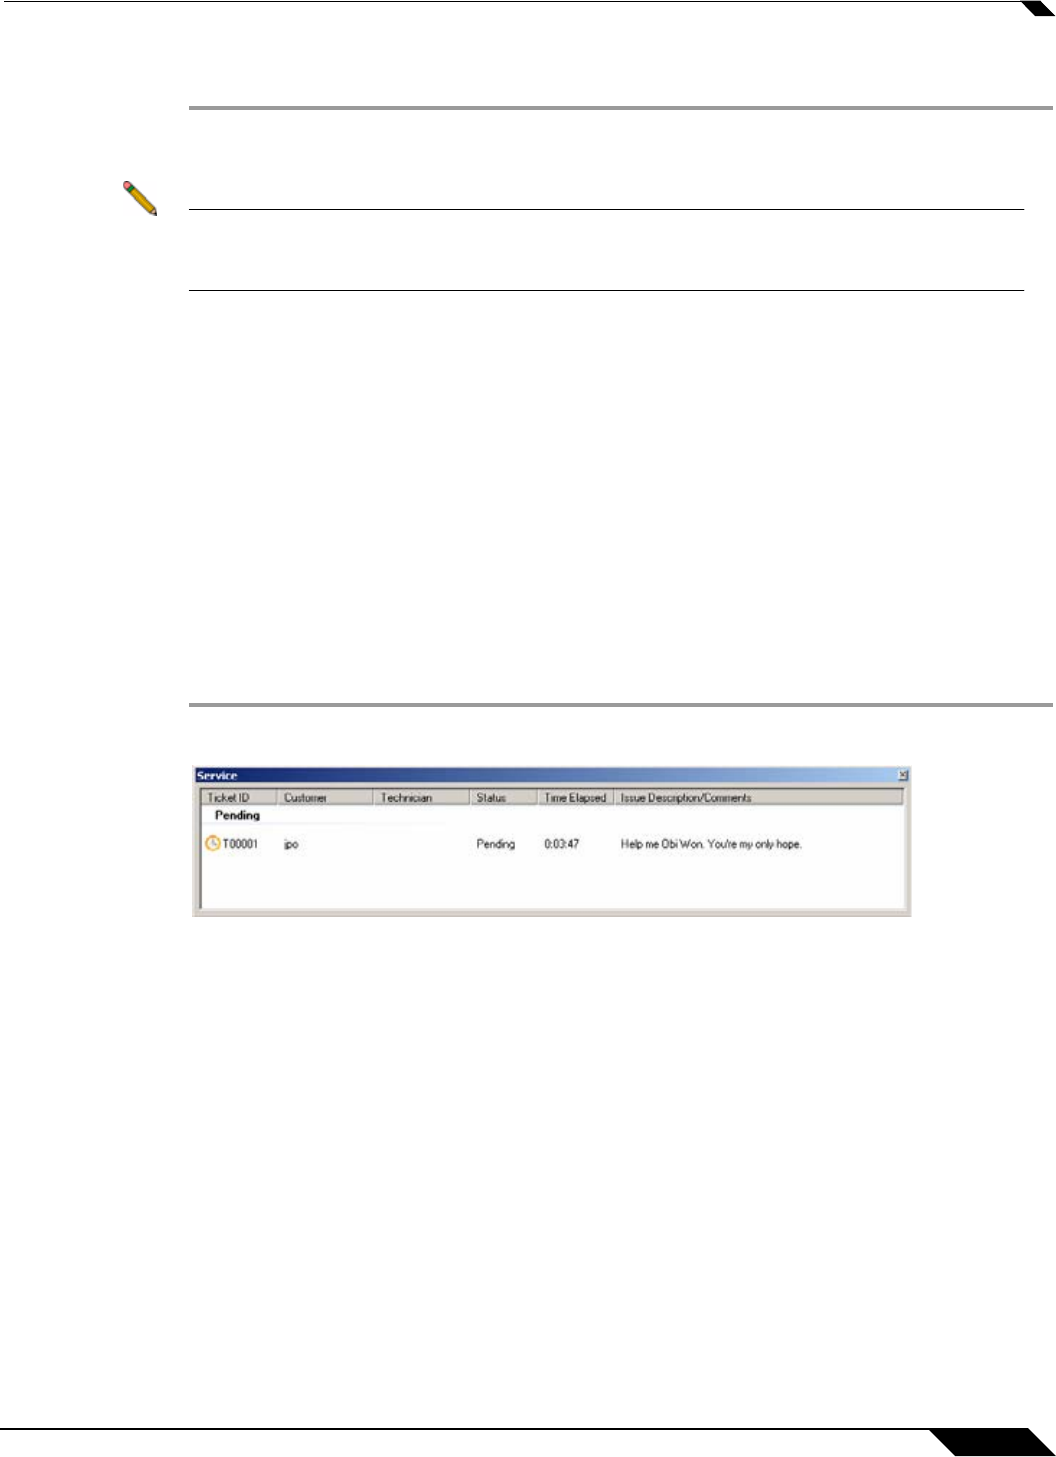
Assisting Customers
A pop-up window in the bottom right task bar alerts the technician when a customer is in the
assistance queue. The customer queue is also displayed in the Service window.
Step 1 Double-click on a customer’s user name to begin assisting the customer.