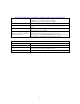
USER’S GUIDE HIGH INTENSITY ULTRASONIC PROCESSOR Model VC50AT TABLE OF CONTENTS Important Safeguards SECTION 1 – INSTALLATION Inspection Electrical Requirements Installing the Ultrasonic Processor SECTION II – OPERATION Principles of Ultrasonic Disruption Functions of Controls, Indications, and Connectors Preparations for Use Tuning Using the Ultrasonic Processor SECTION III – SERVICE INFORMATION Return of Equipment The Ultrasonic Atomizer supplied with this instruction manual is constructed of the finest
READ BEFORE INSTALLING OR USING THE EQUIPMENT Your Ultrasonic Atomizer has been designed with safety in mind. However, no design can completely protect against improper usage, which may result in bodily injury and/or equipment damage. Please observe the following warnings at all times, read the operating instructions carefully before operating the equipment, and retain this instruction manual for future reference.
SECTION 1 – INSTALLATION INSPECTION Prior to installing the Ultrasonic Atomizer, perform a visual inspection to detect any evidence of damage, which might have occurred during shipment. Before disposing of any packaging material, check it carefully for small items. The Ultrasonic Atomizer was carefully packed and thoroughly inspected before leaving our factory. The carrier, upon acceptance of the shipment, assumed responsibility for its safe delivery.
INSTALLING THE ULTRASONIC PROCESSOR The Ultrasonic Atomizer should be installed in an area that is free from excessive dust, dirt, explosive and corrosive fumes, and extremes of temperature and humidity. SECTION II – OPERATION PRINCIPLES OF ULTRASONIC ATOMIZATION The ultrasonic power supply converts 50/60 Hz line voltage to high frequency 20 kHz (20,000 cycles per second) electrical energy.
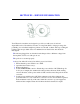
FUNCTIONS OF KEYS, CONTROLS, INDICATORS, AND CONNECTORS POWER SWITCH OUTPUT CONTROL POWER MONITOR (METER) TUNE CONTROL 25-50 SCALE SELECT SWITCH Increases or decreases the POWER MONITOR sensitivity ON position – energizes the power supply. OFF position – de-energizes the power supply. Illuminates when the power supply is energized. Controls the amplitude of vibrations at the probe tip. Indicates in watts the amount of ultrasonic power delivered to the probe.
PREPARATION FOR USE CAUTION Do not operate an Ultrasonic Atomizer that has been in a very cold or hot environment for a prolonged period of time. Wait until it has reached room temperature 1. Ensure that the AMPLITUDE is set to OFF. 2. Plug the electrical line cord into the electrical outlet. 3. If the optional footswitch is used, insert the plug into the jack located on the rear panel. Make sure that the plug is inserted forcefully all the way in. 4.
TUNING Tune the power supply in accordance with the following procedures each time a new converter or probe is used. 1. Ensure that the probe is not immersed in the liquid and that it does not come in contact with anything. 2. Set OUTPUT CONTROL TO “100”. 3. Set 25-50 POWER MONITOR SCALE SELECT SWITCH to “25”. 4. Set POWER SWITCH to ON, and rotate the TUNE CONTROL clockwise or counterclockwise until minimum (not maximum) reading (usually less than 30) is obtained on the POWER MONITOR.
USING THE ULTRASONIC PROCESSOR CAUTION Do not operate the power supply unless it is connected to the converter. High voltage is present in the power supply – do not operate with the cover off. 1. Ensure that the power supply is properly tuned. 2. Feed the liquid to the nozzle. 3. Set POWER SUPPLY to ON, if footswitch is used, depress footswitch. 4. Using OUTPUT CONTROL increase or decrease intensity as required. 5. Adjust liquid flow rate as desired.
SECTION III – SERVICE INFORMATION Your Ultrasonic Atomizer was designed to provide you with years of safe and dependable service. Nevertheless, because of component failure or improper usage, the possibility does exist that it might not perform as it should, or that it will stop working all together. The most probable causes for malfunction are listed below and should be investigated. The unit was plugged into an electrical outlet that provides a different voltage from that required.
NOZZLE CLEANING Whenever possible, flush the nozzle with water or an appropriate solvent after use. Ensure that there is no material build- up on the atomizing surface. If material build-up is present, clean the atomizing surface with steel wool. Clean the inside of the atomizing nozzle with a pipe cleaner or a small round brush. Do not under any circumstance use a drill to remove material build- up.