
Installation Guide


29
4. If a battery pack is used, it must also be disconnected,
see Chapter "8.1 Installing and removing battery pack"
.
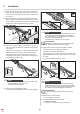
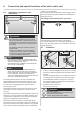
5. Remove the control unit cover.
Attaching the control unit cover
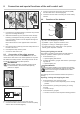
1. After working on the wall control unit, replace the con-
trol unit cover in reverse order.
2. Connect the operator to the mains voltage. Check that
the power supply is connected.
The operator is supplied with mains voltage.
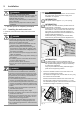
6.1 Control unit cover of the wall control
unit
DANGER
Danger due to electric current!
Contact with live parts may result in electric
FXUUHQWÀRZLQJWKURXJKWKHERG\(OHFWULF
shock, burns or death will result.
` All work on electrical components must be
carried out by a trained electrician.
` Disconnect the mains plug before working on
the operator.
` If a battery pack is connected, disconnect it
from the wall control unit.
` Check that the operator is not live.
` Secure the operator against being switched
back on.
WARNING
Danger due to hot surfaces!
After frequent operation, parts of the motor car-
riage or the control unit may become hot. If the
cover is removed and hot parts are touched,
they may cause burns.
` Allow the operator to cool down before
removing the cover.
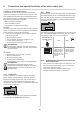
Removing the light and control unit cover
1. Disconnect the operator from the mains voltage. Check
that the operator is disconnected from the power
supply.
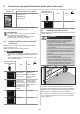
3.
1.2.
Fig. 2 Fig. 3
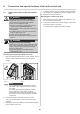
NOTE
The control unit cover is connected to the cir-
cuit board of the wall control unit via a connec-
tion cable.
If a battery pack has been installed, it is also
connected to the circuit board. Carefully
remove the control unit cover and disconnect
the connections to prevent damage to the wall
control unit.
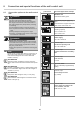
2. Loosen the screw on the wall unit of the control
unit cover and remove the control unit cover gently
upwards.
3. Unplug the connection cable for the membrane keypad
from the wall control unit.
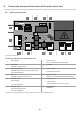
6. Connection and special funtions of the wall control unit