
Installation Guide


26
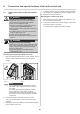
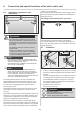
Fig. 28
NOTE
Do not push the door to the mechanical stop. This
is because the opener will pull the door against
the mechanical stop. This will apply tension to the
door and it may be damaged.
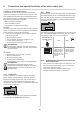
A clearance of 1.18" (30 mm) is required.
INFORMATION
Alternatively, the limit stop can be pushed under
the chain and clamped into the rail later.
28. Tighten the screw on the limit stop with a phillips
screwdriver without changing its position.
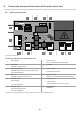
Check the door OPEN end position:
Open the door fully for this. The carriage moves to the
door OPEN position on the limit stop until a click noise
is heard.
The door OPEN end position is set.
“clic”
¹⁄
¹⁄
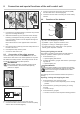
Fig. 29 Fig. 30
NOTE
In case of an emergency release, the door may
independently open or close itself due to a broken
spring or incorrect setting of the weight balancing.
The opener could be damaged or destroyed.
INFORMATION
It can be locked and released in any door posi-
tion.
29. Move door to center position.
The carriage moves with it.
30. Pull the emergency release handle.
Carriage is locked.
The door can only be moved by the opener.
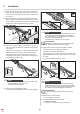
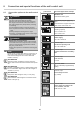
24. Attach the curved door arm (1) to the door bracket (2).
Guide the bolt, (3) through the hole in the door brack-
et and in the curved door arm and secure with the lock-
ing c-clip (4).
25. Attach the door arm (5) to the carriage (6). The open
side of the door arm must be facing towards the ceiling.
Guide the bolt (7) through the holes in the carriage and
the door arm. Secure with the locking c-clip (8).
1/2"
Fig. 26
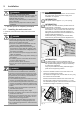
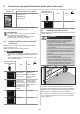
26. Slide the curved door arm (1) into the door arm (2)
and secure with two bolts 3/8" (3) and two self-locking
nuts 3/8" (4).
Tighten the nuts using a 1/2" open-end wrench. While
tightening, hold the screws in place using a second
1/2" open-end wrench. Basic position of the screw
arrangement, see graphic. The length of the door arm
can be adjusted if necessary.
Fig. 27
NOTE
The door must not rub on the opener or rails. This
could damage the opener or rails.
7KHRSHQHUPXVWEHRႇVHW
27. Open the door completely by hand.
The limit stop automatically moves with the carriage.
5. Installation