
User Manual
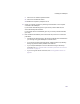
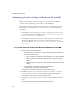
Table Of Contents
- Introduction
- Installing the SOMAport
- Installing the SOMAport and Connecting Equipment
- An overview of the installation
- Unpacking the SOMAport
- Choosing the best location for the SOMAport
- Connecting the power supply and powering on the SOMAport
- Connecting a computer via Ethernet
- Connecting a computer via USB
- Connecting multiple computers to the SOMAport
- Connecting telephones to the SOMAport
- Activating service
- Changing Ethernet Network Settings
- Installing the SOMAport and Connecting Equipment
- SOMAport Lights
- Troubleshooting and Getting Help
- Index
45
Installing the SOMAport
4
Make sure all checkboxes are disabled and click Next.
The Set up Your Internet Mail Account window opens.
5
Enable the No radio button and click Next.
The Completing the Internet Connection Wizard window opens.
6
Click
Finish
.
7
Restart your computer.
NOTE:
Do not skip this step.
8
Check your Internet connection.
See “Activating service” on page 39.
To change network settings in Windows 98 and ME
1
Select Start→Settings→Control Panel.
2
Click the Network icon.
The Network window opens to the Configuration tab.
3
Select
TCP/IP
.
If multiple TCP/IP connections are listed, select the one that contains
“Ethernet”, “NIC”, or “10/100 MB” in its name. Go to step 5.
If TCP/IP is not listed, go to step 4.
4
Install TCP/IP:
i
Click Add.
The Select Network Component Type window opens.
ii
Select
Protocol
from the list.
iii
Click Add.
The Select Network Protocol window opens.
iv
Select Microsoft from the Manufacturers list.
v
Select TCP/IP from the Network Protocols list.
vi
Click OK.
vii
Insert the Windows 98 or ME CD or reboot the computer if prompted to do so.
viii
If the PC reboots, repeat steps 1 to 3, then go to step 5.