
Installation Guide

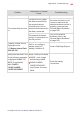


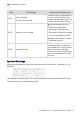


Table Of Contents
- Disclaimers
- Revision History
- HANDLING AND SAFETY INSTRUCTIONS
- IMPORTANT INVERTER SAFETY INSTRUCTIONS
- Chapter 1: Overview
- Chapter 2: Installing the Power Optimizers
- Chapter 3: Installing the Inverter
- Chapter 4: Auto-transformer and Backed-up Loads Panel Installation (for Backup)
- Chapter 5: Meter Installation
- Chapter 6: Commissioning the Installation
- Chapter 7: StorEdge Inverter Connections
- Chapter 8: User Interface
- Chapter 9: Setting Up Communication to the Monitoring Platform
- Chapter 10: System Configuration
- Appendix A: Troubleshooting
- Appendix B: Opening Conduit Drill Guides
- Appendix C: Replacing and Adding System Components
- Appendix D: External Rapid Shutdown
- Appendix E: Mechanical Specifications
- Appendix F: Powering the LG Chem Battery Off and On
- StorEdge Single Phase Inverter with Connection Unit for High Power Technical ...

To open conduit drill guides:
1.
Move the StorEdge Connection Unit safety switch and the inverter ON/OFF switch
to OFF.
2.
Loosen the screws on the front cover of the StorEdge Connection Unit using the
supplied Allen key, as shown below:
Figure 45: Opening the StorEdge Connection Unit cover
3. Remove the StorEdge Connection Unit cover.
4. Open the required conduit drill guides according to the conduits used in the
installation (refer to the figure below for required drill guides; some of the drill
guides may already be open but sealed): The drill guides are located at the bottom
and sides of the enclosure, each with two sizes: ¾'' and 1''. Open the required drill
guides, taking care not to interfere with any of the internal components. It is
recommended to use a Unibit drill.
Figure 46: StorEdge Connection Unit drill guides
NOTE
Unused conduit openings and glands should be sealed with appropriate seals.
Appendix B: Opening Conduit Drill Guides 137
StorEdge Solution with Backup MAN-01-00262-1.5