
Installation Guide
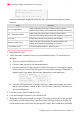


Table Of Contents
- Disclaimers
- Revision History
- HANDLING AND SAFETY INSTRUCTIONS
- IMPORTANT INVERTER SAFETY INSTRUCTIONS
- Chapter 1: Overview
- Chapter 2: Installing the Power Optimizers
- Chapter 3: Installing the Inverter
- Chapter 4: Auto-transformer and Backed-up Loads Panel Installation (for Backup)
- Chapter 5: Meter Installation
- Chapter 6: Commissioning the Installation
- Chapter 7: StorEdge Inverter Connections
- Chapter 8: User Interface
- Chapter 9: Setting Up Communication to the Monitoring Platform
- Chapter 10: System Configuration
- Appendix A: Troubleshooting
- Appendix B: Opening Conduit Drill Guides
- Appendix C: Replacing and Adding System Components
- Appendix D: External Rapid Shutdown
- Appendix E: Mechanical Specifications
- Appendix F: Powering the LG Chem Battery Off and On
- StorEdge Single Phase Inverter with Connection Unit for High Power Technical ...

I m p o r t M e t e r
S t a t u s : < O K / E r r o r # >
P o w e r [ W ] : x x x x x . x
E n e r g y [ W h ] : X X X X X . X
4.
Press the inverter LCD light button to display the Smart Energy Management and
the Battery status screens, and check that:
State = Discharging (assuming consumption > PV production ; inverter
maximum AC power > PV production.
PWR > 0
B S N : X X X X X X X X I D : 2 4
S O E : 8 9 % P W R : 2 W
T o t a l : < X > W h
S t a t e : D i s c h a r g i n g
5.
While the PV modules are exposed to sunlight , verify that the battery is charging
properly:
a. Minimize consumption by turning off all the load circuit breakers, except for the
inverter.
b. In the inverter LCD check that the Meter status screen is displaying import power
close to zero.
c.
Press the external LCD light button to display the Battery status screen, and
check that:
State = Charging
SOEpercentage is increasing
PWR > 0
B S N : X X X X X X X X I D : 2 4
S O E : 8 9 % P W R : 2 W
T o t a l : < x > W h
S t a t e : C h a r g i n g
StorEdge Solution with Backup MAN-01-00262-1.5
122 Verifying StorEdge Components Functionality