
Installation Guide


Table Of Contents
- Disclaimers
- Support and Contact Information
- Revision History
- Contents
- HANDLING AND SAFETY INSTRUCTIONS
- IMPORTANT SAFETY INSTRUCTIONS
- Chapter 1: Introducing the SolarEdge Power Harvesting System
- Chapter 2: Installing the Power Optimizers
- Chapter 3: Installing the Inverter
- Chapter 4: Connecting the AC and the Strings to the Safety Switch
- Chapter 5: Commissioning the Installation
- Chapter 6: User Interface
- Chapter 7: Setting Up Communication
- Appendix A: Errors and Troubleshooting
- Appendix B: Mechanical Specifications
- Appendix C: External Fan Maintenance and Replacement
- Appendix D: Replacing and Adding System Components
- Appendix E: Determining the Circuit Breaker Size
- Technical Specifications - Single Phase Inverters (North America)
- Technical Specifications - Three Phase Inverters (North America)
2.
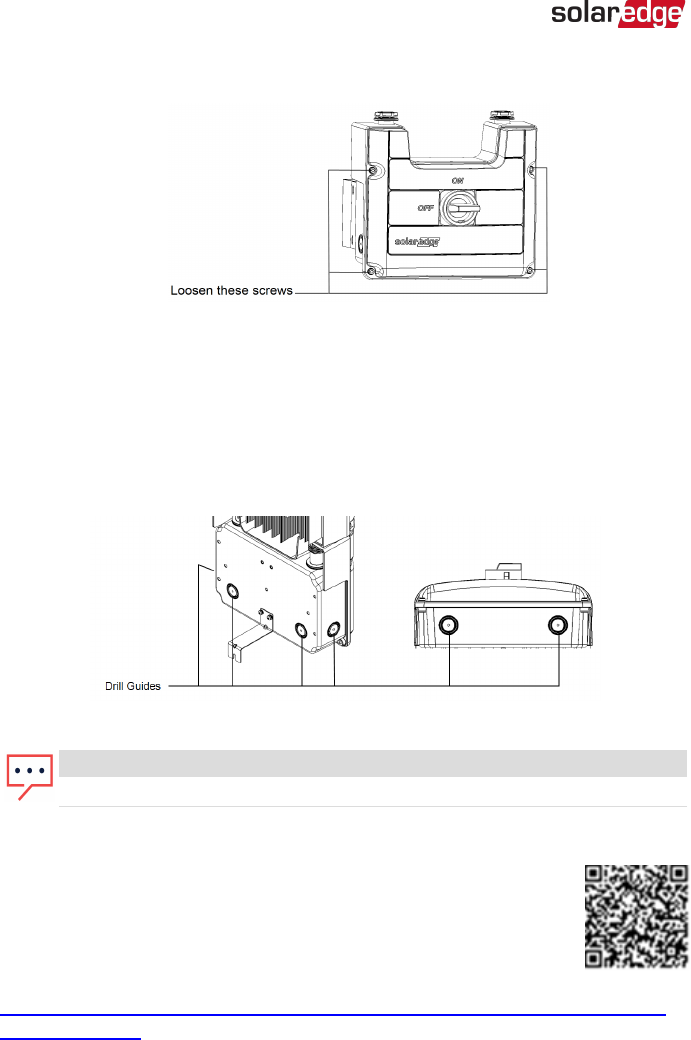
Loosen the screws on the front cover of the Safety Switch , as shown below:
Figure 11: Opening the Safety Switch cover
3. Remove the Safety Switch cover.
4. Open the required AC and DC conduit drill guides according to the conduits used in
the installation: The drill guides are located at the bottom, back and sides of the
enclosure, each with two sizes: ¾'' and 1''. Open the required pair, taking care not
to interfere with any of the internal components. It is recommended to use a Unibit
drill.
Figure 12: Safety Switch drill guides
NOTE
Unused conduit openings and glands should be sealed with appropriate seals.
Mounting the Inverter
The inverter is typically mounted vertically, and the instructions in this
section are applicable for vertical installation. Some three phase inverter
models can be installed horizontally (above 10° tilt) as well as vertically,
and at any tilt over 10° up to 90°. For information and instructions for
horizontal mounting refer to
http://www.solaredge.com/sites/default/files/application_note_horizontal_mounting_of_three_
phase_inverters.pdf.
The inverter is supplied with a mounting bracket.
-Three Phase System Installation Guide MAN-01-00002-4.3
36 Mounting the Inverter