
Install Manual
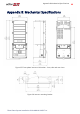
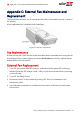
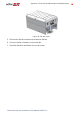
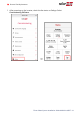
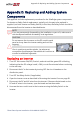
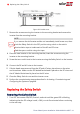
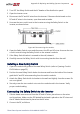
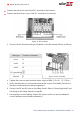
Table Of Contents
- Disclaimers
- Revision History
- Contents
- HANDLING AND SAFETY INSTRUCTIONS
- IMPORTANT SAFETY INSTRUCTIONS
- Chapter 1: Introducing the SolarEdge Power Harvesting System
- Chapter 2: Installing the Power Optimizer
- Chapter 3: Installing the Inverter
- Chapter 4: Connecting the AC and the Strings to the Safety Switch
- Chapter 5: Activating, Commissioning and Configuring the System
- Chapter 6: Setting Up Communication to the Monitoring Platform
- Appendix A: Errors and Troubleshooting
- Appendix B: Mechanical Specifications
- Appendix C: External Fan Maintenance and Replacement
- Appendix D: Replacing and Adding System Components
- Determining the Circuit Breaker Size
- Support Contact Information

Adding, Removing, or Replacing Power Optimizers
1. Turn OFF the inverter ON/OFF/P switch, and wait until the green LED is blinking ,
indicating that the DC voltage is safe (<50V), or wait five minutes before continuing
to the next step.
2. Disconnect the AC to the inverter by turning OFF the circuit breakers on the
distribution panel.
3. Turn OFF the Safety Switch .
4. Disconnect and connect the necessary power optimizers.
5. Perform pairing and other procedures described in
Activating, Commissioning and
Configuring the System
on page 48 on all inverters to which power optimizers were
added or from which power optimizers were removed.
6. In the monitoring platform, use the Replace button in the logical
layout tab (in site Admin). Replace the serial number of the removed
power optimizer with the serial number of the newly installed power
optimizer. Refer to https://www.solaredge.com/sites/default/files/se-
monitoring-portal-site-admin.pdf
Appendix D: Replacing and Adding System Components 79
Three Phase System Installation Guide MAN-01-00527-1.4