
Install Manual
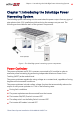


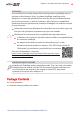
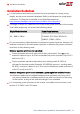
Table Of Contents
- Disclaimers
- Revision History
- Contents
- HANDLING AND SAFETY INSTRUCTIONS
- IMPORTANT SAFETY INSTRUCTIONS
- Chapter 1: Introducing the SolarEdge Power Harvesting System
- Chapter 2: Installing the Power Optimizer
- Chapter 3: Installing the Inverter
- Chapter 4: Connecting the AC and the Strings to the Safety Switch
- Chapter 5: Activating, Commissioning and Configuring the System
- Chapter 6: Setting Up Communication to the Monitoring Platform
- Appendix A: Errors and Troubleshooting
- Appendix B: Mechanical Specifications
- Appendix C: External Fan Maintenance and Replacement
- Appendix D: Replacing and Adding System Components
- Determining the Circuit Breaker Size
- Support Contact Information

Supported ACGrids
Figure 2: AC grids supported by SolarEdge three phase inverters
NOTE
Grid support depends on the inverter model. Some three phase inverters
support the 208V 3-wire grid. Refer to
Setting the Inverter to Support 208V 3-
Wire Grid
on page 39.
Installation Procedure
The following is the procedure for installing and setting up a new SolarEdge site. Many
of these also apply to modification of an existing site.
1. Connecting Power Optimizers in Strings, page 24
2. Recording power optimizer serial numbers (optional), page 52
3. Mounting the inverter, Page 34
4.
Connecting the strings and the AC to the Safety Switch, page 38
5.
Commissioning and activating the installation, page 48
6. Connecting the inverter to the monitoring platform, page 53
Installation Equipment List
Standard tools can be used during the installation of the SolarEdge system. The
following is a recommendation of the equipment needed for installation:
Allen screwdriver for 5mm screw type for the inverter enclosure screws
Standard flat-head screwdrivers set
Non-contact voltage detector
Chapter 1: Introducing the SolarEdge Power Harvesting System 13
Three Phase System Installation Guide MAN-01-00527-1.4