
Quick Installation Guide

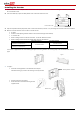
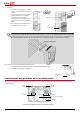

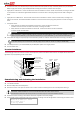
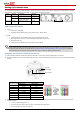
Table Of Contents
- SolarEdge Quick Installation Guide – North America

6
7 If required, perform the following additional steps before closing the inverter cover:
Country settings or inverter configuration using the internal LCD user buttons, located just above the LCD
and are numbered esc, 1, 2, 3/Enter from left to right. Enter the menus by pressing ENTER for five
seconds and then inputting the password 12312312. To verify that the country code is set to USA, select
Country from the main menu, press Enter and select USA+. In the next menu that appears, select the
desired AC grid configuration.
Communication options connection – refer to Setting up Communication on page 7.
8 Close the inverter cover by tightening the screws with a torque of 9.0 N*m/ 6.6 lb*ft. For proper sealing, first tighten the corner screws
and then the two central screws.
9 Make sure the Safety Switch is ON. If an additional external DC switch is installed between the power optimizers and the inverter(s) then
turn it ON.
A message similar to the following appears on the inverter LCD panel:
Vac[V ] V d c[V ] Pac[W ]
2 4 0 . 7 1 4 . 1 0 . 0
P _ OK: 0 0 0 / 0 0 0 <S_ O K >
O F F
10 Verify that the following information appears on the LCD panel:
Vac[V]: Specifies the grid voltage.
Vdc[V]: The DC input voltage of the longest string connected to the inverter. There should be a safety
voltage of 1V for each power optimizer in the string.
Pac[W]: AC power production. At this stage, it should be 0w.
P_OK: Specifies the number of properly connected power optimizers.
S_OK: Indicates the status of the connection to the SolarEdge monitoring portal (if connected).
WARNING!
Before proceeding to the next step, make sure that the cover is closed! High DC Voltage will be present in the inverter following the next step!
Avant d’entamer la prochaine étape, assurez vous que le couvercle est fermé ! Une tension DC très haute sera présente durant l’étape
suivante !
Pairing Power Optimizers to the Inverter
1 Verify that the ON/OFF switch at the bottom of the inverter is OFF.
2 Press and hold down the inverter LCD button for about 10 seconds. The following message is displayed:
K e e p h o l d i n g b u t t o n
f o r p a i r i n g , r e l e a s e
t o e n t e r m e n u . . .
R e m a i n i n g : 3 s e c
Keep holding for 5 seconds until the following is displayed:
P a i r i n g
T u r n S w i t c h T o O n
3 Turn the inverter ON within 5 seconds. If you wait longer than 5 seconds, the inverter exits the pairing mode. The following message is
displayed indicating that the inverter is performing the pairing.
P a i r i n g
R e m a i n i n g [ s e c ] : 1 8 0
4 Wait for the completion of the pairing (remaining seconds is 0). If pairing fails, an error is displayed. In this case, repeat the pairing steps.
5 When pairing succeeds, the following message is displayed:
P a i r i n g
P a i r i n g C o m p l e t e d
6 At the end of the pairing process, the system will start producing power. Verify on the LCD screen that the number next to P_OK equals
the number of installed power optimizers. It may take up to 20 minutes until all the power optimizers are indicated.
WARNING!
After you turn ON the inverter ON/OFF switch, the DC cables carry a high voltage and the power optimizers no longer output a safe
1V output.
Après avoir mis l'interrupteur ON/OFF de l'onduleur monophasé sur ON, les câbles DC portent une haute tension et les optimiseurs
de puissance ne génèrent plus la tension de sécurité de 1V.
WARNING!
After you turn OFF the inverter ON/OFF switch, wait until the LCD indicates that the DC voltage is safe (<50V), or wait five minutes
before opening the cover or disconnecting the strings.
Apres avoir tourné l’interrupteur ON/OFF sur OFF, attendre jusqu'à ce que l’écran LCD indique que la tension DC est sécurisée
(<50V) ou attendre cinq minutes avant d’ouvrir le couvercle ou de déconnecter les strings.