
Documentation


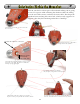


Step 19 - Installing the Nose Bead:
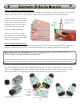
We’re using a very hard hematite bead for the nosewheel. Remember when we told you to save the
rest of the paperclip? This is where it comes back into the construction process.
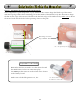
Take a straight part of the paperclip and bend the 3mm (1/8”) tip up just a wee bit. Thread the
paperclip through one side, through the bead, and into the other side of the nose, and solder it in.
Trim the other end and solder it to the pad. Give the bead a spin - ah, you’re getting close to finished!
3mm (1/8”)
19A: Leftover paperclip to
be used for nosebead axle.
Bend tip up just a bit!
19B: Thread the paperclip through one side, and through
the bead
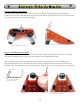
19C: Put the bent part into the other side, solder it in,
and snip & solder the other side!
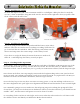
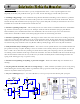
Step 18 - Wiring up the Motors:
Now it’s time to solder the motor leads to the pads on Herbie’s body. Besides being electrical
connections, they also help stiffen up the motor mount. Make sure the white spots on the motors are
closest to the Herbie’s nose before soldering!
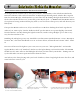
17D: Rear view of installed motors
17E: Side view of Herbie with motors. Looks good, right?
12
Solarbotics Herbie the Mousebot