
User's Manual


Configuring Network Settings
84 Check Point Safe@Office User Guide
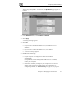
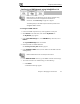
To enable/disable Hide NAT
1. Click Network in the main menu, and click the My Network tab.
The My Network page appears.
2. From the Hide NAT list, select Enabled or Disabled.
3. Click Apply.
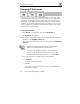
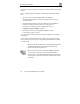
A warning message appears.
4. Click OK.
If you chose to disable Hide NAT, it is disabled.
If you chose to enable Hide NAT, it is enabled.
Configuring a DMZ Network
In addition to the LAN network, you can define a second internal network
called a DMZ (demilitarized zone) network, when using Safe@Office 110
and 225. Safe@Office 110 does not have a dedicated DMZ port, so the DMZ
is a logical second network behind the Safe@Office appliance, and you must
connect DMZ computers to LAN ports. Safe@Office 225 has a dedicated
DMZ port to which you must connect all DMZ computers.
By default, all traffic is allowed from the LAN network to the DMZ network,
and no traffic is allowed from the DMZ network to the LAN network. You
can easily customize this behavior by creating firewall user rules. For further
information, see Creating Rules on page 112.
For example, you could assign your company’s accounting department to the
LAN network and the rest of the company to the DMZ network. The
accounting department would be able to connect to all company computers,
while the rest of the employees would not be able to access any sensitive
information on the accounting department computers. You could then create
firewall rules that allow specific DMZ computers (such a manager’s
computer) to connect to the LAN network and the accounting department.