
- Ethernet Blaster Communications Cable User Guide

1–14 Altera Corporation
EthernetBlaster Communications Cable User Guide December 2004
Cable Setup
2. Choose Programmer (Tools menu).
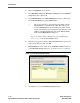
3. Click Hardware Setup. The Hardware Settings tab of the Hardware
Setup dialog box is displayed.
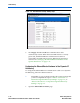
4. Click Add Hardware. The Add Hardware dialog box is displayed.
Select EthernetBlaster and click Auto Detect.
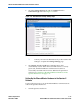
1 The server name list is automatically populated with the
EthernetBlaster communications cable detected on your
subnet if Auto Detect is selected. However, if the cable is
not on your subnet, you must manually type the name or IP
address of the EthernetBlaster cable in the Server Name
field of the Add Hardware dialog box.
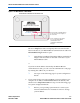
If you are using a direct connection to your computer, type
192.168.0.50 in the Server Name field.
5. Type the server password in the Server password field (“password”
is the factory default), and click OK.
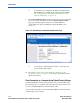
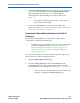
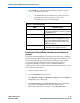
6. EthernetBlaster is now visible in the Available hardware items list
of the Hardware Setup dialog box, as shown in Figure 1–10 below.
Figure 1–10. Hardware Setup Dialog Box
7. Click Close to close the Hardware Setup dialog box.