
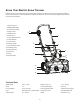
Replacement Part List
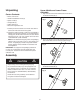
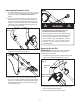

Discharge Chute Assembly
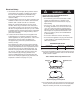
1. Remove the knobs, washers and carriage bolts from the
discharge chute (Fig. 11).
2. Position the chute deector over the discharge chute and
align the holes, placing the washer between the deector
and the chute (Fig. 12).
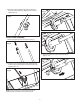
3. Secure the carriage bolts and knobs. Make sure to tighten
the knobs (Fig. 13).
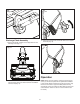
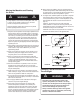
Operation
NOTE: Before using this machine, make sure that the power
source you will use complies with the specications detailed
in this manual. Before inserting the plug into the socket, verify
that the snow thrower’s auger and rubber plates are rmly
secured with screws, and that the rubber plates are facing the
correct direction. Perform a test run to ensure that the rotor
turns freely.
Fig. 10
Fig. 11
Fig. 12
Fig. 13
8