
Owner manual
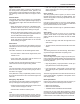


Table Of Contents
- Chapter 1 – Introduction
- Aerial Platform Features
- Options
- Operator’s Manual
- Safety Alerts
- Operation
- Maintenance
- Manual of Responsibilities
- Additional Information
- Component Identification
- Working Envelope
- General Specifications
- Electrocution Hazards
- Minimum Safe Approach Distance
- Prestart Inspection
- Work Place Inspection and Practices
- Operation
- Tip-Over and Falling Hazards
- Electrical System
- Hydraulic System
- Placards and Decals
- Emergency Stop Controls
- Emergency Power System
- Ground Operation Switch
- Platform Foot Switch
- Guardrails
- Lanyard Anchors
- Tilt Alarm
- Ground Fault Circuit Interrupter
- Horn
- Drive Motion Alarm
- Lowering Alarm
- Flashing Light
- Hour Meter
- Battery Level Indicator
- Battery Charge Indicator
- Hydraulic Fluid Filter Gauge
- Fluid Level Sight Gauge
- General Maintenance
- Charging
- Battery Disconnect Switch
- Lower Controls
- Circuit Breaker Reset Buttons
- Upper Controls
- Operator’s Manual Holder
- Electrical System
- Cables and Wiring Harness
- Hydraulic System
- Tires and Wheels
- Lower Control Station
- Level Sensor
- Flashing Light
- Structures
- Upper Control Station
- Drive Motion Alarm
- Lowering Alarm
- Placards and Decals
- Prestart Inspection Checklist
- Cold Weather Start-Up
- Preparing for Operation
- Lower Controls
- Upper Controls
- Gradeability
- Electrical Power Outlet
- Air Line
- Stowing
- Transporting
- Emergency Power System
- Towing
- Troubleshooting Chart
- Table of Contents
- Introduction
- Component Identification
- Special Limitations
- Controls and Indicators
- Battery Disconnect Switch
- Lower Controls
- Circuit Breaker Reset Buttons
- Upper Controls
- Preheat Switch
- Start Switch
- Emergency Stop Button
- Drive Joystick
- Steer Switch
- Drive Range Switch
- Boom Speed Knob
- Rotation Switch
- Riser Switch
- Boom Elevation Switch
- Boom Extension Switch
- Jib Articulation Switch
- Platform Level Switch
- Platform Rotation Switch
- Engine/Emergency Power Switch
- Horn Switch
- Platform Foot Switch
- AC Generator Switch
- Hydraulic Oil Warm-Up Switch
- Pre-Operation Safety Inspection
- System Function Inspection
- Operation
- Cold Weather Start-Up
- Hydraulic System Cold Weather Warm-Up
- Hydraulic System Warm-Up Switch
- Manually Warming The Hydraulic System
- Preparing for Operation
- Lower Controls
- Upper Controls
- Boom Operation
- Driving and Steering
- Drive Speeds
- Pivoting Front Axle
- All Motion Alarm
- Electrical Power Outlet
- AC Generator
- Air Line
- Emergency Lowering
- Lower Controls
- Upper Controls
- After Use Each Day
- Transporting the Machine
- Maintenance
- Inspection and Maintenance Schedule
- Daily Preventative Maintenance Checklist
- Specifications

Controls and Indicators
A46JRT – 0260228 9
Upper Controls
The upper controls (refer to Figure 4) are located on
the control panel at the platform. Boom, platform, and
drive functions can be operated from the upper controls.
The following controls are located on the upper control
panel.
Preheat Switch
The preheat switch (refer to Figure 4) is a momentarily
on toggle switch. This switch operates the glow plugs to
aid in starting the engine when the start switch is in the
on position.
When the engine is warmed up or the ambient tem-
perature is above 10°C (50°F), it is not necessary to
operate the glow plugs before starting the engine.
When the ambient temperature range is 10°C (50°F)
to -5°C (23°F), press and hold the preheat button for
ve seconds before starting the engine.
When the ambient temperature is below -5°C (23°F),
press and hold the preheat button for ten seconds
before starting the engine.
Start Switch
The engine can be started from the platform using the
start switch on the front of the upper control panel (refer
to Figure 4).
This switch is similar to an automobile ignition switch.
Turn the switch to start until the engine starts, then
release it to on.
If the engine dies, the switch must be turned to off
before it can be turned back to start.
An alarm sounds, when the switch is turned on, to warn
others that the machine engine is being started.
Note
On some machines it may be necessary to pause about
three seconds in the on position before going to start so
the starter can engage.
If the platform is to stay in a particular position for a long
time, turn the start switch to off to shut off the engine and
save fuel.
Emergency Stop Button
The emergency stop is a two-position, red push button on
the top of the upper control panel (refer to Figure 4).
Push the button inward to disconnect power from all
control circuits at the upper controls.
Pull the button outward to restore power.
Note
The lower controls override the upper controls. If the up-
per control emergency stop button is engaged the lower
controls can still be used to operate the aerial platform.
•
•
•
•
•
•
•
Push the emergency stop button inward when the
upper controls are not in use to protect against unin-
tentional operation.
Drive Joystick
The drive joystick (refer to Figure 4) is used to control
forward and reverse motion of the aerial platform. The
distance the joystick is moved is proportional to the ma-
chine drive speed.
Hold the joystick forward to move the aerial platform
forward and backward to move in reverse as indicated
by the directional arrows on the chassis.
Drive and steer functions may be operated simultane-
ously.
Steer Switch
The steer switch (refer to Figure 4) is a momentary
contact, rocker switch on top of the drive joystick. This
switch controls the two front wheels to steer the aerial
platform.
To steer to the right, hold down the right side of the
steer switch.
To steer to the left, hold down the left side of the steer
switch.
Note
The steering wheels are not self-centering. Set the steer-
ing wheels straight ahead after completing a turn.
Drive Range Switch
The drive range switch (refer to Figure 4) has two posi-
tions to select drive wheel operation when the booms are
in the stowed position; tip boom fully retracted and main
boom fully lowered.
High range (rabbit) – high speed drive 7.2 km/h (4.5
mph) with booms in the stowed position.
Low range (turtle) – creep speed 1.2 km/h (0.8 mph)
with high torque drive operation with booms in any
position.
The drive range operates in low when the booms are out
of the stowed position, regardless of the position of the
drive range switch.
Boom Speed Knob
Use the boom speed control knob (refer to Figure 4) to
control the speed of the following boom functions:
Main boom raise/lower
Main boom extend/retract
Turntable rotation clockwise/counterclockwise
Set the knob to slow (turtle) when beginning a boom
movement. The speed may be increased by slowly rotat-
ing the knob toward fast (rabbit). For smooth operation,
rotate the knob to slow when ending boom movement.
•
•
•
•
•
•
•
•