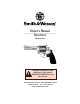
Owner’s Manual Revolvers - Modern Style - Read the instructions and warnings in this manual CAREFULLY BEFORE using this firearm. 2100 Roosevelt Avenue • Springfield, MA 01104 1-800-331-0852 • Fax: 413-747-3317 www.smith-wesson.
READ THESE INSTRUCTIONS AND WARNINGS CAREFULLY. BE SURE YOU UNDERSTAND THESE INSTRUCTIONS AND WARNINGS BEFORE USING THIS FIREARM. This SAFETY, INSTRUCTION and PARTS MANUAL should always accompany this firearm and be transferred with it upon change of ownership or presented to another person. A copy of the SAFETY, INSTRUCTION, & PARTS MANUAL is available FREE upon request from: SMITH & WESSON CUSTOMER SUPPORT CENTER 2100 ROOSEVELT AVENUE SPRINGFIELD, MA 01104 TEL.: 1-800-331-0852 E-mail: qa@smith-wesson.
INDEX SAFETY . . . . . . . . . . . . . . . . . . . . . . . . . . .4 BASIC FIREARMS SAFETY RULES . . . . . . . .5-6 SAFE STORAGE & TRANSPORTATION . . . . . .7-8 NOMENCLATURE . . . . . . . . . . . . . . . . . . .8-9 PREPARATION FOR FIRING . . . . . . . . . . . .9-10 AMMUNITION . . . . . . . . . . . . . . . . . . . .10-12 AMMUNITION WARNING - Ti, Sc, PD SERIES .13 MODEL NUMBER IDENTIFICATION . . . . . . . .14 INSPECTING YOUR REVOLVER . . . . . . . . . . .15 INTERNAL LOCK MECHANISM . . . . . . . . .
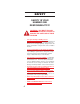
SAFETY SAFETY IS YOUR NUMBER ONE RESPONSIBILITY!!!! WARNING: YOU MUST FOLLOW ALL OF THESE SAFETY RULES TO ENSURE THE SAFE USE OF YOUR FIREARM 4 • Safe gun handling is YOUR personal responsibility at all times. Firearms are dangerous and can cause serious injury and death if they are misused or used inappropriately. Safety must be the prime consideration of anyone who owns or handles firearms. • You are responsible for the firearm at all times.
BASIC FIREARM SAFETY RULES At home, in the field, at the range, or anywhere, the first concern of every firearm owner should be safety. Apply the following safety rules in every situation, with any kind of firearm. WARNING! THE FAILURE TO FOLLOW THESE BASIC FIREARM SAFETY RULES MAY RESULT IN AN UNINTENDED DISCHARGE WHICH COULD CAUSE SERIOUS PERSONAL INJURY OR DEATH. • BEFORE HANDLING ANY FIREARM, UNDERSTAND ITS OPERATION. Not all firearms are the same.
BASIC FIREARM SAFETY RULES CONT’D. ADDITIONAL IMPORTANT SAFETY RULES 6 • Never carry or store a firearm with the hammer or striker in the cocked position. • Do not allow a firearm to be used by individuals who have not read these basic firearms safety rules and do not understand its safe operation and the rules of safe gun-handling. • Be sure all accessories, such as holsters and grips, are compatible with the firearm and that the accessories do not interfere with safe operation.
SAFE STORAGE & TRANSPORTATION WARNING: SAFE AND SECURE STORAGE OF YOUR FIREARM IS ONE OF THE MOST IMPORTANT RULES OF FIREARM SAFETY. YOUR FAILURE TO FOLLOW THESE RULES MAY RESULT IN SERIOUS INJURY OR DEATH. • You must always secure your firearm and ammunition separately so that they are not accessible to children or other unauthorized persons. • Safe and secure storage and transportation of your firearm are your responsibility. It is a full-time responsibility. • ALWAYS STORE YOUR FIREARM UNLOADED.
SAFE STORAGE & TRANSPORTATION CONT’D. • • Your local police department or gunshop will furnish you with available information on storing and/or transporting a firearm legally. YOUR FIREARM IS YOUR RESPONSIBILITY. Protect your firearm from theft or misuse by untrained or unqualified individuals. MAINTENANCE BEFORE STORAGE When storing, do not encase your firearm in anything that will attract or hold moisture, for example, leather or heavy cloth.
NOMENCLATURE CONT’D. DOUBLE ACTION - A firing action where the hammer or striker is drawn back, released, and the gun fired by a single pull of the trigger. DOUBLE ACTION ONLY - A firearm designed so that it can only be fired in double action. PISTOL - A handgun that contains the cartridges in a magazine. REVOLVER - A handgun that contains the cartridges in a cylinder that revolves at the rear of the barrel.
PREPARATION FOR FIRING CONT’D. • Be sure that all cylinders and actions of firearms are open, that chambers are clear of cartridges, magazines are removed, and that firearms are pointing in a safe direction before anyone is allowed in front of the firing position. • Be alert at all times. Never shoot if you are tired, cold or impaired in any way. • Treat your firearm as if it were loaded at all times. AMMUNITION A. • GENERAL PRINCIPLES A firearm and ammunition are a system and must work together.
AMMUNITION CONT’D. • Use only commercially manufactured ammunition with internal ballistic pressures which are in strict accordance with the specifications of the Sporting Arms and Ammunition Manufacturers’ Institute (SAAMI). • Be certain all ammunition you use complies with the SAAMI specifications. If you are uncertain, contact your ammunition supplier for verification. C.
AMMUNITION CONT’D. E. AMMUNITION WARNINGS • “Plus-P” (+P) ammunition generates pressures in excess of the pressures associated with standard ammunition. Such pressures may affect the wear characteristics or exceed the margin of safety built into some revolvers and could therefore be DANGEROUS. • “Plus-P” ammunition should not be used in medium (K frame) revolvers manufactured prior to 1958.
AMMUNITION WARNING FOR Ti, Sc, PD Series REVOLVERS Before placing any of these reduced weight revolvers into service, perform the following test to determine the suitability of the ammunition you intend to use. At a gun range or other suitable and safe location, prepare your revolver for firing by fully loading its cylinder with the ammunition to be tested. While pointing the firearm in a safe direction, fire all but the last round.
MODEL NUMBER IDENTIFICATION The internal serial number and the model and dash numbers appear inside the yoke (figure 3) when the cylinder is in the open position. The external serial number appears below the cylinder.
INSPECTING YOUR REVOLVER When you inspect your revolver, you must first check to ensure that it is unloaded. Do this with your finger off the trigger and out of the trigger guard (Figure 6) and keep the barrel of the gun pointed in a safe direction. Press the thumbpiece forward and push the cylinder to the left (Figure 7). You are now able to visually check all charge holes for cartridges and the barrel for obstructions.
INTERNAL LOCK MECHANISM CONT’D. TO ENGAGE THE LOCK WARNING: Never lock the revolver while it is loaded. Never lock the firearm with the hammer cocked. Open the cylinder and ensure the revolver is completely unloaded. Hold the revolver with the cylinder open in one hand. Insert the key and turn it counter-clockwise using the other hand. The key will turn approximately 90o. The locked indicator flag will become visible on revolvers with exposed hammers.
INTERNAL LOCK MECHANISM CONT’D. WARNING: TO SAFELY RECOVER FROM A SITUATION WHERE THE REVOLVER HAS BEEN INCORRECTLY LOCKED WITH THE HAMMER FULLY COCKED, THE FOLLOWING STEPS MUST BE FOLLOWED. THROUGHOUT THIS PROCEDURE, THE REVOLVER MUST BE TREATED AS IF IT WERE LOADED. 1. WITH YOUR FINGER OFF THE TRIGGER AND OUT OF THE TRIGGER GUARD, PLACE THE THUMB OF YOUR SHOOTING HAND ON THE HAMMER AND PULL FULLY REARWARD TO ENSURE THE HAMMER IS IN THE FULLY COCKED POSITION. 2.
LOADING • Do not load your revolver until you have read and understand the Basic Firearms Safety Rules. • Do not load your revolver until you are at the shooting site and fully prepared to fire. • If your internal lock is engaged, unlock before proceeding. • To load your revolver, hold it in one hand with the muzzle pointed in a safe direction and away from you and others while keeping your finger off the trigger and out of the trigger guard. Press the thumbpiece forward to unlock the cylinder.
FIRING CONT’D. A lesser amount of trigger pressure and motion are necessary to fire the revolver when the hammer is in the cocked position. As in any firing situation, continue to exercise great care in handling a revolver which has been placed in the single action or cocked mode. Double Action Firing* While holding the grips firmly, pull the trigger fully to the rear. The hammer will move rearward and then fall forward to fire the revolver. Never touch the trigger until you are ready to fire.
FIRING CONT’D. (3) Apply pressure to the trigger to release the hammer as shown in Figure 14. Immediately after the hammer has come out of cocked position, release the trigger and withdraw your finger from the trigger guard. WARNING: Failure to remove your finger from the trigger guard as soon as the hammer releases could cause the revolver to fire if your thumb slips off of the hammer spur.
CLEARING MISFIRES If during firing, a cartridge fails to fire, wait ten seconds while keeping the muzzle pointed in a safe direction. Keep your finger off of the trigger and out of the trigger guard. Press and hold the thumbpiece forward and swing the cylinder to the left. Remove the defective cartridge and dispose of it in a method specifically approved for live round disposal. UNLOADING • Always keep the firearm pointed in a safe direction away from you and others.
SIGHT ADJUSTMENT Ensure your firearm is unloaded before adjusting your sights. At all times follow the basic rules of safe gun handling. To make a sight adjustment with adjustable rear sight • To raise the point of impact, raise the rear sight by turning the elevation screw counterclockwise one or two clicks at a time. • To lower the point of impact, lower the rear sight by turning the elevation screw clockwise one or two clicks at a time.
CLEANING AND MAINTENANCE !! WARNING !! Ensure your firearm is unloaded before beginning to clean it. At all times follow the basic rules of safe gun handling. Your firearm is a precision instrument. To insure reliable function it is necessary to follow a routine maintenance procedure. After firing your handgun, be sure to unload it following the procedure outlined in the section entitled “Unloading” on page 21 before performing any cleaning or maintenance procedure.
SERVICE, SHIPPING & PARTS For Owners Within The United States SERVICE Customer Service 2100 Roosevelt Avenue Springfield, MA 01104 Tel: 800-331-0852 • 413-781-8300 E-mail: qa@smith-wesson.com Should your Smith & Wesson firearm require service, it should be returned to Smith & Wesson in its original case or in a similarly secure container. It is not necessary to take the gun to a dealer for shipment. However, before shipping your firearm, call or e-mail our Customer Service Dept.
SERVICE, SHIPPING, & PARTS CONT’D. Since we cannot assume responsibility for custom parts and accessories, such as stocks, special sights, or holsters, please remove these items before returning your firearm. Warranty repair work will begin upon receipt and examination of the firearm. In the case of repairs or work not covered by the warranty, a quotation covering the cost of the work plus round trip transportation charges will be sent to you. Repairs or modification will begin upon receipt of payment.
WARRANTY For Owners Within The United States This warranty is granted by Smith & Wesson, 2100 Roosevelt Avenue, P.O. Box 2208, Springfield, MA 01102-2208. This warranty is effective from the date of purchase after February 1, 1989 and applies to the original owner of any handgun purchased after that date. With respect to such handguns, this warranty supersedes any and all other warranties. Smith & Wesson handguns are warrantied to be free from defects in material and workmanship.
EXTENDED SERVICE POLICY For Owners Within The United States Even after the warranty period has expired, Smith & Wesson will repair, without charge, any handgun purchased by the original owner on or after February 1, 1989 that is found to have defect in material or workmanship. Eligibility for this extended service policy requires returning the Product Registration Card within thirty days of purchase. A copy of the bill of sale in the owner’s name and the sales receipt should accompany the handgun.
COMPONENT PARTS View 01 02 03 04 05 07 09 10 11 12 13 14 15 16 17 18 19 20 21 22 23 24 25 26 27 28 31 32 33 33A 35 36 37 Description Extractor Rod Center Pin Center Pin Spring Extractor Rod Collar Extractor Spring Cylinder Extractor Rear Sight Leaf Rear Sight Leaf Plunger Rear Sight Leaf Plunger Spring Rear Sight Elevation Nut Rear Sight Windage Nut Rear Sight Spring Clip Rear Sight Elevation Stud Rear Sight Slide Rear Sight Windage Screw Rear Sight Leaf Screw Thumbpiece Nut Thumbpiece Bolt Bolt Plunger Sp
COMPONENT PARTS CONT’D.
GUNSMITH WARNING CAUTION: TITANIUM & SCANDIUM REVOLVERS NO attempt should ever be made to remove the hybrid Aluminum/Stainless Steel Barrel Assembly with a standard barrel wrench. To do so will destroy the barrel shroud and possible the frame of your revolver. As the accompanying drawing (Figure18) shows, the barrel shroud is keyed into the frame by a metal tab. The stainless steel barrel tube must only be removed by a qualified gunsmith using a special tool available from Smith & Wesson.
This handgun is not equipped with a device that fully blocks use by unauthorized users. More than 200,000 firearms like this one are stolen from their owners every year in the United States. In addition, there are more than a thousand suicides each year by younger children and teenagers who get access to firearms. Hundreds more die from accidental discharge. It is likely that many more children sustain serious wounds or inflict such wounds accidentally on others.
Smith & Wesson 2100 Roosevelt Avenue • Springfield, MA 01104 www.smith-wesson.