
Manual

19
FIELD STRIPPING DISASSEMBLY CONT’D.
FIGURE 17
FIGURE 19
FIGURE 20
FIGURE 21
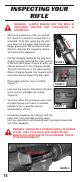
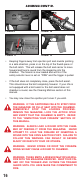
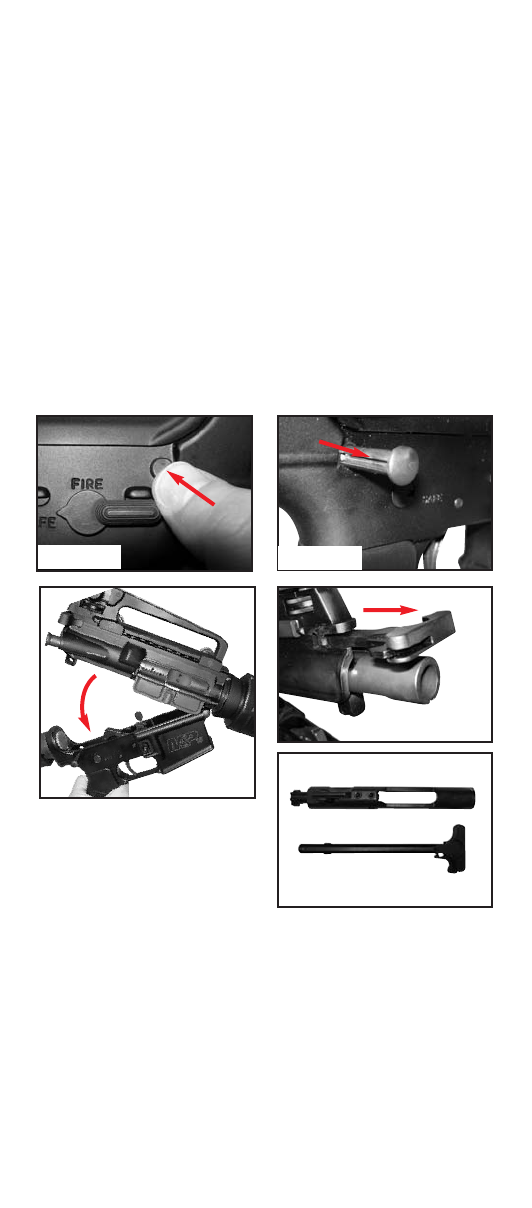
• Push in take down pin (above and behind the trigger) from
left of lower receiver and pull the pin out on the right of the
receiver until it comes to a positive stop. (Figure 17 & 18)
• Pivot lower receiver down and away from upper receiver.
(Figure 19)
Note: Never dry-fire with the rifle disassembled.
• If required for more convenience, remove pivot screw from
front of receivers and separate the receivers.
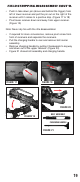
• Pull the charging handle to rear and remove bolt carrier
assembly.
• Remove charging handle by pulling it backwards to keyway
and down out of the upper receiver. (Figure 20)
• Figure 21 shows bolt assembly and charging handle.
BOLT ASSEMBLY
CHARGING HANDLE
FIGURE 18