Owner’s Manual 22A/22S Sport Series Target Pistols Read the instructions and warnings in this manual CAREFULLY BEFORE using this firearm. 2100 Roosevelt Avenue • Springfield, MA 01104 1-800-331-0852 • Fax: 413-747-3317 www.smith-wesson.
WARNING READ THESE INSTRUCTIONS AND WARNINGS CAREFULLY. BE SURE YOU UNDERSTAND THESE INSTRUCTIONS AND WARNINGS BEFORE USING THIS FIREARM. FAILURE TO READ THESE INSTRUCTIONS AND TO FOLLOW THESE WARNINGS MAY RESULT IN SERIOUS INJURY AND DEATH TO YOU AND OTHERS This SAFETY, INSTRUCTION and PARTS MANUAL should always accompany this firearm and be transferred with it upon change of ownership or presention to another person.
Your Safety Responsibilities . . . . . . . . . . . . . . . . . . . . . . . .3-6 Safe Storage and Transportation . . . . . . . . . . . . . . . . . . . . .7-8 Nomenclature . . . . . . . . . . . . . . . . . . . . . . . . . . . . . . . . . .8-9 Preparation for firing . . . . . . . . . . . . . . . . . . . . . . . . . . . .9-10 Ammunition . . . . . . . . . . . . . . . . . . . . . . . . . . . . . . . . .10-12 Model Number Identification . . . . . . . . . . . . . . . . . . . . . . . .
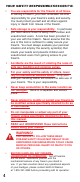
YOUR SAFETY RESPONSIBILITIES CONT’D. • You are responsible for the firearm at all times. In owning a firearm, you must undertake full-time responsibility for your firearm’s safety and security. You must protect yourself and all others against injury or death from misuse of the firearm. • Safe storage is your responsibility. In particular, you must secure firearms safely from children and unauthorized users. A lock has been provided for your use with this firearm.
YOUR SAFETY RESPONSIBILITIES CONT’D. • ALWAYS SAFELY STORE AND SECURE YOUR FIREARM. Safe and secure storage of your firearm is one of the most important responsibilities of firearms ownership. It is a full-time responsibility. You must always secure your firearm and ammunition separately so that they are not accessible to children or other unauthorized persons. (See Safe Storage Instructions.) • ALWAYS TREAT EVERY FIREARM AS IF IT IS LOADED AND WILL FIRE IF THE TRIGGER IS PULLED.
YOUR SAFETY RESPONSIBILITIES CONT’D. • HAVE ADEQUATE VENTILATION AT ALL TIMES. Discharging firearms in poorly ventilated areas, cleaning firearms, or handling ammunition may result in exposure to lead and other substances known to cause birth defects, reproductive harm, and other serious physical injury. Review the warnings and labels for all ammunition and cleaning products carefully. Wash hands thoroughly after exposure. • NEVER USE ALCOHOL OR DRUGS BEFORE OR WHILE SHOOTING.
SAFE STORAGE & TRANSPORTATION WARNING: SAFE AND SECURE STORAGE OF YOUR FIREARM IS ONE OF THE MOST IMPORTANT RULES OF FIREARM SAFETY. YOUR FAILURE TO FOLLOW THESE RULES MAY RESULT IN SERIOUS INJURY OR DEATH TO YOU OR OTHERS. • You must always secure your firearm and ammunition separately so that they are not accessible to children or other unauthorized persons. • Safe and secure storage and transportation of your firearm are your responsibility. It is a full-time responsibility.
SAFE STORAGE & TRANSPORTATION CONT’D. • • Your local police department or gunshop will furnish you with available information on storing and/or transporting a firearm legally. YOUR FIREARM IS YOUR RESPONSIBILITY. Protect your firearm from theft or misuse by untrained or unqualified individuals. MAINTENANCE BEFORE STORAGE When storing, do not encase your firearm in anything that will attract or hold moisture, for example, leather or heavy cloth.
NOMENCLATURE CONT’D. DECOCK - The process by which the hammer or striker is safely lowered. DOUBLE ACTION - A firing action where the hammer or striker is drawn back, released, and the gun fired by a single pull of the trigger. DOUBLE ACTION ONLY - A firearm designed so that it can only be fired in double action. PISTOL - A handgun that contains the cartridges in a magazine. REVOLVER - A handgun that contains the cartridges in a cylinder that revolves at the rear of the barrel.
PREPARATION FOR FIRING CONT’D. • Always be alert and always follow the safety instructions of the range officer. • Always be sure that all cylinders and actions of firearms are open, that chambers are clear of cartridges, magazines are removed, and that firearms are pointing in a safe direction. • Always be alert. Never shoot if you are tired, cold or impaired in any way. • Always treat your firearm as if it were loaded. • Never use alcohol or drugs before or while shooting. AMMUNITION A.
AMMUNITION CONT’D. B. HANDLOADED OR RELOADED AMMUNITION !! WARNING !! Never use non-standard, reloaded or “handloaded” ammunition which has not been subjected to internal ballistic pressure testing. Reloaded or handloaded ammunition, may have many manufacturing and quality variables (such as the type and amount of gun powder).
AMMUNITION CONT’D. • Additional ammunition calibers can be fired from the following list of select calibers. Can also Fire Caliber on Barrel .45 Colt .45 Schofield, .45 S&W, .45 Auto Rim .45 S&W .45 Schofield .44 Magnum .44 Special .357 Magnum .38 Special, .38 Special +P .22LR .22L, .22 Short, .22CB, .22BB (in revolvers only) 10mm .40 S&W (in revolvers only) • In some cases, a round of ammunition not specified on your handgun may fit into the chamber or cylinder.
FIGURE 2a Accessory Sight Mount Rear Sight Barrel Take Down Button Frame Trigger Trigger Guard Magazine Release Grip Magazine Well MODEL NUMBER & SERIAL NUMBER Manual Safety FIGURE 2 Slide Stop MODEL NUMBER IDENTIFICATION Slide Front Sight 13
INSPECTING YOUR PISTOL PRIOR TO FIRING When you inspect your pistol, you should first check for yourself to ensure that it is unloaded. To do this, grasp the pistol with your finger off the trigger and outside the trigger guard, point the pistol in a safe direction, depress the magazine release, and remove the magazine (Figure 3).
LOADING • Do not load the pistol until you are ready to use it. • Keep your finger off the trigger and outside the trigger guard until you are ready to fire. WARNING: In 2001, a magazine safety was added to all Sport Series Pistols. Pistols with a magazine safety are designed to disengage the trigger linkage, and thereby prevent the trigger from firing the pistol when the magazine is removed from the pistol. Never place your finger on the trigger or in the trigger guard while you remove the magazine.
LOADING CONT’D. • Inspect your pistol to ensure that the chamber is empty and the firing pin is not protruding beyond the breech face as previously described in the “Inspecting Your Pistol” section. WARNING: Verify that the firing pin is not protruding from the breech face. WARNING: Never attempt to load the pistol by inserting a round into the open ejection port. WARNING: Always load a round into the chamber by feeding it from the magazine.
FIRING • • Keep the pistol pointed in a safe direction and your finger outside the trigger guard until you are ready to fire. Place the manual safety in the fire (down) position. While holding the grip firmly, pull the trigger fully to the rear. As the trigger is drawn fully to the rear, the hammer is released, striking the firing pin which strikes the cartridge primer. Upon firing the slide moves rearward thereby extracting and ejecting the spent cartridge case.
UNLOADING • • Point the muzzle in a safe direction. Make sure your finger is off the trigger and out of the trigger guard. Verify that the manual safety is in the safe (up) position. Depress the magazine release, and remove the magazine (Figure 9).
FIELD STRIPPING DISASSEMBLY WARNING: Always follow the field stripping instructions exactly. Never do anything beyond what you are specifically instructed to do in this manual. Never alter or modify the parts in your pistol. • • • • WARNING: Safety glasses should be worn during this process. Point the pistol in a safe direction. Make sure your finger is off the trigger, and the trigger is in the "at rest" or forward position. Depress the magazine release, and remove the magazine.
FIELD STRIPPING DISASSEMBLY CONT’D. • • • • • • • Release the take down button. Place the index finger of your shooting hand on the slide. Gently move the barrel rearward, freeing the rear sight bridge hook from the frame. As the barrel is lifted from the frame continue to capture the slide assembly with the index finger of your shooting hand.(Figure 13) Lift barrel off of the frame assembly and set it aside. (Figure 14) Grasp the slide with the free hand.
FIELD STRIPPING DISASSEMBLY CONT’D. FIGURE 18 This completes field stripping of the firearm. No further disassembly should be attempted. WARNING: Continued dry-firing of this firearm in a disassembled state can cause damage. WARNING: Never disassemble your handgun beyond the field stripping process outlined in this manual. Never manipulate any internal components beyond what you are specifically instructed to do in this manual since this may affect the reliability, functioning and safety of your handgun.
FIELD STRIPPING REASSEMBLY CONT’D. • • • • While gently pressing down, move the slide fully to the rear and engage the slide stop (Figure 23. Capture the slide with the index finger of your shooting hand to prevent inadvertent release from the frame, causing possible injury (Figure 24). Grasp the barrel in free hand by muzzle end and engage the sight bridge hook with the frame hook and pull forward (Figure 25).
LUBRICATION CONT’D. FIGURE 27 FIGURE 28 MAGAZINE DISASSEMBLY FOR CLEANING • • • • Remove all cartridges from magazine before disassembly. Grasp magazine and insert drift (a common key will work as well) into the key hole and through the spring. (Figure 29). Using the drift, depress spring approximately one inch and slide the butt plate off of the magazine tube (Figure 30). Remove the spring. Slide the magazine pull-down button down to the key hole and lift to remove the button.
MAGAZINE REASSEMBLY CONT’D. FIGURE 33 FIGURE 34 FIGURE 35 FIGURE 36 Key REAR SIGHT ADJUSTMENT • The rear sight is fully adjustable for both windage and elevation. The top screw controls the elevation and each click raises or lowers the point of impact at the target. The windage adjustment screw, located on the right side of the body, controls the windage and each click moves the point of impact right or left at the target.
CLEANING AND MAINTENANCE CONT’D. Using a small brush dipped in solvent, remove all deposits from around the breech of the barrel, chamber (charge holes), extractor and adjacent areas which have been subjected to the action of powder or primer residue. Remove any residue on the frame with light brushing and a solvent. After cleaning the entire gun, use a cloth to apply a light film of high quality gun oil to all external metal surfaces and wipe clean.
SERVICE, SHIPPING & PARTS For Owners Within The United States SERVICE Customer Service 2100 Roosevelt Avenue Springfield, MA 01104 Tel: 800-331-0852 • 413-781-8300 E-mail: qa@smith-wesson.com Should your Smith & Wesson firearm require service, it should be returned to Smith & Wesson in its original case or in a similarly secure container. It is not necessary to take the gun to a dealer for shipment. However, before shipping your firearm, call or e-mail our Customer Service Dept.
SERVICE, SHIPPING, & PARTS CONT’D. Since we cannot assume responsibility for custom parts and accessories, such as stocks, special sights, or holsters, please remove these items before returning your firearm. Warranty repair work will begin upon receipt and examination of the firearm. In the case of repairs or work not covered by the warranty, a quotation covering the cost of the work plus round trip transportation charges will be sent to you. Repairs or modification will begin upon receipt of payment.
WARRANTY For Owners Within The United States This warranty is granted by Smith & Wesson, 2100 Roosevelt Avenue, P.O. Box 2208, Springfield, MA 01102-2208. This warranty is effective from the date of purchase after February 1, 1989 and applies to the original owner of any handgun purchased after that date. With respect to such handguns, this warranty supersedes any and all other warranties. Smith & Wesson handguns are warrantied to be free from defects in material and workmanship.
WARRANTY CONT’D. Smith & Wesson reserves the right to determine what constitutes ordinary wear and tear. However, we can rebuild handguns that have experienced extreme usage or are beyond their normal useful life at a fee that will be quoted to the owner. This warranty gives you specific legal rights. You may also have other rights that vary from state to state. Note: All liability is excluded in the event that the instructions in this manual are not observed.
COMPONENT PARTS View 1 2 3 4 5 6 7 8 9 10 11 12 13 14 15 16 17 18 19 20 21 22 23 24 Description Barrel Assembly Grips Ejector Extractor Extractor Plunger Extractor Spring Firing Pin Firing Pin Return Spring Firing Pin Stop Pin Frame Grip Screw Hammer Hammer Pin Magazine Tube Magazine Butt Plate Magazine Catch Magazine Catch Pin Magazine Catch Spring Magazine Follower Magazine Follower Button Magazine Spring Mainspring Mainspring Guide Mainspring Guide Pin 25 26 27 28 29 30 31 32 33 34 35 36 37 38 39 40 41
This handgun is not equipped with a device that fully blocks use by unauthorized users. More than 200,000 firearms like this one are stolen from their owners every year in the United States. In addition, there are more than a thousand suicides each year by younger children and teenagers who get access to firearms. Hundreds more die from accidental discharge. It is likely that many more children sustain serious wounds or inflict such wounds accidentally on others.
Smith & Wesson 2100 Roosevelt Avenue • Springfield, MA 01104 www.smith-wesson.