Contents 1. 2. 3. 4. 5. 6. 7. IMPORTANT SAFETY INSTRUCTIONS ____________________ 2 INSTALLATION ______________________________________ 10 DESCRIPTION OF THE CONTROLS _____________________ 17 OPERATING INSTRUCTIONS ___________________________ 27 CLEANING AND MAINTENANCE ________________________ 48 TROUBLESHOOTING. WHAT TO DO IF... _________________ 51 TROUBLESHOOTING _________________________________ 56 Thank you for choosing one of our products.
Installation TRANSLATION OF INSTRUCTIONS THE ORIGINAL 1. IMPORTANT SAFETY INSTRUCTIONS - - SAVE THESE INSTRUCTIONS Before using the appliance, carefully read all the instructions contained in this manual. During installation, take care not to injure yourself on the sharp edges of the appliance: wear safety gloves. This manual is an integral part of the appliance; it must always be kept intact together with the dishwasher for future reference (even if sold).
Installation - Do not operate your dishwasher unless all enclosure panels are properly in place. - Do not tamper with controls. - The appliance must be installed and connected in accordance with the instructions provided by the manufacturer. Installation must be performed by qualified technicians in accordance with applicable regulations. - The installation and repair or servicing shall be carried out by qualified and authorised technical personnel.
Installation - Never leave waste packaging unattended. Do not allow children to play with packaging materials. Separate waste packaging materials by type and consign them to the nearest recycling centre. - The plate with the technical data, serial number and marking is in a visible position on the inside edge of the door. It must not be removed. - The appliance must be earthed in compliance with electrical safety regulations.
Installation - Building-in the appliance underneath a hob is absolutely forbidden. Installing a hob on top of freestanding appliance is absolutely forbidden. - To ensure stability, install the appliance only under continuous worktop, securely fixed to adjacent cabinets. If the appliance is installed in a high cabinet, both the appliance and the cabinet must be adequately fixed.
Installation - The appliance must be connected to the water supply by means of new hoses. - Briefly test the appliance after installation. Run a wash cycle with a temperature of between 113°F and 158°F (45°C-70°C) with the dishwasher empty and using a specific dishwasher detergent. (It is not sufficient to run a soak cycle). If the dishwasher fails to operate correctly, disconnect it from the electrical power supply and call the nearest technical service centre.
Installation - Some detergents are strongly alkaline. Avoid contact with the skin and eyes. Detergents can be extremely dangerous if swallowed. They contain substances capable of causing permanent damage to the mouth and throat, and even leading to suffocation. Observe all the safety instructions on the packaging of these products. - Do not drink the water residues which may be present on the dishes or appliance at the end of the washing program.
Installation - - - void the warranty but may also put the user’s safety at risk. In the event of a fault, disconnect the dishwasher from the electrical power supply and shut off the water tap. In the event of damage to the supply cord, have it replaced by the manufacturer or an authorised technical service centre. Some components are live even with the on/off button in the off position. Before performing any maintenance work on the appliance, disconnect it from the electrical power supply.
Installation 1.1 Disposal The appliance does not contain substances in quantities sufficient to be considered hazardous to health and the environment, in accordance with current European directives: To dispose of the appliance: Remove the washing compartment door. Cut the power cable, Make the lock unusable.
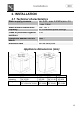
Installation 2. INSTALLATION 2.1 Technical characteristics Water supply pressure Water supply temperature Capacity Class of protection against moisture Protection against electric shock Electrical data min. 0,05 - max. 0,9 MPa (min. 0.5 – max. 9 bar) max.
Installation 2.2 General Information This appliance may be placed up against walls or other furniture units. If the appliance is installed near a heat source, fit a special insulating panel to prevent overheating and malfunction of the appliance. To facilitate the installation procedure, the intake and drain hoses can be positioned in any direction; make sure that the hoses are not kinked, crushed or pulled too tightly.
Installation Building-in a dishwasher underneath a hob is absolutely forbidden. Moreover, dishwashers may not be installed directly touching appliances which are not conventional built-in kitchen appliances (e.g. fireplaces, stoves, etc.). When installing the dishwasher in a compartment next to one or more other appliances, it is essential to comply with all the recommendations provided by the appliance’s manufacturer (minimum distances, installation procedures, etc.).
Installation 2.3 Water supply connection CONNECTING TO THE WATER SUPPLY Connect the intake hose to a cold water supply with ¾” gas thread, inserting the filter A supplied with the dishwasher. Take care to screw the hose firmly into place with your hands and then complete by tightening about ¼ of a turn with pliers. In dishwashers equipped with the AQUASTOP device, the filters is already fitted inside the threaded ring.
Installation DRAIN CONNECTION Insert the dishwasher’s drain hose into a drain pipe having a diameter of at least 4 cm (1"37/64), or alternatively, place it inside the kitchen sink using the plastic support provided, taking care not to crush or excessively bend the hose. It is important to prevent the hose from coming loose and falling. For this purpose, the plastic support is equipped with a hole for tying it to the wall or water tap.
Installation 2.4 Electrical connection Check that the voltage and the frequency of the mains match the ratings on the name plate of the appliance positioned on the inner edge of the door. This appliance must be grounded. In the event of a malfunction or breakdown, grounding will reduce the risk of electric shock by providing a path of least resistance for electric current. This appliance is equipped with a cord having an equipmentgrounding conductor and a grounding plug.
Installation Do not use adaptors or shunt connections in order to avoid the possibility of overheating or burning. The power cable must be replaced by the manufacturer or by an Authorized Service Centre.
User instructions 3. DESCRIPTION OF THE CONTROLS 3.1 Upper panel All the dishwasher controls are grouped on the upper panel. Switch-on, programming, switch-off, etc. procedures are only possible when the door is open. The panel shown is only a guideline example. 1 ON/OFF BUTTON Press this button to switch the dishwasher on/off. 2 SELECTED PROGRAM INDICATOR LIGHTS Illumination of this light denotes the program selected and the occurrence of a fault (troubleshooting).
User instructions Information displayed Scheduled program duration Remaining program time Delayed start Error message no no 1 - 9 hours E SETTING THE WASHING PROGRAM AND SWITCHING ON After identifying the most suitable program with the aid of the programs table: Press the ON/OFF button (1) and wait for the PROGRAM INDICATOR LIGHT (2) to illuminate; Keep pressing the PROGRAM SELECTION button (3) until the indicator light corresponding to the desired program illuminates; select the option required
User instructions Description of the programs: The number, type and the sequence of wash programs depend on the model purchased. Refer to the instruction manual supplied together with the product. SOAK Pans and dishes awaiting completion of the load AUTO Normally soiled dishes including dried-on residues, for daily use. DELICATE Wash cycle for mixed loads such as wine glasses and lightly soiled dishes. CRYSTAL & CHINA Wash cycle for delicate items, such as wine glasses and lightly soiled fine china.
User instructions AUTOMATIC DOOR OPENING – DRY ASSIST The program ends with a drying cycle that consists of a time during which the door is closed, and a time during which the door is slightly open (just waiting, to assist drying). The duration depends on the program and model. Any intervention (opening / closing the door, switching off etc.) during this stage will end the program early.
User instructions 3.2 Washing programs Before starting a washing program make sure that: The water supply tap is open. The softener container contains regenerating salt. The correct amount of detergent has been added to the dispenser. The baskets have been correctly loaded. The spray arms are able to rotate freely and without obstruction. The dishwasher door is securely closed.
User instructions OPTION SELECTION Options are selected by pressing the relative button by the symbol of the option required; the light comes on to confirm that the option has been activated. It is not possible to select any options when the soak program is being used. All options are disabled at the end of the wash cycle. All options are disabled when a program is CANCELLED after it has begun. ½ LOAD FLEXI ZONE (if present) Ideal if just a few dishes need to be washed, allowing energy savings.
User instructions DRY ASSIST (if present) It starts automatically if the selected program is compatible with the option. It can be disabled before starting the program. The door opens automatically, allowing the dishes to be dried perfectly even at low rinse temperatures, and therefore resulting in significant energy savings. The first part of the drying cycle takes place with the door closed. The door then opens automatically by a few centimetres.
User instructions DELAY (if present) Allows you to program the dishwasher cycle to start during the required time period (e.g. night). Press the DELAY button to activate the option. A delay of 1 hour is shown on the display. Pressing the button repeatedly will allow you to select the required delay of up to 9, 12 or 24 hours depending on the model. To cancel the setting, press the button several times until no numbers appear on the display. The option cannot be selected once the cycle is running.
User instructions TO SAVE ON ENERGY! … AND PROTECT THE ENVIRONMENT Always use the dishwasher with a full load. Do not wash the dishes in running water. Use the washing program that is most appropriate for each type of load. Do not carry out any preliminary rinsing. If available, connect the dishwasher to a hot water supply up to 60°C. TO CUT DOWN ON DETERGENT CONSUMPTION! … AND PROTECT THE ENVIRONMENT The phosphates contained in dishwasher detergents are harmful to the environment.
User instructions SWITCHING OFF At the end of the program the beeper sounds briefly and the lights of programs no. 4 and 5 (marked "end") flash. To switch off the dishwasher, open the door and press the ON/OFF button (1). ENERGY MANAGEMENT After 5 minutes of waiting (washing cycle completed, stopped or set but not started) the dishwasher switches to a standby state to reduce energy consumption.
User instructions 4. OPERATING INSTRUCTIONS Once the dishwasher has been correctly installed, prepare for use as follows: Adjust the water softening system; Add the regenerating salt; Add the rinse aid and detergent. 4.1 Using the water softening system The amount of scale contained in the water (water hardness index) can cause whitish staining on the dry dishes, which tend to become dull over time.
User instructions Do not use table salt as it contains insoluble substances which, over time, may damage the water softening system. When necessary, refill the regenerating salt container before starting the washing program. In this way, the excess saline solution will be immediately removed by the water; the prolonged presence of salt water inside the tank may lead to corrosion.
User instructions WATER HARDNESS TABLE WATER HARDNESS German degrees (°dH) French degrees (°dH) 0–6 0 – 11 7 – 10 SETTINGS H0 All lights off (no salt) 12 – 18 H1 One light on 11 – 15 19 – 27 H2 Two lights on 16 – 21 28 – 37 H3 Three lights on 22 – 28 38 – 50 H4 Four lights on 29 - 50 51 – 90 H5 Five lights on Contact your local water board for information on the hardness of your water supply.
User instructions In order for the water softening system to give fault-free service, the appliance performs a regeneration cycle of the system at regular intervals. The regeneration process consists of several stages. It starts at the end of the last rinse cycle, after the amount of water indicated in the mains water hardness setting has been reached during the wash cycle, and finishes at the beginning of the following wash cycle.
User instructions 4.2 Adding the rinse aid The detergent and rinse aid dispensers are situated on the inner part of the door: the detergent dispenser is on the left, and the rinse aid dispenser is on the right. The rinse aid helps the dishes dry faster and prevents the formation of scale deposits and staining; it is automatically added to the water during the final rinse cycle, from the container situated on the inner side of the door.
User instructions ADJUSTING THE RINSE AID DISPENSER MODE Press and hold the PROGRAM SELECTION (3) button, after approximately 15 seconds the salt light flashes, keep it pressed until the rinse aid light (5) flashes and the program indicator lights (2) indicate the current setting.
User instructions 4.3 Adding the detergent Open the detergent dispenser cover by lightly pressing the button P. Add the detergent or tablet. Close the cover by sliding it until it stops, indicated by a click. The dispenser will open automatically during the wash cycle. Only add the detergent or tablet if the dispenser is dry. With the exception of the SOAK program, before every washing cycle it is necessary to add the required amount of detergent to the detergent dispenser.
User instructions With the exception of the SOAK program, before every washing cycle it is necessary to add the required amount of detergent to the detergent dispenser. The rinse aid, on the other hand, should only be added as required. When a program with a hot pre-wash is selected (see program table), extra detergent must be placed in the cavity. Use only detergents specially formulated for dishwashers.
User instructions WARNING! Make sure that the dishes are securely in place so that they cannot tip over or obstruct the rotation of the spray arms during the washing cycle. Do not place very small objects in the baskets as these could fall and obstruct the spray arms or the wash pump. Containers such as cups, bowls, glasses and pots should always be loaded with the opening facing downwards and with any cavities at an angle, to allow the water to drain out.
User instructions 4.5 Using the baskets Capacity, including serving dishes: 12 or 13 place settings depending on model (see energy label). LOWER BASKET The lower basket receives the full force of the lower spray arm, and should therefore be used for the “toughest” items with a heavier degree of soiling. All types and combinations of loads are permitted, provided that the dishes, pots and pans are arranged with all the soiled surfaces exposed to the water jets coming from the bottom.
User instructions LOADING THE LOWER BASKET Carefully load flat plates, soup plates, dessert and serving dishes, positioning them vertically. Pots, pans and their covers must be loaded upside down. When loading soup plates and dessert bowls, be sure to leave a gap between them. Loading examples: UPPER BASKET The upper basket should be loaded with small or medium-sized items such as glasses, small plates and saucers, tea or coffee cups, shallow bowls and light objects.
User instructions CUTLERY BASKET (on some models only) The basket is suitable for all types of cutlery, except long items that may interfere with the upper spray arm. The cutlery should be arranged in the spaces in the upper racks to allow the water to pass effectively between the items. Forks and spoons should be positioned with the handle facing downwards, taking care not to injure yourself with the prongs of the forks.
User instructions TOP CUTLERY BASKET (on some models only) The basket is designed to take cutlery, placed in the spaces provided, and long utensils, positioned lengthwise. The “drawer” extraction system makes the basket easier to load, but it can also be taken completely off its runners by removing the retainers (as shown here). Take great care to replace the retainers to ensure that the basket does not come off the runners accidentally.
User instructions FLEXIDUO TOP CUTLERY BASKET (on some models only) This comprises two independent sliding, pull-out tray racks for easier loading/unloading of cutlery. Various loading systems and configurations are possible. For example, tea cups can be loaded with the right-hand rack set in the low position, while the left-hand rack or both can be removed to allow large dishes to be put in the top basket.
User instructions EXAMPLES OF LOADING FOR INTENSIVE DIRT 12 standard place setting If the bottom basket inserts are of the fold-down type, they should be laid flat for easier loading. 13 standard place setting If the bottom basket inserts are of the fold-down type, they should be laid flat for easier loading.
User instructions 13 standard place setting TOP CUTLERY BASKET (on some models only) If the bottom basket inserts are of the fold-down type, they should be laid flat for easier loading.
User instructions 13 standard place setting FLEXIDUO TOP CUTLERY BASKET (on some models only) If the bottom basket inserts are of the fold-down type, they should be laid flat for easier loading.
User instructions UPPER BASKET EQUIPMENT (depending on the model) Cutlery tray For knives, spoons (tea and dessert) and long objects. The ends are designed to hold long stemmed glasses. - It can be removed by pressing and pushing the release levers (B) at the same time. - It has to be lowered if the upper basket is in the topmost position. Press the catches (G) simultaneously.
User instructions Fold-down shelves For mugs, cups and long objects. The ends are designed to hold long stemmed glasses When not used they can be moved to a vertical position (until a click is heard). Shelves with expandable wings For small objects, mugs and cups. They can be used either closed or open (pull the upper, sliding part). To close them, press the release device (S) and slide them downwards. The ends are designed to hold long stemmed glasses (even when closed).
User instructions Fold-down tines These can be secured in a vertical position, resting on the bottom of the basket if unused, or placed in an intermediate position, as required. The single tine on the right is ideal for supporting long stemmed glasses.
User instructions ADJUSTING THE UPPER BASKET The height of the top basket can be adjusted to allow large dishes or pans to be placed in the bottom basket. The adjustment procedure may be type A or B, depending on the dishwasher model purchased. Version A: pull-out with adjustment in two positions. Pull out both the basket guides. Remove the stops, first releasing them as shown in the diagram. Pull out the basket.
User instructions 5. CLEANING AND MAINTENANCE Before carrying out any work, always unplug the appliance from the electrical supply or switch off the omnipolar circuit breaker. 5.1 General warnings and recommendations Avoid the use of acidic or abrasive detergents. Clean the outer surfaces and door-lining of the dishwasher regularly using a soft cloth moistened with water or with a normal detergent suitable for painted surfaces. Clean the door gaskets with a damp sponge.
User instructions CLEANING THE FILTER UNIT If the dishwasher is used every day, we recommend that you clean it once a week. It is advisable to periodically inspect the centre filter C and, if necessary, to clean it.
User instructions CLEANING THE FILTER UNIT (models with planetarium sprayer) If the dishwasher is used every day, we recommend that you clean it once a week. It is advisable to periodically inspect the centre filter and, if necessary, to clean it. remove the planetarium sprayer follow the instructions provided.
User instructions 6. TROUBLESHOOTING. WHAT TO DO IF...
User instructions The dishwasher does not start Cutlery becomes oxidized even if washed together with other items that are subject to oxidation (pot handles, damaged knives, etc.) Too much salt in the washing water The door does not close Avoid washing parts that can become oxidized The door does not close Check the condition of the door lock catch: Tighten the cap of the water softener container properly Check the position of the door lock catch (D).
User instructions - if it has not triggered (N), the door opens and closes normally - if it has triggered (S), close the door with force (without slamming it) until it rearms; then open and close the door again Door does not close properly Failure No power It is not clear if the spray arms are working No water is taken in Make sure that there are no obstacles that prevent it from closing (e.g. objects protruding from the baskets) Contact technical assistance Check the power supply.
User instructions Dishes not dry No rinse aid A program has been used that does not involve a final drying cycle Water in dishes or pans The dishes were taken out too soon Use of ecological rinse aids Plastic dishes Clouding of glassware Water marks on some items or on plastic dishes Removable streaks on glasses, metal items and cutlery The combined detergent used does not produce good drying results Glass not dishwasher safe The formation of drops on the plastic parts is inevitable; stains may theref
User instructions Food residues on the dishes Dishes too close together, baskets too full The spray arms do not rotate Clogged spray arm nozzles Dirty filters Filters inserted incorrectly or not fastened in place Wash program unsuitable for the type of soil Combined detergent used with programs that are too short Not enough detergent (if you are using a powder detergent) Upper basket not horizontal White film in the chamber or on the door The substances contained in the detergent has settled out Incorre
User instructions 7. TROUBLESHOOTING The dishwasher is capable of signalling a number of faults through the simultaneous illumination of several indicator lights, with the following meanings: FAULT DESCRIPTION E1 Acquastop failure The anti-flooding system has been activated (for the relevant models only). The system is tripped in case of water leaks. Contact the after-sales service. E2 Safety level The system which limits the water level inside the dishwasher has been tripped.
User instructions FAULT DESCRIPTION Turbine flow-regulator malfunction (for the relevant models only) The appliance is not able to "measure" the amount of water loaded accurately. Interrupt the program and switch off the dishwasher. Switch the dishwasher back on, program it again and start the washing cycle. If the problem persists, contact the after-sales service. E7 E8 Alternate washing system malfunction Interrupt the program and switch off the dishwasher.