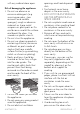
PRECAUTIONS 3 General safety instructions For this appliance Appliance purpose This user manual Manufacturer’s liability Identification plate Disposal To save energy Light sources How to read the user manual 3 8 9 9 9 9 10 10 10 10 DESCRIPTION 11 General Description 11 Control panel 11 Other parts 11 Accessories 12 Optional accessories (can be purchased separately) 13 Microwaves 13 USE 13 Preliminary operations Materials suitable for use with microwaves Using the accessories 13 14 14 Display 16 F
• • • • • • • • • • • of electrical appliances, provided that they are supervised or instructed by adults who are responsible for their safety. Children must not play with the appliance. Keep children under the age of 8 at a safe distance unless they are constantly supervised. Keep children under the age of 8 away from the appliance when it is in use. Cleaning and maintenance must not be carried out by unsupervised children. The cooking process must always be monitored.
used, children should use the appliance only when supervised by an adult, as very high temperatures are generated. • Check the appliance visually during the cooking of foods in plastic or paper containers. Improper use Danger of explosion • When using the microwave to heat or reheat liquids, the boiling process may be delayed – boiling temperature can be reached without the formation of the usual "rolling boil".
• • • • • • • • • heated in sealed containers. Remove the cover or the teat (in the case of baby bottles). Always check the temperature of the preparation after it has been heated, it should not be too high. For an even temperature and to avoid scalding stir or shake the contents. Puncture the skin of food that has a hard skin or peel (e.g. potatoes, apples, etc.) before cooking. Do not use the microwave functions when the oven is empty.
with any cabinet door open. Risk of damaging the appliance • Do not use abrasive or corrosive detergents (e.g. scouring powders, stain removers and metallic sponges), rough or abrasive materials or sharp metal scrapers on glass parts as this could cause scratch the surface and break the glass. Use wooden or plastic utensils. • Do not sit on the appliance. • Do not use cleaning products containing chlorine, ammonia or bleach on parts made of steel or that have metallic surface finishes (e.g.
open. • Do not use the handle to lift or move this appliance. Installation and maintenance • THIS APPLIANCE MUST NOT BE INSTALLED IN A BOAT OR CARAVAN. • The appliance must not be installed on a pedestal. • Position the appliance into the cabinet cut-out with the help of a second person. • To prevent any possible overheating, the appliance should not be installed behind a decoration door or a panel.
Temperature probe (if present) • Do not touch the rod or the tip of the temperature probe after use. • Wear oven gloves when handling the temperature probe. • Take care not to scratch or damage enamelled or chromeplated surfaces with the tip or the plug of the temperature probe. • Do not insert the temperature probe into openings and slots on the appliance. • When the temperature probe is not in use, make sure that the protective metal cap is properly closed.
Disposal This appliance conforms to the WEEE European directive (2012/19/EU) and must be disposed of separately from other waste at the end of its service life. The appliance does not contain substances in quantities sufficient to be considered hazardous to health and the environment, in accordance with current European directives. Power voltage Danger of electrocution • Use dark metal moulds: They help to absorb the heat better. • Remove all trays and racks which are not required during cooking.
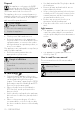
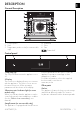
DESCRIPTION General Description 1 Control panel 2 Seal 3 Temperature probe socket (on some models only) 4 Light bulb 5 Door 6 Fan Frame shelf Control panel 1 ON/OFF key The ON/OFF button turns the appliance on or off. 2 Display The touchscreen display allows you to interact with the appliance. Touch the icons to access the various functions. All the operating parameters will be shown on the display.
Boiling rod Cooling fan To be placed in containers when heating liquids, necessary to avoid delayed boiling. The fan cools the appliance and comes into operation during cooking. The fan causes a steady outflow of air from above the door which may continue for a short period of time even after the appliance has been turned off.
the rack above and for cooking pies, pizzas, baked desserts, biscuits, etc. WARNING: The deep tray can be used for combined microwave cooking. Do not use it for microwave cooking ONLY. bread, focaccia...), but you can also use it for more delicate preparations such as biscuits. BBQ (teflon-coated barbecue grill pan) Protective cover (on some models only) Double-use accessory: the striped side is recommended for grilling meat (fillets, hamburgers...
shelves. • Remove and wash all the appliance accessories (see chapter "CLEANING AND MAINTENANCE"). First heating 1. Set a cooking time of at least one hour (see paragraph "Using the oven"). 2. Heat the empty oven compartment at the maximum temperature to burn off any residues left by the manufacturing process. When heating the appliance • air the room; • don't stay.
the oven cavity. container while heating. Gently insert racks and trays into the oven until they come to a stop. Clean the trays before using them for the first time to remove any residues left by the manufacturing process. Rack and glass tray Tray rack The tray rack has to be inserted into the tray. In this way fat can be collected separately from the food which is being cooked. The glass tray must be placed on the rack. The tray rack has to be inserted into the glass tray.
Display The parameters and values for the currently selected function will be indicated on the display. To use it, simply touch the "virtual" keys and/or scroll through the values indicated (the image shows the main menu screen). Information area Information regarding the menus and submenus of the functions in progress in the main area are indicated in this area.
2. Scroll up and down through the hours and minutes to set the current time. PROBE (on some models only) Press and hold the HOME button or the ON-OFF button for a few seconds to stop cooking immediately at any time and return to the main menu. Connectivity (on some models only) Connectivity requirements: • Smartphone or PC tablet with IOS or Android operating system. The minimum versions of the operating systems are available at the following link: www.smeg.com/smegconnect/ • Wi-Fi network (2.
sound. 3. Touch the TRADITIONAL COOKING Reactivating the display To reactivate the display when it is off: • Press and hold the ON-OFF button for a few seconds until you hear a series of sounds. The display turns on after a few seconds. The display shows the main menu when it is switched on again. In some cases, the ON-OFF button does not deactivate the display.
2. Scroll through the values and select the required duration. in the cooking level. Modifying the cooking temperature The temperature can be modified at any time during cooking. 1. Touch the TEMPERATURE button or the relevant value. 2. Scroll through the values and select the required cooking temperature. 3. Touch the CONFIRM button to confirm the selected cooking duration. The hours and minutes can be selected separately.
STATIC Programmed cooking Programmed cooking is the function which allows a time-controlled cooking operation to be stopped at an established time depending on the time set by the user, after which the appliance will switch off automatically. For safety reasons, it is not possible to set the end of cooking time by itself without setting the cooking duration. 1. After setting timed cooking, touch PROGRAMMED COOKING button or the relevant value. 2.
ECO This function is particularly suitable for cooking on a single shelf with low energy consumption. It is recommended for all types of food, excluding those that can create a lot of humidity (such as vegetables). To obtain maximum energy savings and reduce cooking times, it is recommended to place food in the oven without preheating. When using the ECO function, avoid opening the door during cooking. 4. Touch the CONFIRM the selected duration.
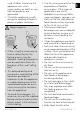
temperature is measured by a sensor inside the tip of the probe. Do not install any telescopic guides on the fourth shelf from the bottom, as they would not allow access to the temperature probe side socket. Positioning the probe 1. Place the food on a tray. 2. Insert the tip of the probe into the food before you place it in the oven. 3. For best results, make sure that the temperature probe is placed transversely in the thickest part of the food and for least 3/ 4 of its length.
A message appears on the display to remind you to connect the probe to the socket and to place it in the food. cavity. This results in a longer cooking time. Medium Sets a medium difference between the probe temperature and oven cavity temperature. This results in a medium cooking time. fast Sets the largest difference between the probe temperature and the temperature of the oven cavity. This results in a shorter cooking time. 8. Touch the CONFIRM button.
5. Insert the plug of the temperature probe into the socket at the side, using the probe to open the protective cover. When using the microwave, the food (or its container) must not be placed on the bottom of the oven cavity. Use the supplied accessories inserted in the shelves suitable for the recipe you want to make. 6. Close the door. 7. Touch the START button to start cooking using the temperature probe. Without preheating: 1. Touch the PRE-HEATING button to disable pre-heating. 2.
8. Scroll through the values and select the required power level of the microwave. End of cooking At the end of cooking, "Function ended" displays and a buzzer sounds briefly, which can be deactivated by touching any point of the display or by opening the door. • Touch the HOME function. The power level of the microwave is from 100 W to 600 W or MAX. button to quit the Microwave power levels Below is a list of the power levels that can be selected: Power (W) 9.
5. Scroll through the values and select the required cooking temperature. 6. Touch the CONFIRM button (at the lower right ) to confirm the cooking temperature that has been selected. 7. Touch the MICROWAVE POWER button or the relevant value. 8. Scroll through the values and select the required power level of the microwave. 11. Scroll through the values and select the required duration. The hours and minutes can be selected separately.
MICROWAVE + GRILL The use of the grill results in perfect browning of the food’s surface. Using the microwave on the other hand leads to rapid internal cooking of the food. can be put in the oven. Cooking phase 1. Open the door 2. Place the dish with the food to be cooked into the oven cavity. 3. Close the door. 4. Touch the START button to start cooking. This stage is indicated by a progressive increase in the cooking level.
a toothpick into the highest point of the dessert. If the dough does not stick to the toothpick, the dessert is cooked. • If the dessert collapses when it comes out of the oven, on the next occasion reduce the set temperature by about 10°C, selecting a longer cooking time if necessary. Advice for defrosting and proving • Place frozen foods without their packaging in a lidless container on the first shelf of the oven. • Avoid overlapping the food.
Quick recipes In this section you will find recipes created by Smeg chefs for cooking quick recipes. This category allows you to prepare traditional recipes in less time. By choosing the type and weight of food, the appliance selects the most suitable function, time and temperature. The instructions on the display indicate when to put the food in the oven and on which shelf. 1. Touch the SMART COOKING button on the "main menu". 2. Scroll through the functions until you select QUICK RECIPES 3.
2. Touch the DELETE history. button to delete the 3. Touch the CONFIRM button to confirm that you wish to delete the history (or the CANCEL button to cancel the operation). Mini guide to accessories Rack We recommend the use of the grill as a support surface for baking moulds/casseroles. In the absence of the baking tray grill, the grill can be used as a base for grilling with the deep baking tray placed on a shelf below to collect the juices. Glass dish Use the glass dish by placing it on the grid.
4. Scroll through the values and select the required cooking temperature. 11. Scroll through the values to set the weight of the food to be cooked. 5. Touch the CONFIRM button to confirm the cooking temperature that has been selected. 12. Touch the CONFIRM button to confirm the settings. At this point, a name for the recipe must be entered. 13. Use the alphanumeric keypad to enter the name of the recipe to be saved. 6. Touch the COOKING DURATION button or the relevant value. 7.
3. Touch the START cooking. button to start Deleting a recipe 1. Touch the MY RECIPES button on the "main menu". 2. Select the recipe that was saved previously. 3. Touch the DELETE recipe. button to delete the 4. Touch the CONFIRM button to confirm that you wish to delete the selected recipe (or the CANCEL button to cancel the operation). Other functions The special functions menu includes several functions such as defrosting, proving or cleaning...
When defrosting heavy and/or irregularly shaped food (e.g. chicken, fish, etc.), it is advisable to turn it inside the oven cavity at least once by 180°. DEFROST BY TIME Manual defrosting function. Select the length of time required for defrosting, when the set time has elapsed, the function will stop. If the internal temperature is greater than the one required, the function will be stopped immediately and "Internal temperature unsafe, please wait until the oven is cool" will display.
9. Touch the CONFIRM the settings. button to confirm 10. Touch the START button to start the Proving cycle. When finished, a buzzer sounds briefly, which can be deactivated by touching any point of the display or by opening the door. PLATE WARMING Function that heats and keeps plates warm. Position a baking tray on the lowest shelf and put the plates on it to warm. 1. Position the tray on the first shelf and place the plates to be warmed at the centre of it.
7. Scroll through the values and select the required cooking duration. 8. Touch the START Melt function. button to start the The microwave power level cannot be changed by the user. At the end of the cooking process an acoustic signal sounds and the display shows . 9. Return the function knob to the 0 position. SOFT Ideal function for preparing cakes and desserts using the microwave. 1. Place the food to be defrosted in a Pyrex or microwave-safe container. 2. Open the door. 3.
5. Scroll through the values and select the required cooking temperature (from 50°C to 250°C). 6. Touch the START Stone function. Please refer to the instructions and recommendations for use described in the accessory documentation. button to start the 1. Select AIRFRY As with normal cooking functions, you can skip pre-heating and set a timed and programmed cooking. . 2. Turn the temperature knob to select the required temperature (from 50°C to 250°C). 7.
5. Touch the TEMPERATURE button or the relevant value. 6. Scroll through the values and select the temperature (from 60°C to 100°C). 7. Touch the CONFIRM button to confirm the selected temperature. 8. Touch the START Sabbath function. To stop the function: • Touch the HOME seconds.
Digital clock Clock format Displays the current time in digital format. Activates/deactivates the clock display in the 12 or 24 hour format. In the event of a temporary power cut, the digital version will remain selected. The Time format function is factory set to 24h. 1. Select 2. Select On. Digital clock. Touch the CONFIRM button to activate the Digital clock mode. Time format. 1. Select 2. Select 12h or 24h. 3. Touch the CONFIRM button to activate the required time format.
Eco light Controls lock For greater energy savings, the lights inside the oven cavity are automatically deactivated approximately one minute after the start of cooking or after the door is opened. To stop the appliance from automatically deactivating the light after approximately one minute, set this mode to Off. Allows the appliance to automatically lock the controls after one minute of normal operation without any intervention from the user. 1. Select Controls lock. 2. Select Yes. 3.
2. Select °C or °F. Show Room (for showrooms only) button to activate 3. Touch the CONFIRM the required temperature format. Display brightness This allows the display brightness level to be selected. The Display brightness function is factory set to High. 1. Select Display brightness. 2. Select from the options High - Medium Low. 3. Touch the CONFIRM the selection. button to confirm Weight type Allows you to set the unit of measurement to display the weight value in kilograms (kg) or in ounces (oz).
2. Touch the No button to cancel the operation. CLEANING AND MAINTENANCE Cleaning the appliance See General safety instructions. Cleaning the surfaces To keep the surfaces in good condition, they should be cleaned regularly after use. Let them cool first. Ordinary daily cleaning Always and only use specific products that do not contain abrasives or chlorine-based acids. Pour the product onto a damp cloth and wipe the surface, rinse thoroughly and dry with a soft cloth or a microfibre cloth.
2. Carefully pull the frame towards the inside of the oven cavity to unhook it from front housing A. 2. Replace the front part of the frame in housing A on the side wall near the opening of the oven cavity. 3. Remove the frame from the rear pin B located at the bottom of the side wall. 3. Screw in the front fixing pin (you can help yourself with a tool, e.g. a coin). 4. Repeat the operation for the frame placed on the other side wall. To refit the rack/tray support frames: 1.
out of the cavity. • Spray a water and washing up liquid solution inside the oven using a spray nozzle. Direct the spray towards the side walls, upwards, downwards and towards the deflector. We recommend spraying approx. 20 times at the most. Do not spray the deflector if it has a selfcleaning coating. • Close the door. • During the assisted cleaning cycle, wash the self-cleaning panels (where fitted), which were previously removed, separately in warm water and a small amount of detergent.
INSTALLATION Electrical connection See General safety instructions. General information Check the mains characteristics against the data indicated on the plate. The identification plate bearing the technical data, serial number and brand name is visibly positioned on the appliance. Do not remove this plate for any reason. The appliance must be connected to ground using a wire that is at least 20 mm longer than the other wires.
leaking in. Fastening bushings 1. Remove the bushing covers on the front of the appliance. 2. Mount the appliance into the recess. 3. Secure the appliance to the cabinet using screws. 4. Cover the bushings with the previously removed covers.
Mounting into a column (mm) *Make sure that the cabinet top/rear section has an opening approx. 35-40 mm deep.
Mounting under worktops (mm) If the appliance is to be built-in under a worktop, a wooden bar has to be installed order to use the seal that is glued to the back of the front panel to prevent water or other liquids leaking in. A min. 603 mm B 560 - 564 mm C 583 - 585 mm D 9 - 11 mm E min. 5 mm F 121 - 1105 mm G min. 560 mm H min. 594 mm co Cutout for power cord (min. 6 cm2) jb Electrical connection box *Make sure that the piece of furniture top/rear part has an opening approx. 60 mm deep.
A min. 603 mm B 560 - 564 mm C 583 - 585 mm D 9 - 11 mm E min. 5 mm F 121 - 1105 mm G min. 560 mm H min. 594 mm co Cutout for power cord (min.