SMC7004VBR V.
Cable/DSL Broadband Router Built-in 4-Port 10/100Mbps Switch User Guide From SMC's Barricade™ line of Broadband Routers November 2003
TABLE OF CONTENTS Introduction . . . . . . . . . . . . . . . . . . . . . . . . . . . . . . . 1 Features and Benefits . . . . . . . . . . . . . . . . . . . . . . . . . . . . . . . . 2 Package Contents . . . . . . . . . . . . . . . . . . . . . . . . . . . . . . . . . . . 3 Minimum Requirements . . . . . . . . . . . . . . . . . . . . . . . . . . . . . . . 4 Getting to Know the Barricade™ . . . . . . . . . . . . . . 5 LED Indicators . . . . . . . . . . . . . . . . . . . . . . . . . . . . . . . . . . . . . .
Table of Contents DDNS (Dynamic DNS) . . . . . . . . . . . . . . . . . . . . . . . . . . UPnP . . . . . . . . . . . . . . . . . . . . . . . . . . . . . . . . . . . . . . . Tools . . . . . . . . . . . . . . . . . . . . . . . . . . . . . . . . . . . . . . . Status . . . . . . . . . . . . . . . . . . . . . . . . . . . . . . . . . . . . . . . 41 42 43 44 Troubleshooting . . . . . . . . . . . . . . . . . . . . . . . . . .47 Technical Specifications . . . . . . . . . . . . . . . . . . . .53 Compliances . . . .
INTRODUCTION Congratulations on your purchase of a Barricade™ Cable/DSL Broadband Router (SMC7004VBR). SMC is proud to provide you with a powerful yet simple communication device for connecting your local area network (LAN) to the Internet. Important Information! This information is addressed to the DSL-Users without a flat rate contract**. With your DSL-router you have received a device of high quality, which allows you fast and easy access to the Internet.
Introduction This disconnect only happens if there are no more open requests received from either the LAN or the WAN side (here this can be requests from the internet, i.e. initiated through the use of so called file sharing programs like eMule, eDonkey, etc.) that keep the router active. In order to counter such incalculable activity and protect yourself from higher than expected on-line costs we therefore recommend again a flat-rate contract for your DSL-connection.
Package Contents • Virtual Private Network support using PPTP, L2TP, or IPSec pass-through. • User-definable application sensing tunnel supports applications requiring multiple connections. • Parental controls allows the user to block access to certain web sites. • Email alerts when the users network is being compromised. • Easy setup through a web browser on any operating system that supports TCP/IP. • Compatible with all popular Internet applications.
Introduction Minimum Requirements 4 • Cable or DSL Modem with Ethernet connection and Internet access from your local telephone company or Internet Service Provider (ISP) using a DSL modem or cable modem. • A computer equipped with a 10 Mbps, 100 Mbps, or 10/100 Mbps Fast Ethernet card, or USB-to-Ethernet converter. • Network adapter with Ethernet (UTP CAT 5) cabling and TCP/IP protocol installed per PC. • Internet Explorer 4.0 (or Higher) or Netscape Navigator 4.
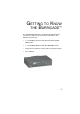
GETTING TO KNOW THE BARRICADE™ The SMC7004VBR Barricade™ Cable/DSL Broadband Router is the perfect solution for the home/office environment. This fullfeatured router offers: • 4 – 10/100 Mbps Auto-Sensing LAN ports with Auto-MDI MDIX feature. • 1 – 10/100 Mbps WAN port with Auto-MDI MDIX feature. • Comprehensive LEDs for network status and troubleshooting. • [Reset] Button.
Getting to Know the Barricade™ LED Indicators The Barricade™ includes LED indicators on the front panel that simplify installation and network troubleshooting.
GETTING CONNECTED The SMC7004VBR Barricade™ Cable/DSL Broadband router is connected between the Cable/DSL Broadband Modem and your computers. If you have more then one computer to connect, simply plug the other computers into the LAN ports on the back of the router. M OD EM C OM P U TER Basic Installation Procedure 1. Connect the LAN Run an Ethernet cable from one of the LAN ports on the back of the Barricade™ to your computer's network adapter. 2.
CONFIGURING YOUR COMPUTER The information outlined in this chapter will guide you through the configuration for the following Operating Systems: • • • • • Windows 95/98 Windows Me Windows 2000 Windows XP Apple Macintosh Configuring Windows 95/98/Me 1. Access your network settings by clicking [Start], choose [Settings], and then select [Control Panel]. 2. In the Control Panel, locate and double-click the [Network] icon.
Configuring your Computer 3. Highlight the TCP/IP line that has been assigned to your network card on the [Configuration] tab of the [Network] properties window. 4. Next, click the [Properties] button to view that adapter's TCP/IP settings. 5. From the [TCP/IP Properties] dialog box, click the [Obtain an IP address automatically] option. 6. Next click on the [Gateway] tab and verify the [Gateway] field is blank.
Configuring Windows 2000 7. Click the [OK] button to close the [TCP/IP Properties] dialog box. 8. On the [Network Properties] window, click the [OK] button to save these new changes. Note: Windows may ask you for the original Windows installation disk or additional files. Check for the files at c:\windows\options\cabs, or insert your Windows CD-ROM into your CD-ROM drive and check the correct file location, for example, D:\win98, D:\win9x. (assume "D" is your CD-ROM drive). 9.
Configuring your Computer 3. Locate and double-click the [Local Area Connection] icon for the Ethernet adapter that is connected to the Barricade™. When the [Status] dialog box window opens, click the [Properties] button. 4. On the [Local Area Connection] Properties box, verify the box next to [Internet Protocol (TCP/IP)] is checked. Then highlight the Internet Protocol (TCP/IP), and click the [Properties] button. 5. Select [Obtain an IP address automatically] to configure your computer for DHCP.
Configuring Windows XP Configuring Windows XP The following instructions assume you are running Windows XP with the default interface. If you are using the Classic interface (where the icons and menus look like previous Windows versions), please follow the instructions for Windows 2000 outlined above. 1. Access your network settings by clicking [Start], choose [Control Panel], select [Network and Internet Connections] and then click on the [Network Connections] icon. 2.
Configuring your Computer 4. Select [Obtain an IP address automatically] to configure your computer for DHCP. Click the [OK] button to save this change and close the [Properties] window. 5. Click the [OK] button again to save these new changes. 6. Reboot your PC. Configuring a Macintosh Computer You may find that the instructions here do not exactly match your screen. This is because these steps and screenshots were created using Mac OS 8.5. Mac OS 7.
CONFIGURING THE BARRICADE™ After you have configured TCP/IP on a client computer, use a web browser to configure the Barricade™ Broadband Router. The Barricade™ can be configured by any Java-supported browser including Internet Explorer 4.0 or above, or Netscape Navigator 4.7 or above. Using the web management interface, you may configure the Barricade™ and view statistics to monitor network activity. Note: Before you attempt to configure your router, if you have access to the Internet please visit www.
Configuring the Barricade™ Disable Proxy Connection You will also need to verify that the HTTP Proxy feature of your web browser is disabled. If it is disabled, your web browser will be able to view the Barricade™ configuration pages. The following steps are for Internet Explorer and for Netscape. Determine which browser you use and follow the appropriate steps. Internet Explorer (5 or above) 1. Open Internet Explorer. Click [Tools], and then select [Internet Options]. 2.
Accessing the Barricade™ Management Accessing the Barricade™ Management To access the Barricade™'s web-based management screens, follow the steps below: 1. Launch your web-browser. Note: Your computer does not have to be ONLINE to configure the Barricade™ Router. 2. In the Address Bar, type: http://192.168.2.1 3. When the Barricade™'s Login screen appears, enter the default password, and click the [Login] button to access the router. Note: The Barricade™ default password is smcadmin.
NAVIGATING THE WEB-BASED ADMINISTRATION The Barricade™'s management interface features a Setup Wizard and an Advanced Setup section. Use the Setup Wizard if you want to quickly setup the Barricade™ for use with a cable modem or DSL modem. Advanced setup supports more advanced functions like hacker attack detection, IP and MAC address filtering, intrusion detection, virtual server setup, virtual DMZ hosts, as well as other advanced functions.
Navigating the Web-based Administration Note: 20 To ensure proper screen refresh after a command entry, be sure that Internet Explorer 5.0 is configured as follows: Under the menu [Tools/Internet Options/ General/Temporary Internet Files/Settings], the setting for [Check for newer versions of stored pages] should be [Every visit to the page].
Setup Wizard Setup Wizard Below is an outline of each option available from the [Setup Wizard] section. This wizard takes 3 steps to complete an ISP configuration. Step One: Time Zone The first step is to configure the Time Zone you are located in. This setting is used for accurate timing of client filtering and log events.
Navigating the Web-based Administration Step Two: Broadband Type Select the type of broadband connection you have. • [Cable Modem] Your ISP may have given you a host name. If so, enter it into this field. • [Fixed-IP xDSL] Some xDSL Internet Service Providers may assign a fixed (static) IP address for your gateway. If you have been provided with this information, choose this option and enter the assigned IP address, subnet mask, gateway IP, and DNS IP addresses for the Barricade™.
Advanced Setup • [PPPoE] Enter the PPPoE user name and password assigned by your Service Provider. The Service Name is normally optional, but may be required by some service providers. Leave the Maximum Transmission Unit (MTU) on the default value (1492) unless you have a particular reason to change it. Enter a maximum idle time (in minutes) to define a maximum period of time for which the Internet connection is maintained during inactivity.
Navigating the Web-based Administration System This section is used to configure the local time zone, password for administrator access, and the IP address of a PC that will be allowed to manage the Barricade™ remotely. • [Time Zone] Use this option to configure the time zone for the Barricade™. This information is used for log entries and client access control. There are 3 options to configure the Router's internal clock: 24 • Using preset or custom NTP servers. • Using your computer system's clock.
Advanced Setup • [Password Settings] Use this menu to restrict access based on a password. By default, the password is smcadmin. Note: • Passwords can contain up to 9 alphanumeric characters and are case sensitive. [Remote Management] This feature allows a remote PC to configure, manage, and monitor the Barricade™ using a standard web browser. 1. Check [Enable]. 2.
Navigating the Web-based Administration [Single IP] You can only remotely managed the Barricade™ from this IP address on the WAN side. [IP Range] You can remotely manage the Barricade™ from any IP address in this range. 3. Set the Remote Management Port to the port through which you want to remotely access the Barricade™. Note: 26 Do not set this for a port that is already in use. For example, if you are running a web server on port 80, you can't set the remote admin port to 80.
Advanced Setup WAN Specify the WAN connection type provided by your Internet Service Provider, then click [More Configuration] to enter detailed configuration parameters for the selected connection type. • [Dynamic IP] The Host Name is optional, but it may be required by some ISPs. The default MAC address is set to the WAN's physical interface on the Barricade™. Use this address when registering for Internet service, and do not change it unless required by your ISP.
Navigating the Web-based Administration • [PPPoE] Enter the PPPoE user name and password assigned by your Service Provider. The [Service Name] field is normally optional, but may be required by some service providers. The MTU (Maximum Transmission Unit) governs the maximum size of the data packets. Leave this on the default value (1492) unless you have a particular reason to change it.
Advanced Setup • [PPTP] Point-to-Point Tunneling Protocol (PPTP) allows the secure remote access over the Internet by simply dialing in a local point provided by an ISP. Using the above screen allows client PCs to establish a normal PPTP session and provides hassle-free configuration of the PPTP client on each client PC.
Navigating the Web-based Administration • [Static IP Address] If your Internet Service Provider has assigned a fixed IP address to you, enter the assigned address and subnet mask for the Barricade™, and then enter the gateway address of your ISP. You may need a fixed address if you want to provide Internet services, such as a web server, or FTP server.
Advanced Setup • [BigPond®] Use this section to configure the built-in client.
Navigating the Web-based Administration • [DNS] Domain Name Servers map numerical IP addresses to the equivalent domain name (e.g. www.smc.com or www.smc-europe.com). Your ISP should provide the IP address of one or more domain name servers. Enter those addresses on this screen.
Advanced Setup LAN From this section, you can configure the TCP/IP configuration for the Barricade™ LAN interface and DHCP clients. • LAN IP Use the [LAN] menu to configure the LAN IP address for the Barricade™ and to enable the DHCP server for dynamic client addresses allocation. Set a period for the lease time if required. For home networks, this may be set to "Forever", which means there is no time limit on the IP address lease.
Navigating the Web-based Administration NAT From this section, you can configure the [Virtual Server] and [Special Application] features that provide control over the port openings in the router's firewall. This section can be used to support several Internet based applications such as VPN connections. • [Virtual Server] You can configure the Barricade™ as a virtual server.
Advanced Setup • [Special Applications] Some applications, such as Internet gaming, videoconferencing, Internet telephony require multiple connections. These applications cannot work with Network Address Translation (NAT) enabled. If you need to run applications that require multiple connections, use the following screen to specify the additional public ports to be opened for each application.
Navigating the Web-based Administration Firewall The firewall does not significantly affect system performance, so we advise enabling it to protect your network users. To enable the Stateful Packet Inspection (SPI) firewall, click on [Advanced] under the [Firewall] section and select [Enable] and click the [Apply] button.
Advanced Setup • [Rule Description:] Set a rule description so you know what this rule applies to. Ex. Jon's Internet Access. • [DHCP menu option:] Apply this rule to a specific IP Address or range of IP's on your network. You can use the DHCP client list to quickly add IP addresses that were provided via DHCP connections.
Navigating the Web-based Administration • [Schedule for Rule:] Set the time and date this rule is active. You can have this rule be active all the time or configure it to only be active on set days and times. You can pick the dates you want this rule to be active by checking the box next to the date. For time, set the start time you want the Rule to active, and then set how long you want the rule to run.
Advanced Setup This tool will also allow you to MAP DHCP IP Addresses to certain MAC Addresses. This tool works well in conjunction with the Parental Control rules to provide maximum control. • Website Blocking The [Website Blocking] feature of the Barricade™ limits access to website domains (i.e. www.somesite.com) or by using keywords which will block any websites that have that keyword in the URL. This feature is an ideal way to protect your family members from questionable content on the Internet.
Navigating the Web-based Administration • [Advanced Firewall Settings] This section allows you to configure several advanced features for the Barricade™ Firewall. The following features can be set on this page: [Advanced Firewall Protection:] Enable/Disable SPI section of firewall. [Discard Ping from WAN:] When this feature is enabled, any host on the WAN cannot ping this product. This helps avoid unnecessary attacks from the WAN side because your connection is invisible.
Advanced Setup [Email Settings:] Configure this option if you want the Barricade™ to email when hackers attempt to attack your network to a specific email address. You will need to configure your email address, username and password, as well as a SMTP server to send the mail through. • DMZ (Demilitarized Zone) If you have a client PC that cannot run an Internet application properly from behind the firewall, then you can open the client PC up to unrestricted two-way Internet access.
Navigating the Web-based Administration The section also has a [Server Configuration] section that automatically opens the port options checked in the [Virtual Server] section. Simply enter in the IP address of your server, such as a web server, and then click on the port option [HTTP Port 80] so users can access your server from the WAN connection (Internet). UPnP The Barricade™ supports UPnP (Universal Plug and Play), a networking architecture that provides compatibility amongst networking equipment.
Advanced Setup Tools Use the [Tools] menu to backup the current configuration, restore a previously saved configuration, restore factory settings, update firmware, and reset the Barricade™. • [Configuration Tools] [Backup Router Settings] Backup saves the Barricade™'s configuration to a file. [Restore Router Settings] To restore settings from a saved backup configuration file. [Reset Barricade to Factory Settings] Restores the Barricade™ settings back to the factory default settings.
Navigating the Web-based Administration • Firmware Upgrade This tool permits easy downloading of the latest Firmware. Download the upgrade file from the SMC website (www.smc.com or www.smc-europe.com) and save it to your hard drive. Browse for the file and then click [Apply]. Check the [Status page Information] section to confirm that the upgrade process was successful. • Reboot Click [Apply] to reboot the Barricade™. The reset will be complete when the power LED stops blinking.
Advanced Setup • [INFORMATION] Displays the number of attached clients, the firmware versions, and the physical MAC address for each media interface, as well as the hardware version and serial number. • [Security Log] Displays illegal attempts to access your network. – Click on the [Save] button to save a security log file. – Click on the [Clear] button to delete the access log. – Click on the [Refresh] button to refresh the screen.
TROUBLESHOOTING The information outlined in this section describes some useful steps for getting your computer and Barricade™ router online. Verify you are connected to the Barricade™ Router If you are unable to access the Barricade™'s web-based administration pages, then you may not be properly connected or configured. The screen shots in this section were taken on a Windows 2000 machine, but the same steps will apply to Windows 95/98/Me/XP.
Troubleshooting If you have an IP address that starts with 169.254.XXX.XXX then see section “I am getting an IP Address that starts with 169.254.XXX.XXX”. If you have another IP address configured, see section “I have another IP Address displayed”. I am getting an IP Address that starts with 169.254.XXX.XXX If you are getting this IP Address, then you need to check that you are properly connected to the Barricade™ Router.
Troubleshooting If you are still unable to get an IP Address from the Barricade™, reinstall your network adapter. Please refer to your adapter manual for instructions. I have another IP Address displayed If you have another IP address listed, then the PC may not be configured for a DHCP connection. Please refer to Configuring your Computer for information. Once you have confirmed your computer is configured for DHCP, then please follow the steps below. 1. Open a DOS window as described above. 2.
Troubleshooting 3. Then type ipconfig/renew. Once you are able to get a valid IP address from the Barricade™ Router, then you can now access the web-based Administration pages. If you still are not getting an IP address from the Barricade™, please reset the router as outlined in Getting to Know the Barricade™ and follow the steps outlined in Troubleshooting section again. If you still cannot access the router once you have reset it, please contact SMC Technical Support.
Troubleshooting I have a Dynamic IP connection and I can't get online Most cable companies use a Dynamic IP configuration to provide Internet access. If you have this type of connection, and are unable to get connected, please follow the steps outlined below: 1. Unplug the power from your Cable or DSL modem for 2 mins. 2. Confirm that your Barricade™ router is configured for a Dynamic IP configuration. 3. Plug the power back into your Modem. 4.
TECHNICAL SPECIFICATIONS Below is an outline of the Technical Specifications for the Barricade™ 4-Port Cable/DSL Broadband Router. Standards 802.3, 802.
Technical Specifications User Authentication Password protected browser-based UI PAP/CHAP/MSCHAP Authentication protocol supported Upgrade method Web-based LEDs Power WAN Link Activity Input Power DC 5V 2A Operating Temperature 0°~40°C Humidity 10%~90% non-condensing Storage Temperature -200~700C Humidity 0~95% non-condensing Compliance FCC CE UL Dimensions 13.2 x 8.7 x 3.
COMPLIANCES FCC Interference Statement This equipment has been tested and found to comply with the limits for a Class B digital device pursuant to Part 15 of the FCC Rules. These limits are designed to provide reasonable protection against radio interference in a commercial environment. This equipment can generate, use and radiate radio frequency energy and, if not installed and used in accordance with the instructions in this manual, may cause harmful interference to radio communications.
COMPLIANCES Emission: EN 5022: 1998+A1:2000 EN 61000-3-2: 2000, EN 61000-3-3: 1995+A1:2000 Immunity EN 55024:1998+A1:2001, EN 61000-4-2, 61000-4-3, 61000-4-4, 61000-4-5 EN 61000-4-6, 61000-4-11 Safety Test: EN 60950 Safety Compliance Wichtige Sicherheitshinweise (Germany) 1. Bitte lesen Sie diese Hinweise sorgfältig durch. 2. Heben Sie diese Anleitung für den späteren Gebrauch auf. 3. Vor jedem Reinigen ist das Gerät vom Stromnetz zu trennen. Verwenden Sie keine Flüssig- oder Aerosolreiniger.
COMPLIANCES 14. Wenn folgende Situationen auftreten ist das Gerät vom Stromnetz zu trennen und von einer qualifizierten Servicestelle zu überprüfen: a. Netzkabel oder Netzstecker sind beschädigt. b. Flüssigkeit ist in das Gerät eingedrungen. c. Das Gerät war Feuchtigkeit ausgesetzt. d. Wenn das Gerät nicht der Bedienungsanleitung entsprechend funktioniert oder Sie mit Hilfe dieser Anleitung keine Verbesserung erzielen. e. Das Gerät ist gefallen und/oder das Gehäuse ist beschädigt. f.
LEGAL INFORMATION AND CONTACTS SMC's Limited Warranty Statement SMC Networks Europe ("SMC") warrants its products to be free from defects in workmanship and materials, under normal use and service, for the applicable warranty term. All SMC products carry a standard 2 year limited warranty from the date of purchase from SMC or its Authorized Reseller.
LEGAL INFORMATION AND CONTACTS FOREGOING WARRANTIES AND REMEDIES ARE EXCLUSIVE AND ARE IN LIEU OF ALL OTHER WARRANTIES OR CONDITIONS, EXPRESSED OR IMPLIED, EITHER IN FACT OR BY OPERATION OF LAW, STATUTORY OR OTHERWISE, INCLUDING WARRANTIES OR CONDITIONS OF MERCHANTABILITY AND FITNESS FOR A PARTICULAR PURPOSE. SMC NEITHER ASSUMES NOR AUTHORIZES ANY OTHER PERSON TO ASSUME FOR IT ANY OTHER LIABILITY IN CONNECTION WITH THE SALE, INSTALLATION, MAINTENANCE OR USE OF ITS PRODUCTS.
LEGAL INFORMATION AND CONTACTS Firmware and Drivers For latest driver, technical information and bug-fixes please visit www.smc-europe.com (section support). Contact SMC Contact details for your relevant countries are available on www.smc-europe.com and www.smc.com. Statement of Conditions In line with our continued efforts to improve internal design, operational function, and/or reliability, SMC reserves the right to make changes to the product(s) described in this document without notice.
Model Number: SMC7004VBR V.