SMC7004ABR V.
BarricadeTM Broadband Router User Guide From SMC’s Barricade line of Broadband Routers September 2003
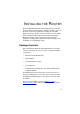
TABLE OF CONTENTS About the Barricade™ Router . . . . . . . . . . . . . . . . . . . . 1 LED Indicators . . . . . . . . . . . . . . . . . . . . . . . . . . . . . . . . . . . . . . 3 Features and Benefits . . . . . . . . . . . . . . . . . . . . . . . . . . . . . . . . 4 Installing the Router . . . . . . . . . . . . . . . . . . . . . . . . . . . . 5 Package Contents . . . . . . . . . . . . . . . . . . . . . . . . . . . . . . . . . . . 5 Hardware Description . . . . . . . . . . . . . . . . . . . . . . . . . .
LAN . . . . . . . . . . . . . . . . . . . . . . . . . . . . . . . . . . . . . . . . . Network Address Translation (NAT) . . . . . . . . . . . . . . . Firewall . . . . . . . . . . . . . . . . . . . . . . . . . . . . . . . . . . . . . . DDNS (Dynamic DNS) Settings . . . . . . . . . . . . . . . . . . . UPnP (Universal Plug and Play) Setting . . . . . . . . . . . . Tools . . . . . . . . . . . . . . . . . . . . . . . . . . . . . . . . . . . . . . . 55 56 59 69 70 71 Print Server Setup . . . . . . . . . . . . .
ABOUT THE BARRICADE™ ROUTER Congratulations on your purchase of the Barricade™ Broadband Router. SMC is proud to provide you with a powerful yet simple communication device for connecting your local area network (LAN) to the Internet. For those who want to surf the Internet at the lowest possible cost, this Broadband Router provides a convenient and powerful solution. IMPORTANT INFORMATION! This information is addressed to the DSL-Users without a flat rate contract**.
About the Barricade™ Router This disconnect only happens if there are no more open requests received from either the LAN or the WAN side (here this can be requests from the internet, i.e. initiated through the use of so called file sharing programs like eMule, eDonkey, etc.) that keep the router active. In order to counter such incalculable activity and protect yourself from higher than expected on-line costs we therefore recommend again a flat-rate contract for your DSL-connection.
LED Indicators LED Indicators The SMC7004ABR includes comprehensive status LED indicators, as described in the following figure and table. LAN Power SMC7004ABR Link/Act WAN 10/100 Reset 1 2 3 4 LED Status Description Power (Green) On Barricade™ Router is receiving power. WAN (Green) On The WAN port has established a valid network connection. Flashing The WAN port is transmitting or receiving traffic. On The indicated LAN port has established a valid network connection.
About the Barricade™ Router Features and Benefits 4 • Internet connection to DSL or cable modem via a 10/100 Mbps WAN port • Internet connection to ISDN TA or PSTN modem via an RS-232 console port • Local network connection via 10/100 Mbps Ethernet ports • Built-in print server for any client attached to the LAN • DHCP for dynamic IP configuration, and DNS for domain name mapping • Firewall with client privileges, hacker prevention, and NAT • NAT also enables multi-user access with a single-
INSTALLING THE ROUTER Before installing the Barricade™ Broadband Router, verify that you have all the items listed under “Package Contents.” If any of the items are missing or damaged, contact your local SMC distributor. Also be sure that you have all the necessary cabling before installing the Barricade™ Router. After installing the Barricade™ Router, refer to the web-based configuration program in “Configuring the Barricade™ Router” on page 35 for information on configuring the router.
Installing the Router Hardware Description The Barricade™ Router can be connected to the Internet or to a remote site using its RJ-45 WAN port or RS-232 serial port. It can be connected directly to your PC or to a local area network using any of the Fast Ethernet LAN ports. It can also function as a print server. Access speed to the Internet depends on your service type. Full-rate ADSL can provide up to 8 Mbps downstream and 640 Kbps upstream. G.lite (or splitterless) ADSL provides up to 1.
Hardware Description • 4 RJ-45 ports for connection to a 10BASE-T/100BASE-TX Ethernet Local Area Network (LAN). These ports can auto-negotiate the operating speed to 10/100 Mbps, the mode to half/full duplex, and the pin signals to MDI/MDI-X (i.e., allowing these ports to be connected to any network device with straight-through cable). These ports can be connected directly to a PC or to a server equipped with an Ethernet network interface card, or to a networking device such as an Ethernet hub or switch.
Installing the Router Item Description Reset Button Use this button to reset the power and restore the default factory settings. LEDs Power, WAN and LAN port status indicators. (See “LED Indicators” on page 3.) LAN Ports Fast Ethernet ports (RJ-45). Connect devices (such as a PC, hub or switch) on your local area network to these ports. Printer Port Parallel port (25-pins, D-type, female). Connect the shared printer to this port. WAN Port WAN port (RJ-45).
Connect the System • TCP/IP network protocol installed on each PC that needs to access the Internet. • A Java-enabled web browser, such as Microsoft Internet Explorer 5.0 or above, or Netscape Communicator 4.0 or above installed on one PC at your site for configuring the Barricade™ Router. Connect the System The Barricade™ Router can be positioned at any convenient location in your office or home. No special wiring or cooling requirements are needed.
Installing the Router 3. Connect your printer: Use standard parallel printer cable to connect your printer to the printer port on the Barricade™ Router. 4. Power on: Connect the power adapter to the Barricade™ Router. Internet Internet Access Device SMC7004ABR Broadband Router t Link/Ac LAN 1 2 3 4 10/100 WAN Power SMC700 1 2 3 4 4ABR Reset SOHO Office or Residence Figure 2.
CONFIGURING CLIENT TCP/IP If you have not previously installed the TCP/IP protocols on your client PCs, refer to the following section. If you need information on how to configure a TCP/IP address on a PC, refer to “Setting Up TCP/IP” on page 14. Installing TCP/IP Windows 95/98/Me 1. Click Start/Settings/Control Panel. 2. Double-click the Network icon and select the Configuration tab in the Network window. 3. Click the Add button. 4. Double-click Protocol.
Configuring Client TCP/IP 5. Select Microsoft in the manufacturers list. Select TCP/IP in the Network Protocols list. Click the OK button to return to the Network window. 6. The TCP/IP protocol will be listed in the Network window. Click OK. The operating system may prompt you to restart your system. Click Yes and the computer will shut down and restart. Windows 2000 1. Click the Start button and choose Settings, then click the Network and Dial-up Connections icon. 2.
Installing TCP/IP 4. Double-click Protocol. 5. Choose Internet Protocol (TCP/IP). Click the OK button to return to the Network window. 6. The TCP/IP protocol will be listed in the Network window. Click OK to complete the installation procedure.
Configuring Client TCP/IP Setting Up TCP/IP To access the Internet through the Barricade™ Router, you must configure the network settings of the computers on your LAN to use the same IP subnet as the Barricade™ Router. The default network settings for the Barricade™ Router are: Gateway IP Address: 192.168.2.1 Subnet Mask: 255.255.255.
Setting Up TCP/IP 2. In the Control Panel, locate and double-click the Network icon. 3. On the Network window Configuration tab, double-click the TCP/IP entry for your network card. 4. Click the IP Address tab. 5. Click the “Obtain an IP address” option. 6. Next click on the Gateway tab and verify the Gateway field is blank. If there are IP addresses listed in the Gateway section, highlight each one and click Remove until the section is empty.
Configuring Client TCP/IP 7. Click the OK button to close the TCP/IP Properties window. 8. On the Network Properties Window, click the OK button to save these new settings. Note: Windows may ask you for the original Windows installation disk or additional files. Check for the files at c:\windows\options\cabs, or insert your Windows CD-ROM into your CDROM drive and check the correct file location, e.g., D:\win98, D:\win9x. (if D is the letter of your CD-ROM drive). 9.
Setting Up TCP/IP 3. From the drop-down menu, select your network card. Click Release and then Renew. Verify that your IP address is now 192.168.2.xxx, your Subnet Mask is 255.255.255.0 and your Default Gateway is 192.168. 2.1. These values confirm that your Barricade™ Router is functioning. Click OK to close the IP Configuration window. Manual IP Configuration 1. Follow steps 1-3 in “DHCP IP Configuration” on page 14 2. Check “Specify an IP address” on the IP Address tab.
Configuring Client TCP/IP 3. In the Gateway tab, add the IP address of the Barricade™ Router (default: 192.168.2.1) in the New gateway field and click Add. 4. On the DNS Configuration tab, add the IP address for the Barricade™ Router and click Add. This automatically relays DNS requests to the DNS server(s) provided by your ISP. Otherwise, add specific DNS servers into the DNS Server Search Order field and click Add. 5. Record the configured information in the following table.
Setting Up TCP/IP 6. Windows may need your Windows 95/98/Me CD to copy some files. After it finishes copying, it will prompt you to restart your system. Click Yes and your computer will shut down and restart. After that, set up other PCs on the LAN according to the procedures described above. Configuring Your Computer in Windows NT 4.0 DHCP IP Configuration 1. From the Windows desktop click Start/Settings/Control Panel. 2. Double-click the Network icon.
Configuring Client TCP/IP 3. Click on the Protocols tab. 4. Double-click TCP/ IP Protocol. 5. Click on the IP Address tab. 6. In the Adapter drop-down list, be sure your Ethernet adapter is selected. 7. Click on “Obtain an IP address from a DHCP server”. 8. Click OK to close the window. 9. Windows may copy files and will then prompt you to restart your system. Click Yes and your computer will shut down and restart.
Setting Up TCP/IP Obtain IP Settings From Your Barricade™ Router Now that you have configured your computer to connect to the Barricade™ Router, it needs to obtain new network settings. By releasing old IP settings and renewing them with settings from the Barricade™ Router, you will also verify that you have configured your computer correctly. 1. On the Windows desktop, click Start/Programs/Command Prompt. 2. In the Command Prompt window, type IPCONFIG /RELEASE and press the key. 3.
Configuring Client TCP/IP 4. Type EXIT and press to close the Command Prompt window. Manual IP Configuration 1. Follow steps 1-5 in “DHCP IP Configuration” on page 19. 2. Check “Specify an IP address” on the IP Address tab. Enter an IP address based on the default network 192.168.2.x (where x is between 2 and 254), use 255.255.255.0 for the subnet mask. In the Gateway field, add the IP address of the Barricade™ Router (default: 192.168.2.1) and click Apply.
Setting Up TCP/IP 3. On the DNS Configuration tab, in the DNS Server Search Order field add the IP address for the Barricade™ Router and click Add. This automatically relays DNS requests to the DNS server(s) provided by your ISP. Otherwise, add specific DNS servers into the DNS Server Search Order field and click Add 4. Record the configured information in the following table. TCP/IP Configuration Setting IP Address ____.____.____.____ Subnet Mask ____.____.____.____ Primary DNS Server ____.____.____.
Configuring Client TCP/IP Configuring Your Computer in Windows 2000 DHCP IP Configuration 1. Access your Network settings by clicking Start, then choose Settings and then select Control Panel. 2. In the Control Panel, locate and double-click the Network and Dial-up Connections icon. 3. Locate and double-click the Local Area Connection icon for the Ethernet adapter that is connected to the Barricade™ Router. When the Status dialog box window opens, click the Properties button. 4.
Setting Up TCP/IP Manual IP Configuration 1. Follow steps 1-4 in “DHCP IP Configuration” on page 24. 2. Select “Use the following IP Address.” 3. Enter an IP address based on the default network 192.168.2.x (where x is between 2 and 254), use 255.255.255.0 for the subnet mask. and the IP address of the Barricade™ Router (default: 192.168.2.1) for the Default gateway field. 4. Select “Use the following DNS server addresses.” 5. Enter the IP address for the Barricade™ Router in the Preferred DNS server field.
Configuring Client TCP/IP Configuring Your Computer in Windows XP DHCP IP Configuration The following instructions assume you are running Windows XP with the default interface. If you are using the Classic interface (where the icons and menus look like previous Windows versions), please follow the instructions for Windows 2000 outlined above. 1. On the Windows desktop, click Start/Control Panel. 2. In the Control Panel window, click Network and Internet Connections. 3.
Setting Up TCP/IP 4. Double-click Internet Protocol (TCP/IP). 5. If “Obtain an IP address automatically” and “Obtain DNS server address automatically” are already selected, your computer is already configured for DHCP. Click Cancel to close each window. 6. Click the OK button again to save these new changes. 7. Reboot your PC. Obtain IP Settings from Your Barricade See “Obtain IP Settings From Your Barricade™ Router” on page 21.
Configuring Client TCP/IP Manual IP Configuration 1. Follow steps 1-5 in “DHCP IP Configuration” on page 26. 2. Select “Use the following IP Address.” 3. Enter an IP address based on the default network 192.168.2.x (where x is between 2 and 254), use 255.255.255.0 for the subnet mask. and the IP address of the Barricade™ Router (default: 192.168.2.1) for the Default gateway field. 4. Select “Use the following DNS server addresses.” 5.
Setting Up TCP/IP Configuring a Macintosh Computer DHCP IP Configuration You may find that the instructions here do not exactly match your screen. This is because these steps and screen shots were created using Mac OS 10.2. Mac OS 7.x and above are similar, but may not be identical to Mac OS 10.2 Follow these instructions: 1. Pull down the Apple Menu . Click System Preferences.
Configuring Client TCP/IP 2. Double-click the Network icon in the Systems Preferences window. 3. If Using DHCP is already selected in the Configure field, your computer is already configured for DHCP. 4. Close the Network dialog box.
Setting Up TCP/IP Obtain IP Settings from Your Barricade Now that you have configured your computer to connect to your Barricade, it needs to obtain new network settings. By releasing old DHCP IP settings and renewing them with settings from your Barricade, you can verify that you have configured your computer correctly. 1. Select Systems Preferences in the pull down Apple Menu . 2. Double-click the Network icon in the Systems Preferences window. 3. Your new settings are shown in the TCP/IP tab.
Configuring Client TCP/IP Manual IP Configuration 1. Follow steps 1-2 in “DHCP IP Configuration” on page 29 2. Select Manually in the Configure field. 3. Enter an IP address based on the default network 192.168.2.x (where x is between 2 and 254), use 255.255.255.0 for the subnet mask. In the Router field, add the IP address of the Barricade™ Router (default: 192.168.2.1) and click Apply Now. 4. Enter the IP address for the Barricade™ Router in the DNS servers field.
Setting Up TCP/IP Verifying Your TCP/IP Connection After installing the TCP/IP communication protocols and configuring an IP address in the same network as the Barricade™ Router, use the Ping command to check if your computer has successfully connected to the Barricade™ Router. The following example shows how the Ping procedure can be executed in an MS-DOS window. First, execute the Ping command: ping 192.168.2.1 If a message similar to the following appears: Pinging 192.168.2.
CONFIGURING THE BARRICADE™ ROUTER The Barricade™ Router can be configured by any Javasupported browser including Internet Explorer 5.0 or above. Using the Web management interface, you can configure the Barricade™ Router and view statistics to monitor network activity. Note: Before you attempt to configure your router, if you have access to the Internet please visit www.smc.com or www.smc-europe.com and download the latest firmware update to ensure your router is running the latest firmware.
Configuring the Barricade™ Router Disable Proxy Connection You will also need to verify that the HTTP Proxy feature of your web browser is disabled. This is so that your web browser will be able to view the Barricade™ Router configuration pages. The following steps are for Internet Explorer and for Netscape. Determine which browser you use and follow the appropriate steps. Internet Explorer (5 or above) 1. Open Internet Explorer. Click Tools, and then select Internet Options. 2.
Internet Explorer (For Macintosh) To access the Barricade™ Router’s management interface, enter the Barricade™ Router IP address in your Web browser http://192.168.2.1. Then click LOGIN. (By default, there is no password.) The home page displays the Setup Wizard and Advanced Setup options.
Configuring the Barricade™ Router Navigating the Web Browser Interface The Barricade™ Router’s management interface features a Setup Wizard and an Advanced Setup section. Use the Setup Wizard if you want to quickly set up the Barricade™ Router for use with a cable modem or DSL modem. Advanced Setup supports more advanced functions like hacker attack detection, IP and MAC address filtering, intrusion detection, virtual server setup, virtual DMZ hosts, and other advanced functions.
Setup Wizard Setup Wizard Time Zone Click on the Setup Wizard picture. The first item in the Setup Wizard is Time Zone setup. . For accurate timing of client filtering and log events, you need to set the time zone. Select your time zone from the drop-down list, and click NEXT. Check Enable Automatic Time Server Maintenance to automatically maintain the Barricade™ Router system time by synchronizing with a public time server over the Internet.
Configuring the Barricade™ Router Broadband Type Select the type of broadband connection you have. For a cable modem connection see the following page. For a Fixed-IP xDSL connection see “Fixed-IP xDSL” on page 41, and for a PPPoE xDSL connection, see “PPPoE” on page 41. Cable Modem After selecting Cable Modem as the Broadband Type, a message will appear stating that your data has been successfully saved.
Setup Wizard Fixed-IP xDSL Some xDSL Internet Service Providers may assign a fixed (static) IP address. If you have been provided with this information, choose this option and enter the assigned IP address, gateway IP address, DNS IP addresses, and subnet mask. Click FINISH to complete the setup. PPPoE Enter the PPPoE User Name and Password assigned by your Service Provider. The Service Name is normally optional, but may be required by some service providers.
Configuring the Barricade™ Router Enable the Auto-reconnect option to automatically re-establish the connection as soon as you attempt to access the Internet again. Click FINISH to complete the setup. Advanced Setup Use the Web management interface to define system parameters, manage and control the Barricade™ Router and its ports, or monitor network conditions. The following table outlines the selections available from this program.
Advanced Setup Menu Description UPnP With Universal Plug and Play, a device can automatically dynamically join a network, obtain an IP address, communicate its capabilities, and learn about the presence and capabilities of other devices. Devices can then directly communicate with each other. This further enables peer to peer networking.
Configuring the Barricade™ Router System Time Zone For accurate timing of client filtering and log events, you need to set the time zone. Select your time zone from the drop-down list, and click NEXT. Check Enable Automatic Time Server Maintenance to automatically maintain the Barricade™ Router system time by synchronizing with a public time server over the Internet. Then configure two different time servers by selecting the options in the Primary Server and Secondary Server fields.
Advanced Setup Password Settings Use this menu to restrict access based on a password. By default, there is no password. For security you should assign one before exposing the Barricade™ Router to the Internet. Passwords can contain from 3–12 alphanumeric characters and are not case sensitive. Note: If your password is lost, or you cannot gain access to the user interface, press the Reset button on the front panel (holding it down for at least five seconds) to restore the factory defaults.
Configuring the Barricade™ Router Remote Management Remote Management allows a remote PC to configure, manage, and monitor the Barricade™ Router using a standard Web browser. Check Enable and enter the IP address of the remote host. Click APPLY. Note: 46 If you specify 0.0.0.0 as this IP address, any host can manage the Barricade™ Router.
Advanced Setup WAN Specify the WAN connection type provided by your Internet Service Provider, then click More Configuration to enter detailed configuration parameters for the selected connection type.
Configuring the Barricade™ Router Dynamic IP The Host Name is optional, but may be required by some ISPs. The default MAC address is set to the WAN’s physical interface on the Barricade™ Router. Use this address when registering for Internet service, and do not change it unless required by your ISP.
Advanced Setup Point-to-Point Over Ethernet (PPPoE) Enter the PPPoE User Name and Password assigned by your Service Provider. The Service Name is normally optional, but may be required by some service providers. The MTU (Maximum Transmission Unit) governs the maximum size of the data packets. Leave this on the default value (1454) unless you have a particular reason to change it.
Configuring the Barricade™ Router You can enable the auto-reconnect option to automatically re-establish the connection as soon as you attempt to access the Internet again. Point-to-Point Tunneling Protocol (PPTP) Point-to-Point Tunneling Protocol (PPTP) can be used to join different physical networks using the Internet as an intermediary. Using the above screen allows client PCs to establish a normal PPTP session and provides hassle-free configuration of the PPTP client on each client PC.
Advanced Setup Enter a maximum Idle Time Out (in minutes) to define a maximum period of time for which the PPTP connection is maintained during inactivity. If the connection is inactive for longer than the Maximum Idle Time, it will be dropped. (Default: 10 minutes) Note: Please be aware that the setting "Maximium Idle Time" to "0" and/or "Auto-Reconnect" enabled can cause increased telephone bills. For further information please visit www.smc-europe.com or contact SMC's technical support team.
Configuring the Barricade™ Router DNS Domain Name Servers map numerical IP addresses to the equivalent domain name (e.g., www.smc.com). Your ISP should provide the IP address of one or more domain name servers. Enter those addresses in this screen.
Advanced Setup Dial-up If you are accessing the Internet via an ISDN TA or PSTN modem attached to the serial port on the Barricade™ Router, then you must specify your account information on this screen as described below. Note: If not checked, then this connection will only be used for backup access if the primary WAN link fails • Dial-Up Service Phone Number – Enter the phone number your service provider has given to you for Internet access.
Configuring the Barricade™ Router • MTU – Leave the Maximum Transmission Unit (MTU) at the default value (1454) unless you have a particular reason to change it. • Maximum Idle Time – Enter a maximum idle time (in minutes) to define a maximum period of time for which the Internet connection is maintained during inactivity (Default: 10). If the connection is inactive for longer than the Maximum Idle Time, it will be dropped.
Advanced Setup LAN • LAN IP – Use the LAN menu to configure the LAN IP address for the Barricade™ Router and to enable the DHCP server for dynamic client address allocation. • Set a period for the lease time if required. For home networks this may be set to Forever, which means there is no time limit on the IP address lease. • IP Address Pool – A dynamic IP start address may be specified by the user, e.g. 192.168.2.100 (default value).
Configuring the Barricade™ Router Network Address Translation (NAT) From this section you can configure the Address Mapping, Virtual Server, and Special Application features that provide control over the port openings in the router’s firewall. This section can be used to support several Internet based applications such as email, FTP, and Telnet. Address Mapping Allows one or more public IP addresses to be shared by multiple internal users.
Advanced Setup Virtual Server If you configure the Barricade™ Router as a virtual server, remote users accessing services such as Web or FTP at your local site via public IP addresses can be automatically redirected to local servers configured with private IP addresses. In other words, depending on the requested service (TCP/UDP port number), the Barricade™ Router redirects the external service request to the appropriate server (located at another internal IP address).
Configuring the Barricade™ Router Special Applications Some applications, such as Internet gaming, videoconferencing, Internet telephony and others, require multiple connections. These applications cannot work with Network Address Translation (NAT) enabled. If you need to run applications that require multiple connections, use the following screen to specify the additional public ports to be opened for each application.
Advanced Setup For a full list of ports and the services that run on them, see www.iana.org/assignments/port-numbers. Firewall The Barricade™ Router firewall can provide access control of connected client PCs, block common hacker attacks, including IP Spoofing, Land Attack, Ping of Death, IP with zero length, Smurf Attack, UDP port loopback, Snork Attack, TCP null scan, and TCP SYN flooding.
Configuring the Barricade™ Router Note: Click on Add PC and define the appropriate settings for client PC services (as shown in the following screen).
Advanced Setup The MAC Filtering feature of the Barricade™ Router allows you to limit access to your network to up to 32 clients based on the MAC (Media Access Control) address of the client machine. This ID is unique to each network adapter. If the MAC address is listed in the table, that client machine will have access to the network. URL Blocking To configure the URL Blocking feature, use the table below to specify the web sites (www.somesite.com) and/or keywords you want to filter on your network.
Configuring the Barricade™ Router Schedule Rule The Schedule Rule feature allows you to configure specific rules based on Time and Date. These rules can then be used to configure more specific Access Control. Enables Schedule-based Internet access control. 1. Click Add Schedule Rule. 2. Define the settings for the schedule rule (as shown on the following screen).
Advanced Setup 3. Click OK and then click the APPLY button to save your settings.
Configuring the Barricade™ Router Intrusion Detection The Barricade™ Router Intrusion Detection feature limits access for incoming traffic at the WAN port.
Advanced Setup • SPI and Anti-DoS firewall protection (Default: Enabled) – When the Stateful Packet Inspection (SPI) feature is turned on, all incoming packets will be blocked except for those types marked with a check in the Stateful Packet Inspection section. • RIP Defect (Default: Enabled) – If a Router Information Protocol (RIP) request packet is not acknowledged by the router, it will stay in the input queue and not be released.
Configuring the Barricade™ Router Stateful Packet Inspection allows you to select different application types that are using dynamic port numbers. If you wish to use the Stateful Packet Inspection (SPI) to block packets, click on the Yes radio button in the “Enable SPI and Anti-DoS firewall protection” field and then check the inspection type that you need, such as Packet Fragmentation, TCP Connection, UDP Session, FTP Service, H.323 Service, and TFTP Service.
Advanced Setup DoS Criteria and Port Scan Criteria Set up DoS and port scan criteria in the spaces provided (as shown below). Parameter Defaults Description Total incomplete TCP/ UDP sessions HIGH 300 sessions Defines the rate of newly unestablished sessions that will cause the software to start deleting half-open sessions. Total incomplete TCP/ UDP sessions LOW 250 sessions Defines the rate of newly unestablished sessions that will cause the software to stop deleting half-open sessions.
Configuring the Barricade™ Router Parameter Defaults Description Half-open fragmentation 1sec detect sensitive time period Length of time before a half-open fragmentation session is detected as half-open. Flooding cracker block time Length of time from detecting a flood attack to blocking of the attack. 300 sec DMZ If you have a client PC that cannot run an Internet application properly from behind the firewall, then you can open the client up to unrestricted two-way Internet access.
Advanced Setup DDNS (Dynamic DNS) Settings Dynamic DNS provides users on the Internet with a method to tie their domain name(s) to computers or servers. DDNS allows your domain name to follow your IP address automatically by having your DNS records changed when your IP address changes. Domain Name – A symbolic network address for the Barricade™ Router formatted as a series of alphanumeric strings separated by periods. E-mail – Enter your e-mail address here. Key – Enter your key here to sign in.
Configuring the Barricade™ Router This DNS feature is powered by TZO.com. With a DDNS connection you can host your own web site, email server, FTP site, and more at your own location even if you have a dynamic IP address. (Default: Disable) UPnP (Universal Plug and Play) Setting Enable UPnP by checking ON in the screen above. UPnP allows the device to automatically: 70 • dynamically join a local network. • obtain an IP address.
Advanced Setup Tools Use the Tools menu to back up the current configuration, restore a previously saved configuration, restore factory settings, update firmware, and reset the Barricade™ Router. Tools - Configuration Tools • Backup – saves the Barricade™ Router’s configuration to a file. • Restore – restores settings from a saved backup configuration file. • Restore to factory defaults – restores the Barricade™ Router settings back to the factory defaults.
Configuring the Barricade™ Router Tools - Firmware Upgrade Use this screen to update the firmware or user interface to the latest versions. Download the upgrade file from the SMC Web site (www.smc.com) and save it to your hard drive. Click Browse to look for the downloaded file. Click APPLY. Check the Status page Information section to confirm that the upgrade process was successful.
Advanced Setup Tools - Reset Click APPLY to reset the Barricade™ Router. The reset will be complete when the power LED stops blinking. Note: If you use the Reset button on the front panel, the Barricade™ Router performs a power reset. If the button is depressed for over five seconds, all the LEDs will illuminate and the factory settings will be restored.
Configuring the Barricade™ Router Status The Status screen displays WAN/LAN connection status, firmware, and hardware version numbers, illegal attempts to access your network, as well as information on DHCP clients connected to your network. The following items are included on this screen: Section INTERNET GATEWAY INFORMATION Security Log Save Clear Refresh DHCP Client Log 74 Description Displays WAN connection type and status. Displays system IP settings, as well as DHCP and Firewall status.
PRINT SERVER SETUP If you want to use the print server built into the Barricade™ Router, then you must first install the Port Monitor program as described in the following section for Windows 95/98/ Me/NT/2000. To configure the Barricade™ Print Server for Windows 95/98/Me/ NT/2000, or Unix, see “Configuring the Print Server” on page 78. Installing the SMC Printer Port Monitor Skip this section if you are using Unix.
Print Server Setup 3. Select the destination folder and click on the Next button. The setup program will then begin to install the programs into the destination folder. 4. Select the Program Folder that will contain the program icon for uninstalling the port monitor, and then click Next.
Installing the SMC Printer Port Monitor 5. Enter the printer port name that will be used to identify the port monitor in your system, and press Next. 6. When the setup program finishes installing the port monitor, check the radio button to restart your computer and then click OK. 7. After rebooting your computer, add the Barricade™ Router print server to your system as described in the following section.
Print Server Setup Configuring the Print Server The Barricade™ Router’s print server supports Microsoft Windows 95/98/Me/NT/2000, and Unix. If you are using Windows 95/98/Me/NT/2000, first install the port monitor as described in the previous section before adding the Barricade™ Router’s print server to your operating system. Configuring the Network Printer in Win 95/98/Me/2000 1. On a Windows 95/98/Me/2000 platform, open the Printers window in the My Computer menu, and double-click the Add Printer icon.
Configuring the Print Server 2. Follow the prompts to add a Local printer to your system. Specify the printer type attached to the Barricade™ Router. 3. Click the Use the following port button and select the monitored port (the default port name is SMC100).
Print Server Setup 4. Enter the IP address of the Barricade™ Router and click OK, and then click Next in the Add Printer Wizard dialog box. 5. Continue following the prompts to finish installing the Barricade™ Router print server. The printer type you specified will now be added to your Printers menu. Configuring the Network Printer in Windows NT 1. On a Windows NT platform, open the Printers window in the My Computer menu, and double-click the Add Printer icon.
Configuring the Print Server 2. Follow the prompts to add a local printer to your system. 3. Select the monitored port. The default port name is SMC100. Then click the Configure Port button.
Print Server Setup 4. Enter the IP address of the Barricade™ Router and click OK, and then click Next in the Add Printer Wizard dialog box. 5. Specify the printer type attached to the Barricade™ Router. 6. Continue following the prompts to finish installing the Barricade™ Router print server. The printer type you specified will now be added to your Printers menu.
Configuring the Print Server 3. Click on the Add Printer icon to launch the Add Printer Wizard. 4. Click Next button to begin the printer installation process. 5. On the next dialog box, choose the Local Printer option and verify the “Automatically detect and install my Plug and Play printer” option is unchecked. Note: On Windows XP check the “Local printer attached to this computer.” 6. Click the Next button to create a new printer port.
Print Server Setup 7. Select the Create a New Port option and then select the Standard TCP/IP Port option in the drop-down menu.
Configuring the Print Server 8. When you click the Next button the “Add Standard TCP/IP Printer Port Wizard” will launch. 9. To start this new installation wizard click the Next button.
Print Server Setup 10. Provide the appropriate IP and Port name information for your new Printer port. If you are using default settings on the router you can use the following information: Printer Name or IP Address: 192.168.2.1 Port Name: IP_192.168.2. Note: This is the IP that you use to administer your router with (for example: 192.168.2.1). If you have changed this IP address then please use the new one that you have assigned to your router. 11. Click the Next button to continue. 12.
Configuring the Print Server 13. Then click the Settings… button to input the Specific Barricade™ Printer port information. 14. In the Configure Standard TCP/IP Port Monitor dialog box you will need to configure some additional settings. Please confirm these settings below: • Port Name: IP_192.168.2.1* • Printer Name or IP Address: 192.168.2.1* Note: This should be the same information that was configured in Step 7.
Print Server Setup • The LPR Settings section should have the Queue Name set to one of two options depending on the version of Barricade™ Router you are using. • The Queue Name is LPT1. • Verify that the LPR Byte Counting Enabled and SNMP Status Enabled options are unchecked. 15. Once you have verified all of these settings, click the OK button to save these settings and close the “Configure Standard TCP/IP Port Monitor” window. 16.
Configuring the Print Server 19. In the dialog box below, choose the manufacturer of your printer, and then choose your printer model. If your printer is not listed here, then please refer to your printer documentation to get your printer installed. 20. Once you have your printer selected in this dialog box click the Next button.
Print Server Setup 21. Name your printer. In this dialog box give your installed printer a name. This will be the name used for this printer in your Printer folder. 22. Once you have named your printer, click Next to continue. 23. Choose the “Do not share this printer” option and click the Next button. 24. Choose No to the “Print Test Page” option, and click the Next button. 25. On the next screen, you should now see a dialog box with a summary of all the printer information that you have just configured.
Configuring the Print Server Once you have completed the printer installation, you will need to configure some properties on your printer. To do so, please follow the steps listed below: 1. If you closed out the Printers window, please re-open it from the control panel. 2. Locate the printer that you just installed, right-mouse click on it, and choose Properties. 3.
Print Server Setup • Both the “Print spooled documents first” and “Enable advanced printing features” options are checked. • All of the other options should be disabled or unchecked. 4. Click on the Ports tab and verify that the TCP/IP port that you just created is selected, and the Enable bidirectional support and Enable printer pooling options are unchecked. 5. Click the Apply button to save the settings. 6. Next click on the General tab and click on the Print Test Page button.
Configuring the Print Server Confirm printer connection On the status page of the web-based login, you can confirm the printer connection to the Barricade™ Router.
TROUBLESHOOTING The information outlined in this section describes some useful steps for getting your computer and Barricade™ Router online. Verify you are connected to the Barricade™ Router If you are unable to access the Barricade™ Router’s web-based administration pages then you may not be properly connected or configured. The screen shots in this section were taken on a Windows 2000 machine, but the same steps will apply to Windows 95/98/Me/XP.
Troubleshooting If you have any other IP address information listed see below. If you have an IP address that starts with 169.254.XXX.XXX then see the next section. If you have another IP address configured, then see the section “I have another IP Address displayed” on page 97. I am getting an IP Address that starts with 169.254.XXX.XXX If you are getting this IP Address, then you need to check that you are properly connected to the Barricade™ Router.
Troubleshooting I have another IP Address displayed If you have another IP address listed then the PC may not be configured for a DHCP connection. Please refer to “Configuring Client TCP/IP” on page 11 for information. Once you have confirmed that your computer is configured for DHCP, then please follow the steps below. 1. Open a DOS window as described above. 2. Type ipconfig/release. 3. Then type ipconfig/renew.
Troubleshooting Symptom The 10/100 LED does not light after a connection is made. Possible Solutions 98 • Check that the host computer and router are both powered on. • Be sure the network cable is connected to both devices. • Verify that Category 5 cable is used if you are operating at 100 Mbps, and that the length of any cable does not exceed 100 m (328 ft). • Check the network card connections. • The 10BASE-T/100BASE-TX port, network card, or cable may be defective.
SPECIFICATIONS Below is an outline of the Technical Specifications for the Barricade™ Router 4-Port Cable/DSL Broadband Router (SMC7004ABR) Standards IEEE 802.3 10BASE-T Ethernet IEEE 802.3u 100BASE-TX Fast Ethernet IEEE 802.
Specifications Temperature Operating: 0 to 40 °C (32 to 104 °F) Storage: -20 to 70 °C (-4 to 158 °F) Humidity 5% to 95% (noncondensing) Dimensions 19.05 x 11.43 x 3.31 cm (7.5 x 4.5 x 1.3 in.) Weight 340 g (12 oz) Input Power 12 V (1 A) Power 12 Watts max.
Specifications Compliances CE Mark Emissions FCC Class B VCCI Class B Industry Canada Class B EN55022 (CISPR 22) Class B C-Tick - AS/NZS 3548 (1995) Class B Immunity EN 61000-3-2/3 EN 61000-4-2/3/4/5/6/8/11 Safety UL 1950 EN60950 (TÜV) CSA 22.2 No.
COMPLIANCES FCC - Class B This equipment has been tested and found to comply with the limits for a Class B digital device, pursuant to Part 15 of the FCC Rules. These limits are designed to provide reasonable protection against harmful interference in a residential installation. This equipment generates, uses and can radiate radio frequency energy and, if not installed and used in accordance with instructions, may cause harmful interference to radio communications.
Compliances EC Conformance Declaration - Class B SMC contact for these products in Europe is: SMC Networks Europe, Edificio Conata II, Calle Fructuós Gelabert 6-8, 2o, 4a, 08970 - Sant Joan Despí, Barcelona, Spain.
LEGAL INFORMATION AND CONTACTS SMC's Limited Warranty Statement SMC Networks Europe ("SMC") warrants its products to be free from defects in workmanship and materials, under normal use and service, for the applicable warranty term. All SMC products carry a standard 2 year limited warranty from the date of purchase from SMC or its Authorized Reseller.
Legal Information and Contacts INCLUDING WARRANTIES OR CONDITIONS OF MERCHANTABILITY AND FITNESS FOR A PARTICULAR PURPOSE. SMC NEITHER ASSUMES NOR AUTHORIZES ANY OTHER PERSON TO ASSUME FOR IT ANY OTHER LIABILITY IN CONNECTION WITH THE SALE, INSTALLATION, MAINTENANCE OR USE OF ITS PRODUCTS.
Legal Information and Contacts Statement of Conditions In line with our continued efforts to improve internal design, operational function, and/or reliability, SMC reserves the right to make changes to the product(s) described in this document without notice. SMC does not assume any liability that may occur due to the use or application of the product(s) described herein.
Model Number: SMC7004ABR V.