
User's Manual


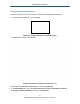
Table Of Contents
- Contents
- Preface
- 1 Getting to Know the Gateway
- 2 Installing the Gateway
- 3 Preconfiguration Guidelines
- 4 Configuring the Gateway
- Accessing the Gateway’s Web Management
- Understanding the Web Management Interface Menus
- Web Management Interface Menus
- Viewing Information About Your Network and Connected Devices
- Viewing Information About Your Network and Connections
- Configuring Firewall Settings
- Viewing System Software Settings
- Configuring System Hardware
- Configuring Your Home Network
- Working with Connected Devices
- Configuring Parental Controls
- Using Advanced Features
- Troubleshooting the Gateway
- 5 Configuring the Gateway’s mso Interface
- Accessing the Gateway’s Web Management
- Understanding the Web Management Interface Menus
- Web Management Interface Menus
- Configuring the Gateway Settings
- Configuring Connections
- Configuring Firewall Settings
- Viewing System Software Settings
- Configuring Hardware
- Configuring Your Home Network
- Working with Connected Devices
- Configuring Parental Controls
- Using Advanced Features
- Troubleshooting the Gateway
- 6 Troubleshooting Procedures
- Basic Troubleshooting Procedures
- Advanced Troubleshooting Procedures
- Specific Troubleshooting Procedures
- Unable to Log In to Gateway
- Local Networked Devices Unable to Access the Gateway
- Unable to Access the Internet
- Unable to Access Networked Devices
- Using the Ping Utility to Troubleshoot
- Gateway Disconnects from the Internet
- Slow Web Browsing
- Unable to Configure Port Forwarding
- Unable to Use Pass-thru VPN
- Gateway is Not Passing DHCP Address to a computer
- Determining a Computer’s MAC Address
- Wireless Troubleshooting
- Application and Gaming Troubleshooting
- Connecting to Messenger Services Behind the Gateway
- Connecting to America Online Behind the Gateway
- Connecting to XBox Live, PSP, and Nintendo WFC
- Index

Preconfiguration Guidelines
27
SMCD3GNV Wireless Cable Modem Gateway User Manual
5. In the Local Area Connection Properties dialog box, verify that Internet Protocol (TCP/IP)
is checked. Then select Internet Protocol (TCP/IP) and click the Properties button. The
Internet Protocol (TCP/IP) Properties dialog box appears.
6. In the Internet Protocol (TCP/IP) Properties dialog box, click Obtain an IP address
automatically to configure your computer for DHCP. Click the OK button to save this
change and close the Internet Protocol (TCP/IP) Properties dialog box.
7. Click the OK button again to save your changes.
8. Restart your computer.
Configuring Microsoft Windows Vista
Use the following procedure to configure a computer running Microsoft Windows Vista with
the default interface. If you use the Classic interface, where the icons and menus resemble
previous Windows versions, perform the procedure under “Configuring Microsoft Windows
2000” on page 25.
1. On the Windows taskbar, click Start, click Control Panel, and then select Network and
Internet Icon.
2. Click View Networks Status and tasks and then click Management Networks
Connections.
3. Right-click the Local Area Connection icon and click Properties.
4. Click Continue. The Local Area Connection Properties dialog box appears.
5. In the Local Area Connection Properties dialog box, verify that Internet Protocol
(TCP/IPv4) is checked. Then select Internet Protocol (TCP/IPv4) and click the
Properties button (see Figure 10). The Internet Protocol Version 4 Properties dialog box
appears.