
User's Manual


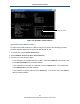


Table Of Contents
- Contents
- Preface
- 1 Getting to Know the Gateway
- 2 Installing the Gateway
- 3 Preconfiguration Guidelines
- 4 Configuring the Gateway
- Accessing the Gateway’s Web Management
- Understanding the Web Management Interface Menus
- Web Management Interface Menus
- Viewing Information About Your Network and Connected Devices
- Viewing Information About Your Network and Connections
- Configuring Firewall Settings
- Viewing System Software Settings
- Configuring System Hardware
- Configuring Your Home Network
- Working with Connected Devices
- Configuring Parental Controls
- Using Advanced Features
- Troubleshooting the Gateway
- 5 Configuring the Gateway’s mso Interface
- Accessing the Gateway’s Web Management
- Understanding the Web Management Interface Menus
- Web Management Interface Menus
- Configuring the Gateway Settings
- Configuring Connections
- Configuring Firewall Settings
- Viewing System Software Settings
- Configuring Hardware
- Configuring Your Home Network
- Working with Connected Devices
- Configuring Parental Controls
- Using Advanced Features
- Troubleshooting the Gateway
- 6 Troubleshooting Procedures
- Basic Troubleshooting Procedures
- Advanced Troubleshooting Procedures
- Specific Troubleshooting Procedures
- Unable to Log In to Gateway
- Local Networked Devices Unable to Access the Gateway
- Unable to Access the Internet
- Unable to Access Networked Devices
- Using the Ping Utility to Troubleshoot
- Gateway Disconnects from the Internet
- Slow Web Browsing
- Unable to Configure Port Forwarding
- Unable to Use Pass-thru VPN
- Gateway is Not Passing DHCP Address to a computer
- Determining a Computer’s MAC Address
- Wireless Troubleshooting
- Application and Gaming Troubleshooting
- Connecting to Messenger Services Behind the Gateway
- Connecting to America Online Behind the Gateway
- Connecting to XBox Live, PSP, and Nintendo WFC
- Index

Troubleshooting Procedures
192
SMCD3GNV Wireless Cable Modem Gateway User Manual
Reply from 192.168.0.1: bytes=32 time=NN ms TTL=xxx
If the path was not contacted successfully, a message similar to the following appears:
Request timed out
If the path is not working properly:
The physical connections may be wrong. Be sure the Gateway’s Online LED is ON. If is
OFF, review “Basic ” on page 180.
Check that the corresponding LEDs on the NIC installed in your computer are ON (refer
to the documentation for your NIC). If they are OFF, verify that the Ethernet card driver
software and TCP/IP software are both installed and configured properly on your
computer.
Verify that the IP addresses for the Gateway and your computer are correct and that
both addresses are on the same subnet (for example,
192.168.1.x/255.255.255.0).
Testing the Path from a Computer to the Internet
After verifying that the path between your computer and Gateway is working properly, use
the following procedure to test the path from your computer to the Internet.
To test the path using ping from a Windows PC:
1. From the Windows task bar, click Start and select Run.
2. In the Open field, type cmd and click OK. A DOS command window appears.
3. At the > prompt, type ping -n 10 IPaddress where IPaddress is the IP address of a
remote device (such as your ISP’s server) or Web site (such as www.yahoo.com).
4. Press Enter. If the path is working, a reply similar to the one in the previous section
appears. If you do not receive replies:
Confirm that your computer has the IP address of the Gateway listed as the default
gateway. If your computer’s IP address is obtained automatically through DHCP, this
information will not be visible in your computer’s Control Panel. Verify that the Gateway’s
IP address is shown as the TCP/IP default gateway.
Check whether your computer’s network address(the portion of the IP address specified
by the netmask) is different than the network address of the remote device.
If your ISP assigned a host name to your computer, enter the name in the Host Name
field in the Add Computer Menu (see “Manually Adding Computers with Static IP
Addresses to the Wireless Network” on page 65).
5. When you finish, type exit at the command prompt and press Enter to close the window