
User's Manual
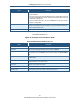

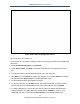


Table Of Contents
- Contents
- Preface
- 1 Getting to Know the Gateway
- 2 Installing the Gateway
- 3 Preconfiguration Guidelines
- 4 Configuring the Gateway
- Accessing the Gateway’s Web Management
- Understanding the Web Management Interface Menus
- Web Management Interface Menus
- Viewing Information About Your Network and Connected Devices
- Viewing Information About Your Network and Connections
- Configuring Firewall Settings
- Viewing System Software Settings
- Configuring System Hardware
- Configuring Your Home Network
- Working with Connected Devices
- Configuring Parental Controls
- Using Advanced Features
- Troubleshooting the Gateway
- 5 Configuring the Gateway’s mso Interface
- Accessing the Gateway’s Web Management
- Understanding the Web Management Interface Menus
- Web Management Interface Menus
- Configuring the Gateway Settings
- Configuring Connections
- Configuring Firewall Settings
- Viewing System Software Settings
- Configuring Hardware
- Configuring Your Home Network
- Working with Connected Devices
- Configuring Parental Controls
- Using Advanced Features
- Troubleshooting the Gateway
- 6 Troubleshooting Procedures
- Basic Troubleshooting Procedures
- Advanced Troubleshooting Procedures
- Specific Troubleshooting Procedures
- Unable to Log In to Gateway
- Local Networked Devices Unable to Access the Gateway
- Unable to Access the Internet
- Unable to Access Networked Devices
- Using the Ping Utility to Troubleshoot
- Gateway Disconnects from the Internet
- Slow Web Browsing
- Unable to Configure Port Forwarding
- Unable to Use Pass-thru VPN
- Gateway is Not Passing DHCP Address to a computer
- Determining a Computer’s MAC Address
- Wireless Troubleshooting
- Application and Gaming Troubleshooting
- Connecting to Messenger Services Behind the Gateway
- Connecting to America Online Behind the Gateway
- Connecting to XBox Live, PSP, and Nintendo WFC
- Index

Configuring the Gateway’s mso Interface
145
SMCD3GNV Wireless Cable Modem Gateway User Manual
Option Description
Set Blocked Days If you selected No for Always Block?, use any of the following methods to specify when the
Gateway is to block this URL:
• Select All = blocks the URL for seven days.
• Select None = deselect blocking of the URL for seven days.
• Monday – Sunday = check the check boxes that correspond to the days when you want the
Gateway to block this URL.
SAVE button Click this button to save your settings.
CANCEL button Click this button to discard your settings on the Add Blocked Domain menu.
Specifying Keywords to be Blocked
To block keywords for non-trusted computers, perform the following procedure from the
Managed Sites menu.
1. Next to Enable Managed Sites, click Enabled.
2. Under Blocked Keywords, click ADD. The Add Blocked Keyword menu appears (see
Figure 86).
3. Complete the fields in the Add Blocked Keyword menu (see Table 43).
4. Click SAVE (or click CANCEL to discard your settings). If you clicked SAVE, the blocked
keyword appears below Blocked Keywords on the Managed Keywords menu.
5. To block additional keywords, repeat steps 2 through 4.
6. To edit a blocked keyword, click the EDIT button next to the blocked keyword you want to
modify, edit the settings on the Add Blocked Keyword menu (see Table 43), and click
SAVE.
7. To delete a blocked keyword, click the X next to the keyword. When the Delete Keyword
Block Rule message appears, click OK to delete the blocked keyword or CANCEL to retain
it. If you clicked OK, the keyword is removed from Blocked Keywords on the Managed
Keywords menu.