SMC2804WBR
BarricadeTM 2.
COPYRIGHT Information furnished by SMC Networks, Inc. (SMC) is believed to be accurate and reliable. However, no responsibility is assumed by SMC for its use, nor for any infringements of patents or other rights of third parties which may result from its use. No license is granted by implication or otherwise under any patent or patent rights of SMC. SMC reserves the right to change specifications at any time without notice. Copyright © 2003 by SMC Networks, Inc.
COMPLIANCES FCC - Class B This equipment has been tested and found to comply with the limits for a Class B digital device, pursuant to Part 15 of the FCC Rules. These limits are designed to provide reasonable protection against harmful interference in a residential installation. This equipment generates, uses, and can radiate radio frequency energy and, if not installed and used in accordance with instructions, may cause harmful interference to radio communications.
Compliances EC Conformance Declaration - Class B SMC contact for these products in Europe is: SMC Networks Europe, Edificio Conata II, Calle Fructuós Gelabert 6-8, 2o, 4a, 08970 - Sant Joan Despí, Barcelona, Spain.
Industry Canada - Class B This digital apparatus does not exceed the Class B limits for radio noise emissions from digital apparatus as set out in the interference-causing equipment standard entitled “Digital Apparatus,” ICES-003 of the Department of Communications.
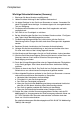
Compliances Wichtige Sicherheitshinweise (Germany) 1. Bitte lesen Sie diese Hinweise sorgfältig durch. 2. Heben Sie diese Anleitung für den späteren Gebrauch auf. 3. Vor jedem Reinigen ist das Gerät vom Stromnetz zu trennen. Verwenden Sie keine Flüssigoder Aerosolreiniger. Am besten eignet sich ein angefeuchtetes Tuch zur Reinigung. 4. Die Netzanschlu ßsteckdose soll nahe dem Gerät angebracht und leicht zugänglich sein. 5. Das Gerät ist vor Feuchtigkeit zu schützen. 6.
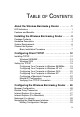
TABLE OF CONTENTS About the Wireless Barricade g Router . . . . . . . . 1 LED Indicators . . . . . . . . . . . . . . . . . . . . . . . . . . . . . . . . . . . . . . 1 Features and Benefits . . . . . . . . . . . . . . . . . . . . . . . . . . . . . . . . 2 Installing the Wireless Barricade g Router . . . . . . 3 Package Contents . . . . . . . . . . . . . . . . . . . . . . . . . . . . . . . . . . . 3 Hardware Description . . . . . . . . . . . . . . . . . . . . . . . . . . . . . . . . . 4 System Requirements .
TABLE OF CONTENTS Setup Wizard . . . . . . . . . . . . . . . . . . . . . . . . . . . . . . . . . . . . . . Time Zone . . . . . . . . . . . . . . . . . . . . . . . . . . . . . . . . . . . Broadband Type . . . . . . . . . . . . . . . . . . . . . . . . . . . . . . . Advanced Setup . . . . . . . . . . . . . . . . . . . . . . . . . . . . . . . . . . . System . . . . . . . . . . . . . . . . . . . . . . . . . . . . . . . . . . . . . . WAN . . . . . . . . . . . . . . . . . . . . . . . . . . . . . . . . . . . . . .
ABOUT THE WIRELESS BARRICADE G ROUTER Congratulations on your purchase of the Wireless Barricade™ g Broadband Router. SMC is proud to provide you with a powerful yet simple communication device for connecting your local area network (LAN) to the Internet. For those who want to surf the Internet at the lowest possible cost, this Router provides a convenient and powerful solution. LED Indicators The Wireless Barricade g Router includes status LED indicators, as described in the following figure and table.
About the Wireless Barricade g Router Features and Benefits 2 • Internet connection to DSL or cable modem via a 10/100 Mbps WAN port • Local network connection via 10/100 Mbps Ethernet ports or 54 Mbps wireless interface (supporting up to 253 mobile users) • 802.11g draft Compliant – interoperable with multiple vendors • Provides seamless roaming within 802.
INSTALLING THE WIRELESS BARRICADE G ROUTER Before installing the Wireless Barricade™ g Broadband Router, verify that you have all the items listed under “Package Contents.” If any of the items are missing or damaged, contact your local SMC distributor. Also be sure that you have all the necessary cabling before installing the Router. After installing the Router, refer to the Web-based configuration program in “Configuring the Wireless Barricade g Router” on page 26 for information on configuring the Router.
Installing the Wireless Barricade g Router Please register on SMC’s Web site at www.smc.com The Wireless Barricade g Router is covered by a limited lifetime warranty. Hardware Description The Router can be connected to the Internet or to a remote site using its RJ-45 WAN port. It can be connected directly to your PC or to a local area network using any of the Fast Ethernet LAN ports. Access speed to the Internet depends on your service type.
Hardware Description (i.e., allowing these ports to be connected to any network device with straight-through cable). These ports can be connected directly to a PC or to a server equipped with an Ethernet network interface card, or to a networking device such as an Ethernet hub or switch. • One RJ-45 port for connection to a DSL or cable modem (WAN). This port also auto-negotiates operating speed to 10/100 Mbps, the mode to half/full duplex, and the pin signals to MDI/MDI-X.
Installing the Wireless Barricade g Router System Requirements You must have an ISP that meets the following minimum requirements: 6 • Internet access from your local telephone company or Internet Service Provider (ISP) using a DSL modem, cable modem, ISDN TA, or PSTN analog modem. You may also have access over the telephone system to an analog modem at another site.
Connect the System Connect the System The Router can be positioned at any convenient location in your office or home. No special wiring or cooling requirements are needed. You should, however comply with the following guidelines: • Keep the Router away from any heating devices. • Do not place the Router in a dusty or wet environment. You should also remember to turn off the power, remove the power cord from the outlet, and keep your hands dry when you install the Router.
Installing the Wireless Barricade g Router 3. Power on: Connect the power adapter to the Router. Internet Internet Access Device Wireless Cable/DSL Broadband Router LAN PWR SMC7004 WLAN WAN 1 2 3 Link Activity AWBR Notebook with Wireless PC Card SOHO Office or Residence Figure 2.
Connect the System Figure 3. Making the LAN Connections Attach to Your Network Using Radio Signals Install a wireless network adapter in each computer that will be connected to the Internet or your local network via radio signals. SMC currently offers several wireless network cards, including the SMC2602W and SMC2632W Wireless cards. Rotate both antennas on the back of the Router to the desired position.
Installing the Wireless Barricade g Router radio link, or access other computers or network resources in the wired LAN infrastructure or over the Internet via the Router. The wireless infrastructure configuration not only extends the accessibility of wireless PCs to the wired LAN, but also doubles the effective wireless transmission range for wireless PCs by retransmitting incoming radio signals through the Router.
Connect the System Attach the Wireless Barricade g Router to the Internet If Internet services are provided through an xDSL or cable modem, use unshielded or shielded twisted-pair Ethernet cable (Category 3 or greater) with RJ-45 plugs to connect the broadband modem directly to the WAN port on the Router. DSL/Cable Modem ISP (Primary) Figure 5.
CONFIGURING CLIENT TCP/IP If you have not previously installed the TCP/IP protocols on your client PCs, refer to the following section. If you need information on how to configure a TCP/IP address on a PC, refer to “Setting Up TCP/IP” on page 15. Installing TCP/IP Windows 95/98/ME 1. Click Start/Settings/Control Panel. 2. Double-click the Network icon and select the Configuration tab in the Network window. 3. Click the Add button. 4. Double-click Protocol.
Installing TCP/IP 5. Select Microsoft in the manufacturers list. Select TCP/IP in the Network Protocols list. Click the OK button to return to the Network window. 6. The TCP/IP protocol will be listed in the Network window. Click OK. The operating system may prompt you to restart your system. Click Yes and the computer will shut down and restart. Windows 2000 1. Click the Start button and choose Settings, then click the Network and Dial-up Connections icon. 2.
Configuring Client TCP/IP 4. Double-click Protocol. 5. Choose Internet Protocol (TCP/IP). Click the OK button to return to the Network window. 6. The TCP/IP protocol will be listed in the Network window. Click OK to complete the installation procedure.
Setting Up TCP/IP Setting Up TCP/IP To access the Internet through the Router, you must configure the network settings of the computers on your LAN to use the same IP subnet as the Router. The default network settings for the Router are: Gateway IP Address: 192.168.2.1 Subnet Mask: 255.255.255.0 Note: These settings may be changed to suit your network requirements, but you must first configure at least one computer as described in this chapter to access the Router’s Web configuration interface.
Configuring Client TCP/IP 3. On the Network window Configuration tab, double-click the TCP/IP entry for your network card. 4. Click the IP Address tab. 5. Click the “Obtain an IP address“ option. 6. Next click on the Gateway tab and verify the Gateway field is blank. If there are IP addresses listed in the Gateway section, highlight each one and click Remove until the section is empty. 7. Click the OK button to close the TCP/IP Properties window.
Setting Up TCP/IP 8. On the Network Properties Window, click the OK button to save these new settings. Note: Windows may ask you for the original Windows installation disk or additional files. Check for the files at c:\windows\options\cabs, or insert your Windows CD-ROM into your CDROM drive and check the correct file location, e.g., D:\win98, D:\win9x. (if D is the letter of your CD-ROM drive). 9. Windows may prompt you to restart the PC. If so, click the Yes button.
Configuring Client TCP/IP Configuring Your Computer in Windows NT 4.0 1. From the Windows desktop click Start/Settings/Control Panel. 2. Double-click the Network icon. 3. Click on the Protocols tab. 4. Double-click TCP/IP Protocol. 5. Click on the IP Address tab. 6. In the Adapter drop-down list, be sure your Ethernet adapter is selected.
Setting Up TCP/IP 7. Click on “Obtain an IP address from a DHCP server”. 8. Click OK to close the window. 9. Windows may copy files and will then prompt you to restart your system. Click Yes and your computer will shut down and restart. Obtain IP Settings From Your Wireless Barricade g Router Now that you have configured your computer to connect to the Router, it needs to obtain new network settings.
Configuring Client TCP/IP 4. Type EXIT and press to close the Command Prompt window. Configuring Your Computer in Windows 2000 1. Access your Network settings by clicking Start, then choose Settings and then select Control Panel. 2. In the Control Panel, locate and double-click the Network and Dial-up Connections icon. 3. Locate and double-click the Local Area Connection icon for the Ethernet adapter that is connected to the Router.
Setting Up TCP/IP 5. Select “Obtain an IP address automatically” to configure your computer for DHCP. Click the OK button to save this change and close the Properties window. 6. Click the OK button again to save these new changes. 7. Reboot your PC. 8. To obtain new network settings see “Obtain IP Settings from Your Wireless Barricade g Router” on page 17. Configuring Your Computer in Windows XP The following instructions assume you are running Windows XP with the default interface.
Configuring Client TCP/IP 3. the Local Area Connection Properties box, verify the box next to Internet Protocol (TCP/IP) is checked. Then highlight the Internet Protocol (TCP/IP), and click the Properties button. 4. Select “Obtain an IP address automatically” to configure your computer for DHCP. Click the OK button to save this change and close the Properties window. 5. Click the OK button again to save these new changes. 6. Reboot your PC.
Setting Up TCP/IP Manual IP Configuration 1. Check Specify an IP address on the IP Address tab. Enter an IP address based on the default network 192.168.2.x (where x is between 2 and 254), and use 255.255.255.0 for the subnet mask. 2. In the Gateway tab, add the IP address of the Router (default: 192.168.2.1) in the New gateway field and click Add.
Configuring Client TCP/IP 3. On the DNS Configuration tab, add the IP address for the Router and click Add. This automatically relays DNS requests to the DNS server(s) provided by your ISP. Otherwise, add specific DNS servers into the DNS Server Search Order field and click Add. 4. After finishing TCP/IP setup, click OK, and then reboot the computer. After that, set up other PCs on the LAN according to the procedures described above.
Setting Up TCP/IP Pinging 192.168.2.1 with 32 bytes of data: Request timed out. there may be something wrong in your installation procedure. Check the following items in sequence: 1. Is the Ethernet cable correctly connected between the Router and the computer? The LAN LED on the Router and the Link LED of the network card on your computer must be on. 2. Is TCP/IP properly configured on your computer? If the IP address of the Router is 192.168.2.1, the IP address of your PC must be from 192.168.2.2 - 192.
CONFIGURING THE WIRELESS BARRICADE G ROUTER The Wireless Barricade g Router can be configured by any Java-supported browser including Internet Explorer 4.0 or above, or Netscape Navigator 4.0 or above. Using the Web management interface, you can configure the Router and view statistics to monitor network activity. Note: Before you attempt to configure your router, if you have access to the Internet please visit www.smc.
Disable Proxy Connection Disable Proxy Connection You will also need to verify that the HTTP Proxy feature of your web browser is disabled. This is so that your web browser will be able to view the Router configuration pages. The following steps are for Internet Explorer and for Netscape. Determine which browser you use and follow the appropriate steps. Internet Explorer (5 or above) 1. Open Internet Explorer. Click Tools, and then select Internet Options. 2.
Configuring the Wireless Barricade g Router Netscape (4 or above) 1. Open Netscape. Click Edit, and then select Preferences. 2. In the Preferences window, under Category, double-click Advanced, then select the Proxies option. 3. Check “Direct connection to the Internet.” 4. Click the OK button to save the changes. To access the Router’s management interface, enter the Router IP address in your Web browser http://192.168.2.1. Then click LOGIN. (By default, there is no password.
Navigating the Web Browser Interface Navigating the Web Browser Interface The Router’s management interface features a Setup Wizard and an Advanced Setup section. Use the Setup Wizard if you want to quickly set up the Router for use with a cable modem or DSL modem. Advanced setup supports more advanced functions like hacker attack detection, IP and MAC address filtering, intrusion detection, virtual server setup, virtual DMZ hosts, and other advanced functions.
Configuring the Wireless Barricade g Router Setup Wizard Time Zone Click on the Setup Wizard picture. The first item in the Setup Wizard is Time Zone setup. For accurate timing of client filtering and log events, you need to set the time zone. Select your time zone from the drop-down list, and click NEXT.
Setup Wizard Broadband Type Select the type of broadband connection you have. For a cable modem connection see the following page. For a Fixed-IP xDSL connection see “Fixed-IP xDSL” on page 32, and for a PPPoE xDSL connection, see “PPPoE” on page 32. Cable Modem After selecting Cable Modem as the Broadband Type, a message will appear stating that your data has been successfully saved. Note: Select Home to return to the home page, then select Advanced Settings/WAN to configure the required parameters.
Configuring the Wireless Barricade g Router Fixed-IP xDSL Some xDSL Internet Service Providers may assign a fixed (static) IP address. If you have been provided with this information, choose this option and enter the assigned IP address, gateway IP address, DNS IP addresses, and subnet mask. Click FINISH to complete the setup. PPPoE Enter the PPPoE User Name and Password assigned by your Service Provider. The Service Name is normally optional, but may be required by some service providers.
Advanced Setup Advanced Setup Use the Web management interface to define system parameters, manage and control the Router and its ports, or monitor network conditions. The following table outlines the selections available from this program. Menu Description System Sets the local time zone, the password for administrator access, and the IP address of a PC that will be allowed to manage the Router remotely.
Configuring the Wireless Barricade g Router Menu Description Status Provides WAN connection type and status, firmware and hardware version numbers, system IP settings, as well as DHCP, NAT, and Firewall information. Displays the number of attached clients, the firmware versions, the physical MAC address for each media interface, and the hardware version and serial number. Shows the security and DHCP client log. System Time Zone Sets the time zone for the Router.
Advanced Setup Password Settings Use this menu to restrict access based on a password. By default, there is no password. For security you should assign one before exposing the Router to the Internet. Passwords can contain from 3–12 alphanumeric characters and are not case sensitive. Note: If your password is lost, or you cannot gain access to the user interface, press the Reset button on the rear panel (holding it down for at least five seconds) to restore the factory defaults.
Configuring the Wireless Barricade g Router Remote Management Remote Management allows a remote PC to configure, manage, and monitor the Router using a standard Web browser. Check Enable and enter the IP address of the remote host. Click APPLY. Note: If you specify 0.0.0.0 as this IP address, any host can manage the Router.
Advanced Setup Dynamic IP The Host Name is optional, but may be required by some ISPs. The default MAC address is set to the WAN’s physical interface on the Router. Use this address when registering for Internet service, and do not change it unless required by your ISP. If your ISP used the MAC address of an Ethernet card as an identifier when first setting up your broadband account, only connect the PC with the registered MAC address to the Router and click the Clone MAC Address button.
Configuring the Wireless Barricade g Router Point-to-Point Over Ethernet (PPPoE) Enter the PPPoE User Name and Password assigned by your Service Provider. The Service Name is normally optional, but may be required by some service providers. The MTU (Maximum Transmission Unit) governs the maximum size of the data packets. Leave this on the default value (1454) unless you have a particular reason to change it.
Advanced Setup Point-to-Point Tunneling Protocol (PPTP) Point-to-Point Tunneling Protocol (PPTP) can be used to join different physical networks using the Internet as an intermediary. Using the above screen allows client PCs to establish a normal PPTP session and provides hassle-free configuration of the PPTP client on each client PC. Enter the assigned IP address, subnet mask and default gateway IP address (usually supplied by your ISP), and then the PPTP User ID, Password and PPPTP Gateway IP address.
Configuring the Wireless Barricade g Router Static IP Address If your Internet Service Provider has assigned a fixed IP address, enter the assigned address and subnet mask for the Router, then enter the gateway address of your ISP. You may need a fixed address if you want to provide Internet services, such as a Web server or FTP server.
Advanced Setup DNS Domain Name Servers map numerical IP addresses to the equivalent domain name (e.g., www.smc.com). Your ISP should provide the IP address of one or more domain name servers. Enter those addresses in this screen.
Configuring the Wireless Barricade g Router LAN • LAN IP – Use the LAN menu to configure the LAN IP address for the Router and to enable the DHCP server for dynamic client address allocation. • Set a period for the lease time if required. For home networks this may be set to Forever, which means there is no time limit on the IP address lease. • IP Address Pool – A dynamic IP start address may be specified by the user, e.g. 192.168.2.100 (default value).
Advanced Setup Wireless To configure the Router as a wireless access point for wireless clients (either stationary or roaming), all you need to do is define the radio channel, the Service Set identifier (SSID), and encryption options. Channel and SSID You must specify a common radio channel and SSID (Service Set ID) to be used by the Router and all of your wireless clients. Be sure you configure all of your clients to the same values. ESSID: The Service Set ID.
Configuring the Wireless Barricade g Router Transmission Rate: Set the data rate transmitted from the Router. The lower the data rate, the longer the transmission distance. (Default: Fully Automatic.) Channel: The radio channel through which the Router communicates with PCs in its BSS. (Default: “Auto”) Note: The available channel settings are limited by local regulations.
Advanced Setup If you are transmitting sensitive data across wireless channels, you should enable Wired Equivalent Privacy (WEP) encryption. Encryption requires you to use the same set of encryption/decryption keys for the Router and all of your wireless clients. You can choose between standard 64-bit or the more robust 128-bit encryption. You may automatically generate encryption keys or manually enter the keys. For automatic 64-bit security, enter a passphrase and click Generate.
Configuring the Wireless Barricade g Router If you use encryption, configure the same keys used for the Router on each of your wireless clients. Note that Wired Equivalent Privacy (WEP) protects data transmitted between wireless nodes, but does not protect any transmissions over your wired network or over the Internet.
Advanced Setup Network Address Translation (NAT) From this section you can configure the Address Mapping, Virtual Server, and Special Application features that provide control over the port openings in the router’s firewall. This section can be used to support several Internet based applications such as VPN Address Mapping Allows one or more public IP addresses to be shared by multiple internal users. Enter the Public IP address you wish to share into the Global IP field.
Configuring the Wireless Barricade g Router Virtual Server If you configure the Router as a virtual server, remote users accessing services such as Web or FTP at your local site via public IP addresses can be automatically redirected to local servers configured with private IP addresses. In other words, depending on the requested service (TCP/UDP port number), the Router redirects the external service request to the appropriate server (located at another internal IP address).
Advanced Setup Special Applications Some applications, such as Internet gaming, videoconferencing, Internet telephony and others, require multiple connections. These applications cannot work with Network Address Translation (NAT) enabled. If you need to run applications that require multiple connections, use the following screen to specify the additional public ports to be opened for each application. Specify the public port number normally associated with an application in the Trigger Port field.
Configuring the Wireless Barricade g Router For a full list of ports and the services that run on them, see www.iana.org/assignments/port-numbers. Firewall The Router firewall can provide access control of connected client PCs, block common hacker attacks, including IP Spoofing, Land Attack, Ping of Death, IP with zero length, Smurf Attack, UDP port loopback, Snork Attack, TCP null scan, and TCP SYN flooding.
Advanced Setup 51
Configuring the Wireless Barricade g Router MAC Filtering Table The MAC Filtering feature of the Router allows you to control access to your network to up to 32 clients based on the MAC (Media Access Control) Address of the client machine. This ID is unique to each network adapter. If the MAC address is listed in the table, that client machine will have access to the network.
Advanced Setup URL Blocking To configure the URL Blocking feature, use the table below to specify the websites (www.somesite.com) and/or keywords you want to filter on your network. To complete this configuration, you will need to create or modify an access rule in “Access Control” on page 50. To modify an existing rule, click the Edit option next to the rule you want to modify. To create a new rule, click on the Add PC option.
Configuring the Wireless Barricade g Router Schedule Rule The Schedule Rule feature allows you to configure specific rules based on Time and Date. These rules can then be used to configure more specific Access Control. Enables Schedule-based Internet access control. 1. Click Add Schedule Rule. 2. Define the settings for the schedule rule (as shown on the following screen). 3. Click OK and then click the APPLY button to save your settings.
Advanced Setup Intrusion Detection 55
Configuring the Wireless Barricade g Router 56 • SPI and Anti-DoS firewall protection (Default: Enabled) –The Intrusion Detection Feature limits access for incoming traffic at the WAN port. When the SPI feature is turned on, all incoming packets will be blocked except for those types marked with a check in the Stateful Packet Inspection section. • RIP Defect (Default: Enabled) – If an RIP request packet is not replied to by the Router, it will stay in the input queue and not be released.
Advanced Setup • Stateful Packet Inspection – This is called a “stateful” packet inspection because it examines the contents of the packet to determine the state of the communications; i.e., it ensures that the stated destination computer has previously requested the current communication. This is a way of ensuring that all communications are initiated by the recipient computer and are taking place only with sources that are known and trusted from previous interactions.
Configuring the Wireless Barricade g Router Parameter Defaults Description Fragmentation half-open wait 10 sec Configures the number of seconds that a packet state structure remains active. When the timeout value expires, the router drops the unassembled packet, freeing that structure for use by another packet. TCP SYN wait 30 sec Defines how long the software will wait for a TCP session to synchronize before dropping the session.
Advanced Setup Parameter Defaults Description Incomplete TCP/UDP sessions detect sensitive time period 300 msec Length of time before an incomplete TCP/UDP session is detected as incomplete. Maximum half-open fragmentation packet number from same host 30 Maximum number of half-open fragmentation packets from the same host. Half-open fragmentation detect sensitive time period 1sec Length of time before a half-open fragmentation session is detected as half-open.
Configuring the Wireless Barricade g Router (Demilitarized Zone) may expose your local network to a variety of security risks, so only use this option as a last resort. DDNS (Dynamic DNS) Settings Domain Name – A series of alphanumeric strings separated by periods, that is the address of a the Router network connection and that identifies the owner of the address. Dynamic DNS provides users on the Internet with a method to tie their domain name(s) to computers or servers.
Advanced Setup This DNS feature is powered by TZO.com. With a DDNS connection you can host your own web site, email server, FTP site, and more at your own location even if you have a dynamic IP address. (Default: Disable) UPnP (Universal Plug and Play) Setting Enable UPnP by checking ON in the screen above. UPnP allows the device to automatically: • dynamically join a network • obtain an IP address • convey its capabilities and learn about the presence and capabilities of other devices.
Configuring the Wireless Barricade g Router Tools Use the Tools menu to backup the current configuration, restore a previously saved configuration, restore factory settings, update firmware, and reset the Router. Tools - Configuration Tools • 62 • Backup – saves the Router’s configuration to a file. • Restore – restores settings from a saved backup configuration file. • Restore to factory defaults – restores the Router settings back to the factory default original.
Advanced Setup Tools - Firmware Upgrade Use this screen to update the firmware or user interface to the latest versions. Download the upgrade file from the SMC Web site (www.smc.com) and save it to your hard drive. In the Upgrade Target field, choose Firmware. Then click Browse to look for the previously downloaded file. Click APPLY. Check the Status page Information section to confirm that the upgrade process was successful.
Configuring the Wireless Barricade g Router Tools - Reset Click APPLY to reset the Router. The reset will be complete when the power LED stops blinking. Note: 64 If you use the Reset button on the front panel, the Router performs a power reset. If the button is held depressed for over five seconds, all the LEDs will illuminate and the factory settings will be restored.
Advanced Setup Status The Status screen displays WAN/LAN connection status, firmware, and hardware version numbers, illegal attempts to access your network, as well as information on DHCP clients connected to your network. The following items are included on this screen: Section Description INTERNET Displays WAN connection type and status. GATEWAY Displays system IP settings, as well as DHCP and Firewall status.
TROUBLESHOOTING The information outlined in this section describes some useful steps for getting your computer and the Router online. A. Verify your connection to the Router If you are unable to access the Router’s web-based administration pages then you may not be properly connected or configured. The screen shots in this section were taken on a Windows 2000 machine, but the same steps will apply to Windows 95/98/Me/XP. To determine your TCP/IP configuration status please follow the steps below: 1.
Troubleshooting If you have an IP address that starts with 169.254.XXX.XXX then see the next section. If you have another IP address configured, then see section C. B. I am getting an IP Address that starts with 169.254.XXX.XXX If you are getting this IP Address, then you need to check that you are properly connected to the Router. Confirm that you have a good link light on the Router for the port this computer is connected to. If not, please try another cable.
Troubleshooting 3. Then type ipconfig/renew. D. The 10/100 LED does not light after a connection is made. 1. Check that the host computer and hub are both powered on. 2. Be sure the network cable is connected to both devices. 3. Verify that Category 5 cable is used if you are operating at 100 Mbps, and that the length of any cable does not exceed 100 m (328 ft). 4. Check the network card connections. 5. The 10BASE-T/100BASE-TX hub/switch port, network card, or cable may be defective.
SPECIFICATIONS Below is an outline of the Technical Specifications for the SMC2804WBR. Standards IEEE 802.3 10BASE-T Ethernet IEEE 802.3u 100BASE-TX FastEthernet IEEE 802.11b IEEE 802.
Specifications Input Power 9 V, 1 A Maximum Current 0.04 A RMS max. @ 110V/240V Power Consumption 5 Watts max.
FOR TECHNICAL SUPPORT, CALL: From U.S.A. and Canada (24 hours a day, 7 days a week) (800) SMC-4-YOU; Phn: (949) 679-8000; Fax: (949) 679-1481 From Europe (8:00 AM - 5:30 PM UK Time) 44 (0) 118 974 8700; Fax: 44 (0) 118 974 8701 INTERNET E-mail addresses: techsupport@smc.com european.techsupport@smc-europe.com Driver updates: http://www.smc.com/index.cfm?action=tech_support_drivers_downloads World Wide Web: http://www.smc.com/ http://www.smc-europe.com/ For Literature or Advertising Response, Call: U.S.A.