
Use and Care Manual


2-2
2.2 Set Up/Assembly
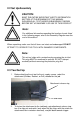
CAUTION:
READ THE ENTIRE IMPORTANT SAFETY INFORMATION
SECTION AT THE BEGINNING OF THIS MANUAL
INCLUDING ALL TEXT UNDER SUBHEADINGS THEREIN
BEFORE SET UP/ASSEMBLY OR USE OF THIS PRODUCT.
Note:
For additional information regarding the location of parts listed
in the following pages, refer to the Assembly Diagram near the
end of this manual.
When unpacking, make sure that all items are intact and undamaged. DO NOT
ATTEMPT TO OPERATE THIS TOOL WITH DAMAGED COMPONENTS.
Note:
This air tool ships with a protective plug covering the air inlet.
This plug MUST be removed to operate. DO NOT attempt
assembly without removing the protective plug first.
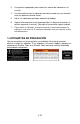
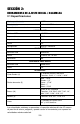
2.3 Tool Set Up
1. Before attaching the air tool to the air supply source, select the
attachment (Grinder, Ratchet, or Drill) needed for the job.
2. To fasten the attachment to the tool body, grip attachment release ring,
turn it to align pin and notch (only when the pin aligns with the notch can
attachments be inserted or removed), and pull back towards trigger.
Attachment release ring
Pin and notch