
Installation Guide

3
General Information
III. INSTALLATION
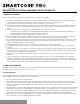
Tools: Tape Measure, Utility Knife, Jigsaw, Tapping Block or Rubber Mallet, Pull Bar, 1/4" Spacers, T-Square, Safety
Glasses, Broom or Vacuum and, if necessary, tools for subfloor repair.
Floating Installation
WPC / SPC plank flooring is designed to be installed utilizing the floating method. Proper expansion space 1/4” (6.35 mm) is required.
Undercut all doorjambs. Do not fasten wal
l moldings and or transition strips to the planks.
Glue Down Installation: WPC / SPC products are approved for glue down installation over approved wood and concrete substrates.
Follow adhesive label application instructions. Maintain 1/4” (6.35 mm) perimeter expansion space. Refer to adhesive label for moisture
limits of the adhesive.
With IXPE/EVA attached pad: Shaw T-180, Shaw 200 & Shaw DP99
Without attached pad: Shaw 200 (residential/multi-family), Shaw 4100 (commercial, rolling load exposure & high traffic areas)
Cork backed products: Shaw 200, Shaw 1500, Shaw 4100 & Shaw 4151
Tile patterns must be installed in a staggered (offset) brick pattern. Minimum 1/3 offset 1/2 offset is preferred.
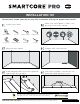
1. Before you start with the installation, it is important to determine the layout of the flooring. Proper planning and layout will
prevent having narrow tile widths at wall junctures or very short length pieces at the end of rows.
2. As with all tile products, install the tiles parallel to the longest exterior wall.
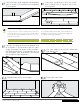
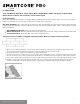
3. Determine if the starter row will need to be cut. (*In order to have a balanced
floor layout, the width of the tile for the first and
last row may need to be cut. The cut width of the tile should be ½ the width of the tile. If the first row of tiles does not need to
be trimmed in width, it will be necessary to cut off the unsupported tongue so that a clean, solid edge shows towards the wall.
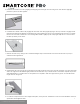
4. Installation of the product must start from the left side of the room, working to th
e right when working in front of the tiles or
facing the starting wall. Use spacers along the walls to maintain proper expansion space (5/16”) and align the first tile.
3
For reference purposes only if printed or downloaded.