
Installation Guide

2
SMARTCORE™ INSTALLATION INSTRUCTIONS (V.1.1)
PRE-INSTALLATION SUBFLOOR REQUIREMENTS
All Subfloors must be:
• Dry
• Structurally sound
• Clean: Thoroughly swept and free of all debris
• Level: Flat to 3/16” per 10-foot radius
Wood subfloors must be dry and well secured. Nail or screw every 6” along joists to avoid squeaking. If not level, sand down high
spots and fill low spots with a Portland Based leveling patch.
Concrete subfloors must be fully cured, at least 60 days old, and should have minimum 6-mil polyfilm between concrete and ground.
Subfloor should be flat and level within 3/16” per 10’ radius. If necessary grind high spots down and level low spots with a Portland
leveling compound.
Ceramic Tile, resilient tile and sheet vinyl must be well-bonded to subfloor, in good condition, clean and level. Do not sand existing
vinyl floors, as they may contain asbestos.
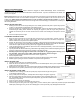
INSTALLATION TOOLS
For all installation methods:
• Tape measure
• Pencil
• Chalk line
• Circular saw
• 3M
Scotch-Blue™ 2080 tape
• Rubber mallet
• ¼” spacers
Acceptable subfloor types:
• CDX Underlayment Grade Plywood (at least ½” thick)
• Underlayment grade particleboard
• OSB (at least ¾” thick)
• Concrete slab
• Existing wood or laminate floor
• Ceramic tile
• Resilient tile & sheet vinyl
STARTING YOUR INSTALLATION
Because houses and buildings expand and contract, and are constantly settling, so it is recommended to leave ¼” between the
perimeter walls and any adjacent hardwood floor.
Work from several open boxes of flooring and “dry lay” the floor before permanently laying the floor. This will allow you to select the
varying textures, colors, and sheens, and to arrange them in a harmonious pattern. Remember, it is the installers’ responsibility to
determine the expectations of what the finished floor will look like with the end user first and then to cull out pieces.
Begin installation next to an outside wall. This is usually the straightest and best reference for establishing a straight working line.
Establish this line by measuring an equal distance from the wall at both ends and snapping a chalk line. The distance you measure
from the wall should be the width of a plank. You may need to scribe cut the first row of planks to match the wall in order to make a
straight working line if the wall is out of straight.
You may want to position a few rows before starting installation to confirm your layout decision and working line. When laying planks,
stagger end joints from row to row by at least 8” (20 cm). When cutting the last plank in a row to fit, you can use the cut-off end to begin
the next row. If cut-off end is less than 8”, discard it and instead cut a new plank at a random length and use it to start the next row.
Always begin each row from the same side of the room.