
User manual
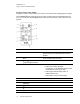

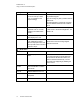
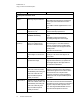
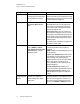
Table Of Contents
- Contents
- Important information
- Chapter 1: About your interactive whiteboard system
- Chapter 2: Installing your interactive whiteboard system
- Chapter 3: Using your interactive whiteboard system
- Appendix 4: Integrating other devices
- Chapter 5: Maintaining your interactive whiteboard system
- Chapter 6: Troubleshooting your interactive whiteboard system
- Before you start
- Determining your interactive whiteboard system’s status
- Resolving interactive whiteboard issues
- Resolving projector issues
- Resolving ECP issues
- Accessing the service menu
- Transporting your interactive whiteboard system
- Appendix A: Remotely managing your system through a network interface
- Appendix B: Remotely managing your system through an RS-232 serial interface
- Connecting your room control system to the ECP
- Projector programming commands
- Appendix C: Remote control code definitions
- Appendix D: Hardware environmental compliance
- Index
C H A P T E R 3
Using your interactive whiteboard system
14 smarttech.com/kb/170401
N O T E
The Mute, Volume Up and Volume Down buttons work only if there is an audio source connected
to the projector for the currently selected video input source.
Adjusting projector settings
The remote control’s Menu button enables you to access the on-screen display to adjust the projector
settings.
I M P O R T A N T
Keep your remote control in a safe place because there is no other way to access menu options.
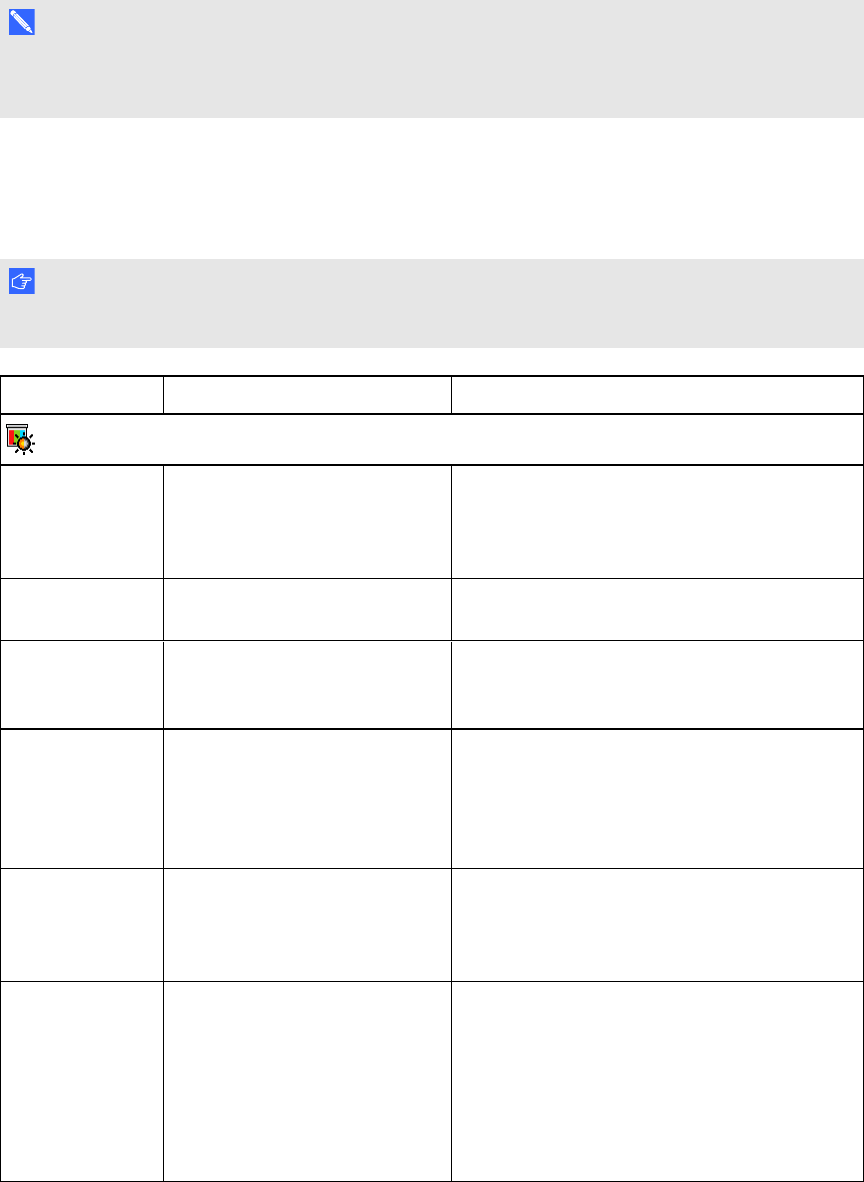
Setting Use Notes
Image Adjustment menu
Display Mode Indicates the projector’s display
output (SMARTPresentation,
BrightRoom, DarkRoom,
sRGB and User).
The default is SMARTPresentation.
Brightness Adjusts projector brightness
from 0 to 100.
The default is 50.
Contrast Adjusts the difference between
the lightest and darkest parts
of the image from 0 to 100.
The default is 50.
Frequency Adjusts the display data
frequency of the projected
image from -5 to 5 to match the
frequency of your computer’s
graphics card.
The default is 0.
This setting applies to VGA inputs only.
Tracking Synchronizes your projector’s
display timing with your
computer’s graphics card from 0
to 63.
This setting applies to VGA inputs only.
H-Position Moves the horizontal position of
the source video left or right
from 0 to 100 (relative to the
projected image).
Don’t adjust this setting unless you’re advised
to by SMARTSupport.
Apply this setting only after you make all boom
adjustments.
This setting applies to VGA inputs only and is
useful in situations where the source video is
cut off.