Configuration and User’s Guide Unifi™ 45 Projector Retrofit Kit for SMART Board™ 500 Series Interactive Whiteboards
Registration Benefits If you register your SMART product, we’ll notify you of new features and software upgrades. Register online at www.smarttech.com/registration. Keep the following information available, in case you need to contact Technical Support: Serial Number Date of Purchase FCC Warning This equipment has been tested and found to comply with the limits for a Class A digital device, pursuant to Part 15 of the FCC Rules.
Important Information Read This Section First IMPORTANT SMART Technologies frequently updates this document to provide accurate support. For the most recent version of this guide, see document 125960 on the SMART technical support website. NOTE: If you own a SMART product other than a Unifi™ 45 projector retrofit kit for SMART Board 500 series interactive whiteboards, refer to the installation manual that came with your product for relevant warnings and maintenance instructions.
Safety Warnings WARNING ii • Failure to follow the installation instructions included in this manual and other guides packaged with your Unifi 45 projector retrofit kit could result in personal injury or damage to the product. • Two people are required to mount the projector and the interactive whiteboard on a wall because they might be too heavy for one person to maneuver onto their wall-mounting brackets.
WARNING 99-00881-20 A0 • If the lamp has shattered or burst, do not touch the glass fragments because they might cause injury. Leave and then ventilate the area where the lamp shattered or burst. Wash your hands thoroughly if you have come into contact with lamp debris. Thoroughly clean the area around the projector, and discard any edible items placed in that area because they might be contaminated. • If the lamp has shattered or burst, call a SMART authorized service representative for instructions.
Other Precautions To ensure operating safety and to avoid product damage, observe the following precautions. • Never operate this unit immediately after moving it from a cold location to a warm location. When the unit is exposed to such a change in temperature, moisture might condense on the lens and crucial internal parts. To prevent the unit from possible damage, do not use it for at least two hours when there is an extreme or sudden change in temperature.
Table of Contents Important Information i Read This Section First................................................................................................................................... i Safety Warnings ............................................................................................................................................. ii Other Precautions ....................................................................................................................................
Customer Support 47 Online Support .............................................................................................................................................47 Training ........................................................................................................................................................47 Contacting SMART Technical Support .........................................................................................................47 General Inquiries.......
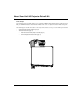
About Your Unifi 45 Projector Retrofit Kit In This Chapter Your Unifi 45 projector retrofit kit enables you to combine the SMART Unifi 45 wall mounted short-throw projector with your SMART Board 580 or 560 interactive whiteboard to create a complete interactive whiteboard system. The following topics describe the features of the components and accessories you received with your retrofit kit.
Unifi 45 Projector System Features The Unifi 45 projector system includes a short throw, high-offset projector for use with your SMART Board 500 series interactive whiteboard, an Extended Control Panel (ECP) and a sturdy support system for classroom environments. This projector system is easy to install, use, service and upgrade.
Standard Accessories SMART provides the following accessories with your Unifi 45 projector retrofit kit. If you need to purchase replacements, contact your authorized SMART reseller. Extended Control Panel (ECP) and Cable The new interactive whiteboard system ECP features connectors for three inputs and control for four inputs, including the direct HD-DB15 RGB connection to the projector. Direct inputs supported include: • a single HD-DB15 (RGB) input connector and associated audio (3.
4 About Your Unifi 45 Projector Retrofit Kit 99-00881-20 A0
Before Installing Your Unifi 45 Projector Retrofit Kit In This Chapter For instructions on installing your Unifi 45 projector retrofit kit, consult the installation documents found in your Unifi 45 projector boxes. Use these materials, including the projector and ECP mounting templates, to install your system. The following sections in this chapter include additional information, optional installation procedures and tips to consider before you install your SMART Board interactive whiteboard system.
Environmental Requirements Before installing your Unifi 45 projector retrofit kit, review the following environmental requirements. CAUTION • Never operate this unit immediately after moving it from a cold location to a warm location. When the unit is exposed to such a change in temperature, moisture might condense on the lens and crucial internal parts. To prevent the unit from possible damage, do not use it for at least two hours when there is an extreme or sudden change in temperature.
IMPORTANT Using the Unifi 45 projector system near a TV or radio might cause interference to the images or audio sound. If this happens, move the TV or radio away from the projector. Before Installing Your SMART Board Interactive Whiteboard System Choose a location for your SMART Board interactive whiteboard system that’s far from bright light sources, such as a window or overhead lighting.
After Installing Your Interactive Whiteboard System After you install the Unifi 45 projector with your SMART Board 500 eries interactive whiteboard, you must adjust the image alignment and focus. Adjusting Image Alignment When you use standard projectors, keystone errors occur when the projected image isn’t perpendicular to the screen.
The image appears taller on the left side when the distance from the projector mirror to the right of the screen is shorter than the distance to the left of the screen. The image appears taller at the right side of the image when the distance from the projector mirror to the left of the screen is shorter than the distance to the right of the screen. Position the centre of the interactive whiteboard so that it aligns with the centre of the projector, as illustrated in the installation document.
Measure this distance. Lowest Point of Projector Boom 3. Top Edge of Frame If the distance isn’t correct, adjust the center hex screw at the base of the projector boom to raise or lower the angle of the boom. Turn Clockwise to Lower the Boom Base Plate on Wall Projector Boom Turn Counterclockwise to Raise the Boom Center Hex Screw TIP 10 You may find it easier to turn the height adjustment screw if an assistant lifts up the installed boom.
To adjust the mirror’s depth and vertical angle for alignment NOTE: This procedure sets the mirror to a neutral position. However, further adjustments will be required. 1. Remove the boom’s front cover. Boom Front Cover You can now access the adjustment screws.
2. Using the included hex key, adjust hex screw 3 to adjust the mirror’s depth for your model of interactive whiteboard, as shown. Model 560: 11/16" (18 mm) Model 580: 5/8" (15 mm) 3. Adjust thumbscrew 1 to center the mirror’s vertical angle, as shown. Angle Too Low Angle Too High Make sure that the mirror isn’t angled too low or too high.
To adjust the horizontal angle for alignment 1. Adjust thumbscrew 2 to center the mirror’s horizontal angle, as shown. NOTE: These images show the mirror from below. Make sure that the mirror isn’t angled too far left or too far right.
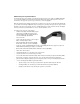
Focusing and Aligning the Image To focus and align the image, project either a computer image, or the projector’s SMART Technologies logo, onto your SMART Board interactive whiteboard. To display the SMART Technologies logo If you don’t have a computer connected and you don’t see the SMART Technologies logo, perform the following steps to display the logo. 1. Point the remote control at the infrared (IR) sensor on the front of the projector, as shown, and then press the MENU button. 2.
To perform an image alignment Use the following procedure to obtain a rectangular image that is slightly smaller than the interactive whiteboard’s screen. NOTES • We recommend that you project a computer image while performing the following steps. If you do not have a computer, use the projector’s MENU (see previous instructions) to change the background to blue so that you can see the full projector image clearly.
3. Adjust the center hex screw at the projector boom’s base to adjust the vertical keystone until the left and right side of the image are parallel. Use in combination with thumbscrew 1 shown in the following steps. Projector Boom Center Hex Screw NOTE: When you adjust the center hex screw, the top of the image moves up and down slightly and the bottom of the image’s width changes. 4. Rotate thumbscrew 1 until the left and right sides of the image are parallel.
6. Use the included hex key to adjust hex screw 3 to change the size of the image. Hex Screw 3 NOTE: Adjusting this screw may affect the other adjustments. 7. Repeat steps 1 through 6, using smaller increments. Adjust the image so that the top corners of the projected image fit into the top corners of the interactive whiteboard’s screen. 8. When you are finished adjusting the image size, adjust the focus if necessary.
18 Before Installing Your Unifi 45 Projector Retrofit Kit 99-00881-20 A0
Connecting Your Interactive Whiteboard System In this Chapter When you connect a computer with SMART Notebook software, you can display and interact with Ink Aware programs on your SMART Board interactive whiteboard system. After you connect the video output of a hardware device such as a VCR or DVD player to the Extended Control Panel (ECP), you can display this video signal on your system.
Connecting Your Computers to the Interactive Whiteboard System You must connect your computers’ video and audio outputs to your Unifi 45 projector or your Extended Control Panel (ECP). Use only one set of the following instructions for your specific installation. Connecting Your Host Computer’s Audio/Visual Outputs to the Projector Inputs IMPORTANT • Install your host computer’s video output directly to your Unifi 45 projector and not to the ECP.
Connecting Audio/Visual Outputs from Your Guest Computer to Your Interactive Whiteboard System’s ECP Input IMPORTANT It is recommended that you reserve the VGA connector on the ECP to install your guest computer’s video output. If you will not have guest computers, you can use the VGA connector on the ECP to install your host computer’s video output. To connect your guest computer’s video or audio output to your ECP input 1.
Connecting Peripheral Visual or Audio-Visual Devices To connect a DVD player, VCR, document camera, digital camera or other visual or audio-visual peripherals to the SMART Board interactive whiteboard system, you must connect your peripheral’s video and audio outputs to the ECP. You can have up to three peripheral devices and a host computer connected at one time.
Using Your Interactive Whiteboard System In This Chapter This chapter describes the basic operation of your interactive whiteboard system, how to retrieve system information and how to access the projector’s image adjustment options.
Using Your Extended Control Panel (ECP) Your ECP includes a Power button and four Input Selection buttons. The ECP enables you to connect up to three peripheral devices and one host computer at the same time. To power up your interactive whiteboard system and select an input 1. Press the ECP’s Power button or an Input Selection button to turn the system on. 2. Press an Input Selection button to change the video source.
Using Your Remote Control The Unifi 45 projector system remote control enables you to open on-screen projector menus and change the projector settings. You can also use the remote control’s On/Standby button to turn the projector system on or off. The adjustment options are accessible from the remote control’s MENU button. To switch between menu headings, press the left To access a menu option, press the up and right or down buttons. button and choose the relevant menu option.
Adjusting Your Projector Settings Image Adjustment Options Contrast This option adjusts projector contrast, from -16 to 16. Brightness This option adjusts projector brightness, from -16 to 16. Color, Tint and Sharpness Use these options to adjust your NTSC, SECAM or PAL video signal. (You can’t use these options to change your computer RGB signal settings.) Picture Mode This option adjusts the projector output to Bright, Standard and True Color modes.
Setting Display Screen Size This option adjusts the projector picture size. Language Support Projector menu support is available in English (default), French, German, Italian, Spanish, Portuguese, Russian, Swedish, Turkish, Polish, Norwegian, Finnish, Czech, Hungarian, Greek, Danish, Dutch, Romanian, Japanese, modern Chinese, traditional Chinese and Korean.
Power On This option enables you to set the Power On setting to Manual (recommended) or Auto. Selecting Auto automatically starts up the projector when the main power is activated. Default Setting 2 Projection Mode This option enables you to choose from various projection positions. The default setting is applied at the factory. Do not adjust this option unless advised to do so by a certified SMART technical support representative.
Lamp Reset Count This field shows the number of times the Lamp Time has been reset. Total Time This field shows your interactive whiteboard system’s operating time since initial startup. Version This field shows your projector firmware version.
30 Using Your Interactive Whiteboard System 99-00881-20 A0
Maintaining Your Unifi 45 Projector System In This Chapter This chapter describes methods to prevent damage to your Unifi 45 projector system and explains how to properly clean and care for it. • Cleaning Your Unifi 45 Projector (this page) • Replacing Your Projector Lamp (page 32) • Transporting Your Projector System (page 35) Cleaning Your Unifi 45 Projector WARNING Cleaning a boom-mounted projector might result in a fall and injury.
Replacing Your Projector Lamp If a lamp fails or if a replacement message appears on the screen, a qualified person can replace the projector lamp. Do not access the service panel without a replacement lamp and instructions in hand. WARNING 32 • If the projector is mounted on the boom, the manufacturer recommends contacting your authorized SMART reseller when the lamp must be exchanged. • Only qualified personnel should replace the projector lamp.
To remove the projector plate assembly from the projector boom 1. Put the system in Standby mode by pressing the power button on the ECP. Wait for the system to enter Standby mode, and then turn the projector’s master power switch off to shut down the system. 2. Unplug the power cord and all connected cables. 3. Wait at least 15 minutes for the projector to completely cool. 4.
To replace the projector plate assembly on the projector boom 1. Complete the last step of the replacement projector lamp instructions. 2. Attach the projector plate to the projector using the three screws that you removed from the projector plate assembly. 3. Put the projector plate assembly back on the projector boom by attaching the projector plate hinge channel to the corresponding flange hook on the projector boom. 4. Hold on to the projector plate assembly firmly when raising the assembly. 5.
Transporting Your Projector System Save your original Unifi 45 projector retrofit kit packaging so that it’s available if you need to transport your system. When required, repack it with as much of the original packaging as possible. This packaging was designed with optimal shock and vibration protection. If your original packaging is no longer available, you can purchase the same packaging directly from your authorized SMART reseller.
36 Maintaining Your Unifi 45 Projector System 99-00881-20 A0
Troubleshooting Your Interactive Whiteboard System In this Chapter This chapter deals with basic troubleshooting issues for your SMART Board interactive whiteboard system that you can easily solve. For more complex issues, or issues not mentioned in this section, please contact your authorized SMART reseller and consult the SMART technical support website.
Projector Ready Lights and Projector Status The three projector ready lights are located on the underside of the projector. They are marked Lamp, On/Standby and Temp (for temperature). Lamp status light On/Standby status light Temp status light Off Off Off The projector isn’t receiving power. Check the connection, power supply and power switch at the back of the projector. Off Solid green Off The projector is operating normally. Off Solid red Flashing red The projector is overheating.
Appendix A: Remote Management of Your Interactive Whiteboard System In This Section This appendix provides detailed instructions on how to set up your computer or your room control system to manage your SMART Board interactive whiteboard system settings.
Serial Interface Settings You must configure your computer’s serial communication program or your room control system’s serial communication settings with the following values: Criteria Input Value Bit Rate 19,200 bps Data Bits 8 Parity None Stop Bits 1 Flow Control None NOTE: Commands must be typed in ASCII format. Terminate all commands and responses with a carriage return. To configure your serial interface 1.
The embedded firmware program coordinates command sequencing and is capable of buffering up to 127 commands. In each power state, the buffer accepts valid commands until the program can process them. Power state Commands Accepted Idle The buffer accepts all valid commands. The system processes the get fwver, get bootver, get input, get powerstate and on commands. Powering The buffer accepts all valid commands. The program doesn’t process commands. On The buffer accepts all valid commands.
To allow the ECP to sequence the commands 1. Type on, and then press ENTER. 2. Type set input vga1, and then press ENTER.
Query Commands Command Result Response (On-Screen) get fwver Displays the ECP’s firmware version* FW version = # get bootver Displays the ECP’s bootloader version* Bootloader version = # get input Displays the projector’s input* Input = # get powerstate Displays the projector’s power state (Idle, Powering, On or Cooling)* Powerstate = # get brightness Displays the projector’s brightness setting Brightness = # get contrast Displays the projector’s contrast setting Contrast = # get volume
Set Commands 44 Command Result Response (On-Screen) set input vga1 Selects the VGA1 projector input Input = vga1 set input vga2 Selects the VGA2 projector input Input = vga2 set input composite Selects the composite projector input Input = composite set input s-video Selects the S-video projector input Input = s-video set brightness +xx (xx is a value between -16 and 16) Increases the brightness by a value equal to xx Brightness = # set brightness -xx (xx is a value between -16 and 16)
Regulatory Compliance Waste Electrical and Electronic Equipment Regulations Waste Electrical and Electronic Equipment regulations apply to all electrical and electronic equipment sold within the European Union. When you dispose of any electrical or electronic equipment, including SMART products, we strongly encourage you to contact your local WEEE recycling agency for recycling and disposal advice. Your SMART product required the extraction and use of natural resources for its production.
46 Regulatory Compliance 99-00881-20 A0
Customer Support Online Support Visit www.smarttech.com/support to view and download user’s guides, “how-to” and troubleshooting articles, software and more. Training Visit www.smarttech.com/trainingcenter for training materials and information about our training services. Contacting SMART Technical Support SMART Technical Support welcomes your call. However, if you experience difficulty with your SMART product, you might want to contact your authorized SMART reseller first.
48 Customer Support 99-00881-20 A0
Index A Adjusting Advanced image adjustment options 26 Default settings 27 Auto input search 27 Beep 27 Blackboard mode 27 Fan mode 28 Keystone 27 Lamp power 28 No signal power off 27 Power on 28 Projection mode 28 Resetting all 28 Image adjustment options 26 Brightness 26 Color, tint and sharpness 26 Contrast 26 Picture mode 26 Keystone alignment 8 Position adjustment options 26 Clamp pulse 26 Frequency 26 Horizontal position 26 Phase 26 Vertical position 26 Projector settings 26 Setting display 27 Backgro
K T Keystone Definition 8 Troubleshooting Warning lights 37 Turning on your system 24 L Lamp cover 38 Lamp replacement 32 M Master power switch 23, 24 Menu 25 Mirror cleaning 31 N Notebook software 19 P Position adjustment options 26 Power settings 27 Power switch Master 23, 24 R Registration 47 Remote control menu 25 Removing the projector plate assembly 33 Replacing the projector lamp 32 Replacing the projector plate assembly 34 Resetting all settings 28 Resetting the lamp timer 34 S Setting disp
SMART Technologies 1207 – 11 Avenue SW, Suite 300 Calgary, AB T3C 0M5 CANADA www.smarttech.com/support www.smarttech.com/contactsupport Support +1.403.228.5940 Toll Free 1.866.518.6791 (U.S.