
User Manual
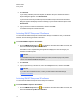

Table Of Contents
- Important information
- Chapter 1: About the SMART Response system
- Chapter 2: Getting started
- Using your SMART Response system
- Environmental requirements
- Computer requirements
- Connecting hardware and activating SMART Response software
- Activating SMART Response software
- Selecting how students answer questions
- Starting SMART Response LE software the first time
- Asking instant questions
- Setting up Teacher Tools
- Creating a class list
- Editing a class list
- Chapter 3: Using SMART Response software
- About SMART Notebook software
- Creating assessments
- Adding questions to the assessment
- About question types
- Adding questions using the Insert Question wizard
- About intelligent expression grading
- Creating answer keys
- Importing questions from a Word document
- Example Word document question formats
- Importing questions from an XML or SQZ file
- Importing questions from a PDF file
- PDF document formatting
- Importing questions from ExamView HTML
- Exporting ExamView tests
- About ExamView HTML question importing
- Setting answers for imported questions
- Adding choices to a question
- Tagging questions
- Starting and connecting to a class
- Connecting to the class
- Disconnecting students from a class
- Using clickers
- Completing assessments
- Chapter 4: Reviewing, printing and exporting assessment results
- Chapter 5: Maintaining your SMART Response system
- Appendix A: Hardware environmental compliance
- Waste Electrical and Electronic Equipment Regulations (WEEE directive)
- Restriction of Certain Hazardous Substances (RoHS directive)
- Batteries
- Packaging
- Covered electronic devices
- China’s Electronic Information Products regulations
- U.S. Consumer Product Safety Improvement Act
- California Air Resources Board – Airborne Toxic Control Measure
- Restriction of Certain Chemicals (REACH directive)

Starting SMARTResponse LE software the first
time
You can use SMARTResponse LE in two modes: Anonymous mode and Sign-in mode. See About
Sign In and Anonymous modes on page 62 for information about the operating modes..
Before you can use SMARTResponse LE in your classroom in Anonymous mode, you must
l assign a classroom name to the receiver, which you can do by creating a .teacher file, or by
starting an assessment in SMARTNotebook software.
l pair the students' clickers with the SMARTResponse receiver.
To use SMARTResponse LE in Sign-in mode, in addition to the above, you must
l assign clicker IDs to each student’s clicker (which you can do when you pair the clickers with
the receiver).
l create a class with a class list containing the clicker IDs.
N N O T E S
l You’re unable to assign a classroom name while you install SMARTResponse software.
You can create a classroom name only after the software is installed and Teacher Tools
starts for the first time.
l If you created a .teacher file on another computer, you can copy it to your computer and open
it instead of creating a new file.
Pairing student clickers
I I M P O R T A N T
You must connect the receiver and start a class before you can pair the clickers with the receiver.
g To pair clickers with the SMARTResponse receiver
1. If a class isn’t running, start Teacher Tools. See Starting Teacher Tools on page 23.
Teacher Tools appears.
C H A P T E R 2
Getting started
20