Installation and User’s Guide SMART Document Camera 280
Product Registration If you register your SMART product, we’ll notify you of new features and software upgrades. Register online at www.smarttech.com/registration. Keep the following information available, in case you need to contact Technical Support: Serial Number____________________________________________ Date of Purchase _________________________________________ FCC Warning This device complies with Part 15 of the FCC Rules.
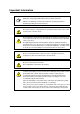
Important Information IMPORTANT Read all the safety and operating instructions before operating the product. Retain the safety and operating instructions for future reference. Adhere to all warnings on the product and in the operating instructions. Follow all operating and user instructions. WARNING Do not push objects of any kind into the openings in this product as this could result in a fire or electric shock.
WARNING This product is equipped with either a polarized 2-wire AC line plug (a plug having one blade wider than the other) or a 3-wire grounding type plug (a plug having a third, grounding pin). The 2-wire polarized plug fits into the power outlet one way only. This is a safety feature. If you are unable to insert the plug fully into the outlet, try reversing the plug. If you are still unable to insert the plug fully into the outlet, contact your electrician to replace the outlet.
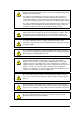
CAUTION Do not block or cover any of the openings or slots of this product. The slots and openings provide ventilation, ensure reliable operation of the product and protect it from overheating. Do not place the product on a surface that would block the openings or slots. Do not place the product on a built-in installation such as a bookcase or rack unless you provide proper ventilation and adhere to the manufacturer's instructions.
CAUTION Do not keep this product in any humid, dusty, salt bearing wind or vibrating location. Use it under the following environmental conditions: • Temperature: 0°C - 40°C (32°F - 104°F) • Humidity: 30% - 85% (Non-condensing) CAUTION Do not point the camera lens directly into the sun as this could cause damage to the camera. CAUTION Don’t hold the camera column or the camera head when you carry the document camera. Hold the main unit with both hands when you carry it.
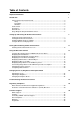
Table of Contents Important Information i Introduction 1 Camera Column and Camera Head................................................................................... 2 Lamp............................................................................................................................ 2 Zoom Dial .................................................................................................................... 2 AF Button...................................................................
vi 99-00864-20 D0
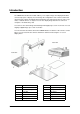
Introduction The SMART Document Camera 280 enables you to capture images and display them with a connected projector or display. You can change the configuration of the camera column and camera head to capture and display printed materials, three dimensional objects, microscope slides, or distant surfaces or objects. You can also display image data from a connected computer or an SD memory card. You can focus the camera image automatically and magnify it up to a 5.2× zoom ratio.
Camera Column and Camera Head The camera column and camera head rotate, enabling you to capture at different angles. You can also rotate the column and head towards the main unit to minimize the risk of damage to the document camera when it’s not in use. Lamp The camera head includes a lamp. Illumination lamp You can turn the lamp on or off by sliding the illumination lamp switch. CAUTION Do not stare directly into the lamp or shine the lamp directly into someone’s eyes.
AF Button The AF button enables you to automatically focus the camera image. Push You can also manually focus the image using the options in SMART Notebook. For more information, see page 13.
Control Panel The buttons on the control panel enable you to turn the document camera on or off, display and control the on-screen display menu, save images to an SD memory card, switch output modes and control the brightness of the image.
Rear Panel The rear panel enables you to connect the document camera to a projector or television display, and then present images from the document camera on the connected hardware. You can also display image data from a connected computer. 1 2 3 4 5 6 Number Name 1 DC IN 12V 2 RGB OUT 3 RGB IN 4 Video OUT 5 OUTPUT (DIP switch) 6 USB (2.
6 Introduction 99-00864-20 D0
Setting Up and Turning On the Document Camera This chapter explains the basic procedure for setting up the document camera. Setting Up the Document Camera To set up the document camera 1. Position the document camera. CAUTION Do not hold the document camera by the camera column or the camera head when you carry it. Hold the document camera with both hands when you carry it. Take care to prevent damage to the camera head. 2. Rotate the column as shown in the figure below.
To connect the document camera to a computer and projector 1. Set the left Output DIP switch on the rear panel of the document camera to RGB. 2. Connect the analog RGB cable to the RGB OUT receptacle on the rear panel of the document camera. 3. Connect the other end of the RGB cable to the input receptacle on the projector. NOTE: If you have a DLP projector, change the Mode setting to Graphics in the on-screen display menu (see page 26). 4.
To connect the document camera to a PAL system television display 1. Set the left Output DIP switch on the rear panel of the document camera to Video. 2. Set the right Output DIP switch on the rear panel of the document camera to PAL. CAUTION Do not change the DIP switch setting when the document camera is turned on. 3. Connect the video cable with the RCA plug to the VIDEO OUT receptacle on the rear panel of the document camera. 4. Connect the other end of the video cable to the television display. 5.
5. Press the left arrow button to return to the previous menu. 10 6. Press the Menu button to confirm your selection. 7. Press the Menu button again to close the on-screen display menu.
Turning Off and Storing the Document Camera This chapter explains the basic procedure for turning off the document camera and storing it safely. CAUTION Do not disconnect cables from the rear panel when the document camera is turned on. To turn off the document camera 1. If the lamp is on, slide the illumination lamp switch to turn the lamp off. 2. Press the Camera button camera image.
3. Rotate the column as shown in the figure below. CAUTION Never rotate the camera column in the opposite direction. Do not hold the camera head when you rotate the camera column. Instead, hold the camera column as you rotate it. 4. Place the document camera in a safe location. CAUTION Do not hold the document camera by the camera column or the camera head when you carry it. Hold the document camera with both hands when you carry it. Take care to prevent damage to the camera head.
Using the Document Camera Using the Document Camera in SMART Notebook Software Your document camera includes a copy of SMART Notebook 10. You can use SMART Notebook software to display and capture images and present them on your interactive whiteboard. You can also use SMART Notebook’s full range of features to manipulate and annotate images to enhance your lesson plan. To display document camera images in SMART Notebook 1. Set up the document camera (see page 7) and turn it on (see page 9). 2.
Displaying Printed Materials You can set up the document camera to display printed materials. To display printed materials 1. Set up the document camera and connect it to your computer (see page 7). 2. Place a document under the camera lens. 3. Rotate the zoom dial on the camera until the document image is at the desired magnification. OR In SMART Notebook, press the plus or minus buttons to the right of the magnification icon until the document image is at the desired magnification. 4.
Displaying Printed Materials Using the Stage You can set up the document camera to display printed materials using the included stage, magnetic sheet and anti-glare sheet. To display printed materials using the stage 1. Set up the document camera and connect it to your computer (see page 7). 2. Align the stage with the document camera using the stage positioning as a guide. 3. Place a document on the stage. Attach the document to the stage with the magnetic sheet. 4.
Displaying a Three Dimensional Object You can adjust the angle of the camera column and column head to capture a three dimensional object from the side. Adjust Adjust Adjust To display a three dimensional object 1. Set up the document camera and connect it to your computer (see page 7). 2. Adjust the angle of the camera column and camera head as shown in the previous figure. NOTE: Position the object so that it is at least 50 mm away from the camera head.
Displaying a Wall Surface or Distant Object You can rotate the camera head to face horizontally to display a distant wall surface or object. Forward shooting Backward shooting To display a wall surface or distant view 1. Set up the document camera (see page 7). NOTE: Position the document camera so that it is at least 50 mm away from the wall surface or object. If you position it closer to the wall surface or object, the camera is unable to focus.
Displaying a Microscope Slide You can present an image of a slide under a microscope. Adjust Adjust To present a microscope slide 1. Place an object, such as a prepared slide, under the microscope. 2. Adjust the focus of the microscope. 3. Set up the document camera (see page 7). 4. Rotate the camera column and the camera head as shown above. 5. Change the Microscope setting to Set in the document camera’s on-screen display menu.
Displaying Image Data from an SD Memory Card You can display image data from an SD (Secure Digital) memory card (not provided). CAUTION Avoid static electricity when handling SD memory cards. SD memory cards are vulnerable to static electricity and exposure to static electricity can cause the memory card to malfunction or corrupt its contents. Do not insert an SDHC memory card. These memory cards are not compatible with the document camera.
To save an image CAUTION You are unable to save an image to an SD memory card if the memory card is write-protected. Do not remove the SD memory card from the document camera when the document camera is reading from or writing to the memory card. SMART Technologies is not liable if the document camera fails to save an image. TIP If you haven’t saved an image since you turned on the document camera, save an image as a test. 1. Press the Camera button Camera mode.
To delete an image 1. If the projector or television display shows the on-screen display menu, press the Menu button on the document camera control panel to close the menu. 2. Press the SD Mode button on the document camera control panel to switch to SD mode. The projector or television display shows an image from the SD memory card. 3. Press the arrow buttons on the document camera control panel to display the next or previous image until you see the image you want to delete. 4.
3. Press the Menu button on the document camera control panel. The on-screen display menu appears. For more information on using the on-screen display menu, see page 9. 4. Select Format Media in the on-screen display menu, and then press the right arrow button to display its submenu. 5. Select Format?, and then press the Menu button to confirm your selection. To remove the SD memory card CAUTION Remove the memory card before you turn off the document camera. 1.
CAUTION Do not connect or disconnect the USB cable when the document camera is turned on. To transfer image data from an SD Memory Card to a computer 1. Set up the document camera (see page 7). 2. Change the USB Mode setting to Mass Storage in the document camera’s on-screen display menu. For more information on changing settings in the on-screen display menu, see page 9.
Changing the Image Selection You can use the document camera with a projector or television display to show the camera image, the video signal from a connected computer or an image from an SD memory card. You can switch between these images without disconnecting and reconnecting the cables. To display the Camera mode Press the Camera button on the document camera control panel. To display the video signal from a connected computer 1. Press the PC button on the document camera control panel.
Changing the Focus, Brightness and Graphics Mode You can manually adjust the focus, change the brightness mode and change the graphics mode if your document camera is connected to a television display or projector using the on-screen display menu. Adjusting the Focus You can press the AF button on the camera head to automatically focus the camera.
For more information on changing settings in the on-screen display menu, see page 9. NOTE: You can also change the brightness mode from Manual to Auto by pressing both brightness buttons on the document camera control panel at the same time. TIP If an object is exposed to bright light, you can reduce the brightness of the image by closing curtains or moving the light source. Changing the Graphics Mode You can change the document camera settings to improve the quality of some documents.
Troubleshooting the Document Camera Issue Solution No image displays or appears. • Turn off the document camera (see page 11). Securely connect all cables and connect the camera’s AC adapter to a power outlet. Wait for several seconds, and then press the Power button on the document camera control panel to turn it on. • Adjust the zoom dial. The camera may be magnified and is displaying a blank section of the document.
28 Troubleshooting the Document Camera 99-00864-20 D0
Regulatory Compliance Waste Electrical and Electronic Equipment Regulations Waste Electrical and Electronic Equipment regulations apply to all electrical and electronic equipment sold within the European Union. When you dispose of any electrical or electronic equipment, including SMART products, we strongly encourage you to contact your local WEEE recycling agency for recycling and disposal advice. Your SMART product required the extraction and use of natural resources for its production.
Customer Support Online Support Visit www.smarttech.com/support to view and download user’s guides, “how-to” and troubleshooting articles, software and more. Training Visit www.smarttech.com/trainingcenter for training materials and information about our training services. Contacting SMART Technical Support SMART Technical Support welcomes your call. However, if you experience difficulty with your SMART product, you may want to contact your local reseller first.
www.smarttech.com/support www.smarttech.com/contactsupport Support +1.403.228.5940 Toll Free 1.866.518.6791 (U.S.