
Maintenance Guide
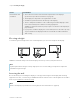

Table Of Contents
- Cover
- Important information
- Contents
- Chapter 1 Welcome
- Chapter 2 Installing the display
- Chapter 3 Connecting computers and other devices

Chapter 2 Installing the display
smarttech.com/kb/171555 24
In some situations, you may need to request an engineering analysis to determine if the wall can support
the display.
Selecting mounting hardware
The mounting hardware required for installation varies according to the type of wall onto which the
display is being mounted.
If you’re using the SMART wall mount (WM-SBID-200), see the wall mount’s illustrated installation
instructions for information about the required mounting hardware (smarttech.com/kb/171373).
Selecting a wall mount
It is always best to mount the display on a wall. If the wall can’t support the display’s weight, you can use
additional hardware to transfer some of the weight to the floor.
The display includes a pre-attached wall bracket which can be used to mount the display to the wall.
See
l
SBID-MX255-V2, SBID-MX265-V2, MX275-V2 and MX286-V2 installation instructions
(smarttech.com/kb/171547)
l
SBID-MX255-V3, SBID-MX265-V3, MX275-V3 and MX286-V3 installation instructions
(smarttech.com/kb/171785).
l
SBID-MX255-V4, SBID-MX265-V4, MX275-V4 and MX286-V4 installation instructions
(smarttech.com/kb/171835).
Contact your authorized SMART reseller (smarttech.com/where) for information on SMART’s mounting
options.
If you choose a third-party option rather than one of SMART’s mounting options, be sure the wall mount
can accommodate the display’s dimensions and support the display’s weight as well as the weight of
any attached accessories.
Mounting the display
Mount the display following the included installation instructions. In addition, consider the following:
The electrical and mechanical components of a display are designed to work properly when the display
is mounted in the orientation described in its installation instructions. Mounting the display in a different
orientation can cause malfunctions and will void the display’s warranty.