
User Guide

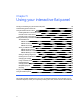
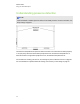
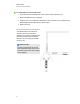
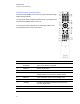
Table Of Contents
- Cover page
- Important information for your interactive flat panel
- Chapter 1: About your interactive flat panel
- Chapter 2: Installing your interactive flat panel
- Chapter 3: Connecting computers and peripheral devices
- Chapter 4: Installing SMART software
- Chapter 5: Using your interactive flat panel
- Turning on and turning off your interactive flat panel
- Understanding presence detection
- Using the infrared remote control
- Getting started with your SMART Board interactive flat panel
- Playing audio files on your interactive flat panel
- Using the USB receptacle
- Chapter 6: Using guest laptops with your interactive flat panel
- Chapter 7: Maintaining your interactive flat panel
- Updating your SMART software and firmware
- Calibrating your interactive flat panel
- Orienting your interactive flat panel
- Replacing a pen nib
- Cleaning the screen
- Cleaning the presence detection sensors
- Cleaning the camera windows and reflective tape
- Maintaining ventilation
- Preventing condensation
- Checking the interactive flat panel installation
- Removing your interactive flat panel
- Transporting your interactive flat panel
- Chapter 8: Troubleshooting for your interactive flat panel
- Appendix A: Adjusting video settings with the on-screen display menu
- Appendix B: Hardware environmental compliance
- Index
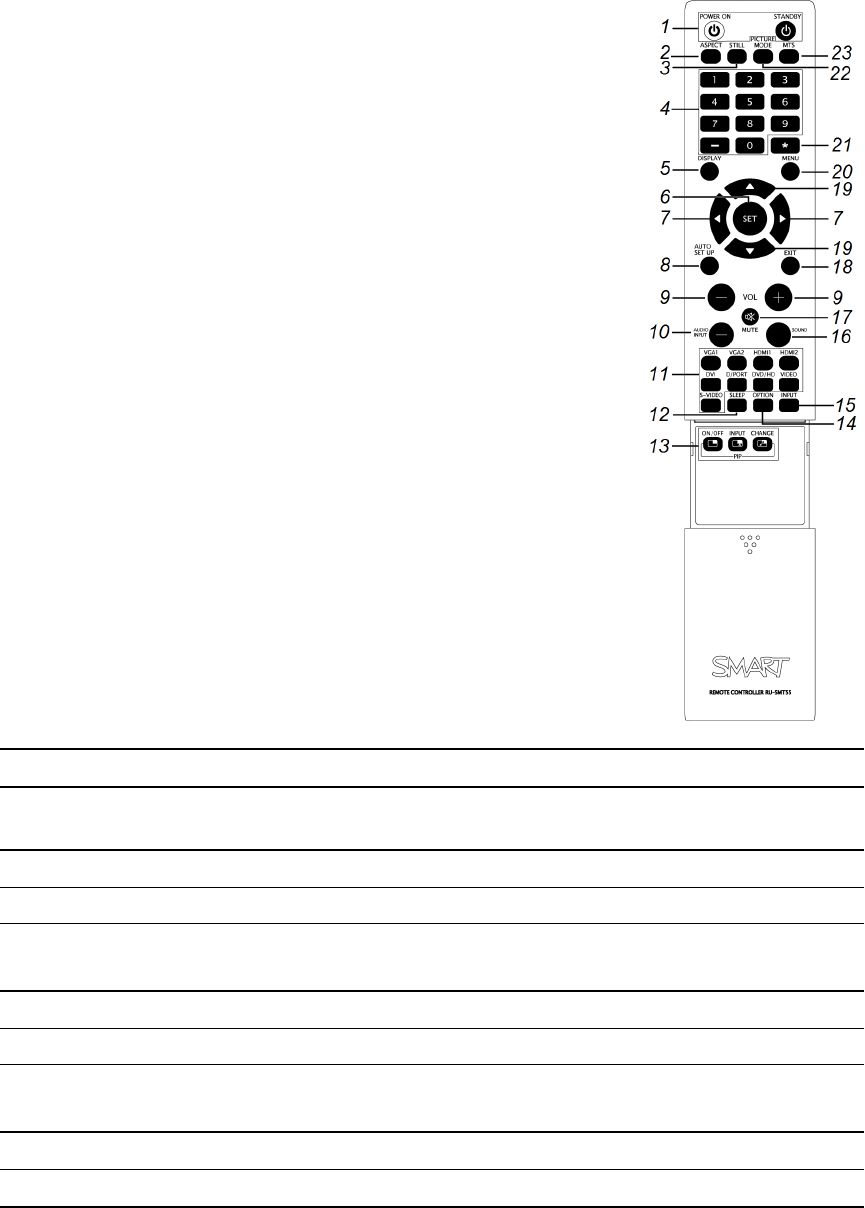
Infrared remote control buttons
The remote control enables you to access on-screen menus and change
display and input settings.
Use the remote control’s POWER ON button turn on your interactive flat
panel and the STANDBY button to turn it off.
Use the remote control’s input buttons to change input sources when
switching between the connected computers.
Number Function Description
1
POWER ON
STANDBY
Turns on your interactive flat panel
Turns off your interactive flat panel
2 ASPECT Selects picture aspect
3
STILL Turns on or turns off the still picture mode
4 Number pad Press buttons on the number pad to set and change passwords,
change channels or to customize or change settings
5 DISPLAY Turns on and turns off the on-screen display menu
6 SET Makes selection
7 Left/Right Increases or decreases the adjustment level within the
on
-
screen display menu
8 AUTO SET UP Enters auto setup menu
9 VOL +/- Increases or decreases audio output level
C H A P T E R 5
Using your interactive flat panel
32