
User Guide
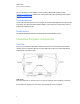
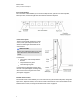
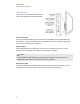
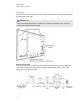
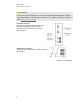
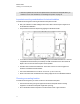
Table Of Contents
- Cover page
- Important information for your interactive flat panel
- Chapter 1: About your interactive flat panel
- Chapter 2: Installing your interactive flat panel
- Chapter 3: Connecting computers and peripheral devices
- Chapter 4: Installing SMART software
- Chapter 5: Using your interactive flat panel
- Turning on and turning off your interactive flat panel
- Understanding presence detection
- Using the infrared remote control
- Getting started with your SMART Board interactive flat panel
- Playing audio files on your interactive flat panel
- Using the USB receptacle
- Chapter 6: Using guest laptops with your interactive flat panel
- Chapter 7: Maintaining your interactive flat panel
- Updating your SMART software and firmware
- Calibrating your interactive flat panel
- Orienting your interactive flat panel
- Replacing a pen nib
- Cleaning the screen
- Cleaning the presence detection sensors
- Cleaning the camera windows and reflective tape
- Maintaining ventilation
- Preventing condensation
- Checking the interactive flat panel installation
- Removing your interactive flat panel
- Transporting your interactive flat panel
- Chapter 8: Troubleshooting for your interactive flat panel
- Appendix A: Adjusting video settings with the on-screen display menu
- Appendix B: Hardware environmental compliance
- Index
l Attach the speakers and connect the speaker wires to the interactive flat panel before you
wall-mount it. For more information, see Installing the speakers on page 14.
Important mounting considerations for trained installers
Consider the following when mounting the interactive flat panel on a wall:
ll Plan your workflow to include cabling because some cable connection points might not be
accessible after installation.
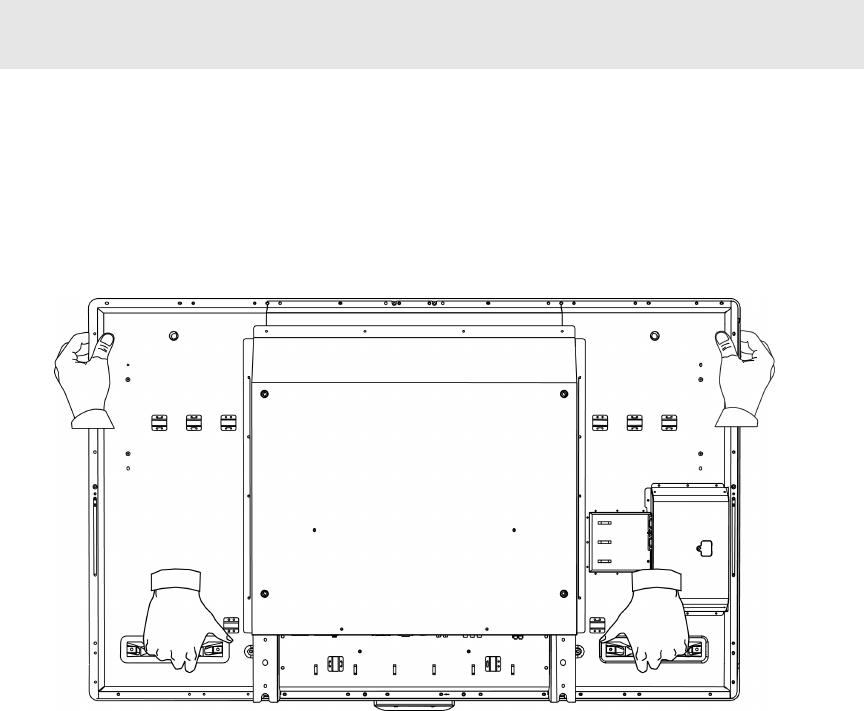
l Carry and lift the interactive flat panel by gripping the handles and sides.
l To mount the interactive flat panel on a wall, you require a standard VESA 600 mm × 400 mm
compatible wall mount bracket (not included). The wall mount bracket must have minimum
depth of 14 mm to ensure sufficient space for the speakers.
l Use M8 screws to fasten the wall bracket. The screws must be 14–15 mm long plus the
thickness of the bracket and the washer.
l The recommended fasten force is 99.57–121.70 in-lb. (11.25–13.75 N·m).
l Refer to the instructions included with the mounting equipment for more detailed information.
Choosing a mounting location
Consider the following when you select a location for the interactive flat panel:
l The wall must be strong enough to support the interactive flat panel and the mounting
equipment. The interactive flat panel weighs 98 lb. (44.5 kg).
l Do not install the interactive flat panel in a location where a door or gate could hit it.
C H A P T E R 2
Installing your interactive flat panel
11