
User Guide
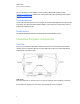
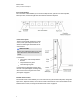
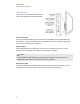
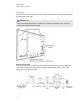
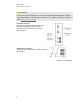
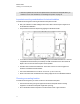
Table Of Contents
- Cover page
- Important information for your interactive flat panel
- Chapter 1: About your interactive flat panel
- Chapter 2: Installing your interactive flat panel
- Chapter 3: Connecting computers and peripheral devices
- Chapter 4: Installing SMART software
- Chapter 5: Using your interactive flat panel
- Turning on and turning off your interactive flat panel
- Understanding presence detection
- Using the infrared remote control
- Getting started with your SMART Board interactive flat panel
- Playing audio files on your interactive flat panel
- Using the USB receptacle
- Chapter 6: Using guest laptops with your interactive flat panel
- Chapter 7: Maintaining your interactive flat panel
- Updating your SMART software and firmware
- Calibrating your interactive flat panel
- Orienting your interactive flat panel
- Replacing a pen nib
- Cleaning the screen
- Cleaning the presence detection sensors
- Cleaning the camera windows and reflective tape
- Maintaining ventilation
- Preventing condensation
- Checking the interactive flat panel installation
- Removing your interactive flat panel
- Transporting your interactive flat panel
- Chapter 8: Troubleshooting for your interactive flat panel
- Appendix A: Adjusting video settings with the on-screen display menu
- Appendix B: Hardware environmental compliance
- Index
Back view
The back of the interactive flat panel includes the bottom terminal panel, the inside terminal panel and
the speaker wire connections.
I M P O R T A N T
Connect all required cables before you wall-mount your interactive flat panel. Some connectors
could be inaccessible after wall mounting.
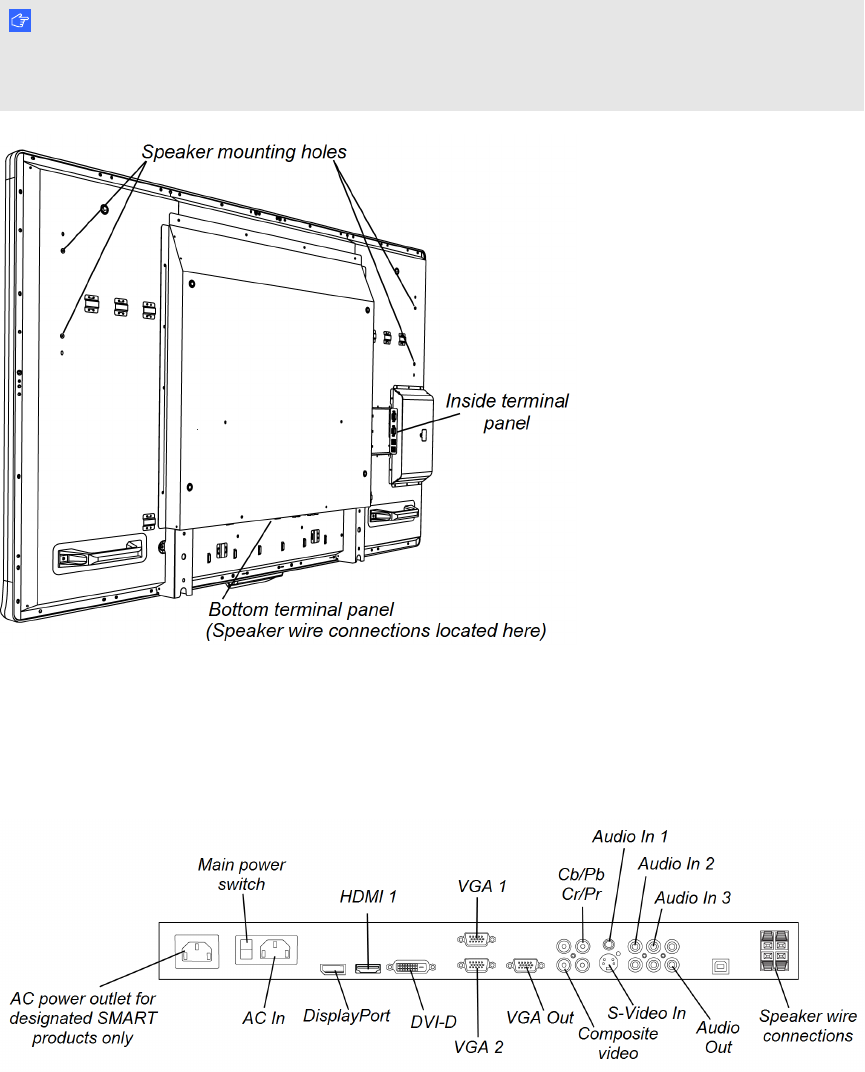
Bottom terminal panel
The bottom terminal panel contains the main power switch and several connections, including both
touch control connections and connections for auxiliary input and output devices, such as DVD
players, Blu-ray™ players and VCRs.
C H A P T E R 1
About your interactive flat panel
7