
User's Manual
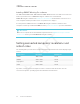


Table Of Contents
- Cover
- Important information
- Contents
- Chapter 1: Welcome
- Chapter 2: Installing the display
- Chapter 3: Connecting power and devices
- Chapter 4: Configuring the display
- Chapter 5: Configuring connected computers
- Chapter 6: Maintaining the display
- Chapter 7: Troubleshooting
- Troubleshooting the display
- Troubleshooting the display’s software
- Referring to the SMART knowledge base for additional troubleshooting information
- Contacting your reseller for additional support
- Appendix A: Using settings
- Appendix B: Remotely managing the display
- Appendix C: Hardware environmental compliance

Chapter 5
43 smarttech.com/kb/171164
Chapter 5: Configuring connected computers
Installing SMART software on connected computers 43
Installing SMART Learning Suite 43
Installing SMART MeetingPro software 44
Setting connected computers’ resolutions and refresh rates 44
Install SMARTsoftware and set the resolution and refresh rate on any computers you connect to
the display.
NOTE
For information about connecting computers, see Connecting cables for room computers,
guestlaptops and other input sources on page23.
Installing SMART software on connected
computers
The display comes with either SMARTLearning Suite or SMARTMeetingPro® software.
Installing SMART Learning Suite
The SBID-7075, SBID-7086, SBID-7275 and SBID-7286 models come with one license of SMART
LearningSuite. You can download SMART LearningSuite from
smarttech.com/downloads and
install it on a room computer.
You can purchase additional licenses of SMARTLearning Suite to install on other computers.
Contact your authorized SMART reseller (smarttech.com/where) for more information.
IMPORTANT
Make sure a computer meets the minimum requirements in the SMARTNotebook software
release notes before you install SMART Learning Suite.