
User's Guide


5. Optionally, select the Also play the object’s sound check box to play sounds attached to
accepted objects when they’re dragged over the activity object (see Adding sounds to objects
on page 91).
6. Select the desired animation for rejected objects in the first Animation drop-down list.
7. Optionally, select the Also play the object’s sound check box to play sounds attached to
rejected objects when they’re dragged over the activity object (see Adding sounds to objects
on page 91).
8. Press Done.
g To present a matching lesson activity
1. Drag the objects (or have students drag the objects) to the activity object.
o
If the object is accepted, the accepted object animation plays (fade out by default).
o
If the object is rejected, the rejected object animation plays (bounce back by default).
2.
Press Add-ons , press Activity Builder, and then press Reset All when you’re done.
g To remove a matching lesson activity
1.
Press Add-ons , and then press Activity Builder.
2. Select the activity object, and then press Clear Properties.
Creating hide-and-show lesson activities
N O T E
You’ll complete the following tasks when creating hide-and-show lesson activities:
l Moving objects (see Moving objects on page 77)
l Locking objects (see Locking objects on page 80)
l Resizing objects using the scaling gesture (see Using the scaling gesture on page 84)
You can hide an object and then reveal it using several techniques:
l Add a Screen Shade to a page. During the presentation, gradually remove the shade to reveal
the underlying text and graphics when you’re ready to discuss them (see Using the Screen
Shade on page 123).
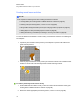
l Cover the object with digital ink and then erase the digital ink (see Writing, drawing and erasing
digital ink on page 42).
C H A P T E R 8
Using SMARTNotebook software in your classroom
118