
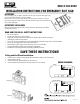
Installation Instructions

• Do not use outdoors.
• Do not mount near gas or electric heaters.
• Equipment should be mounted in locations and at heights where it will not be subject to
tampering by unauthorized personnel.
• The use of accessory equipment not recommended by the manufacturer may cause an unsafe condition.
• Do not use this equipment for other than its intended use.
• Before wiring to power supply, turn off electricity at fuse or circuit breaker.
• Consult local building code for approved wiring and installation.
• Installation and servicing should be performed by qualified personnel.
SAVE THESE INSTRUCTIONS!
Ceiling and End Mount Installation:
1. Connect input as shown in wiring diagram below and fasten canopy to the J-Box bracket.
2. Snap housing to canopy.
3. Connect the battery (when applicable) to the PC Board.
4. Secure faceplate to housing and remove the proper arrow as required.
Page 1 of 2
WIRING DIAGRAMS:
AC ONLY
BATTERY BACKUP
Ceiling Mount
End Mount
BAT
IMPORTANT:
When re-lamping, only use lamps specified in the exit sign. Using other lamp types may
result in transformer damage or unsafe conditions.
Battery in this unit may not be fully charged. After electricity is hooked up to unit, let
the battery charge for at least 24 hours. Normal operation of this unit should then take
effect (when applicable).
IMPORTANT SAFEGUARDS
When using electrical equipment, basic safety precautions should always be followed
including the following:
READ AND FOLLOW ALL SAFETY INSTRUCTIONS
SKU # 346-9020
INSTALLATION INSTRUCTIONS FOR EMERGENCY EXIT SIGN