
Installation manual


28
www.smartavi.com
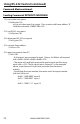
User Administration Menu
Controlling the SMTCP-2 via TELNET
Commands may be sent transparently to the matrix via a TELNET connection to the
SMTCP-2. To use this function, use a telnet client such as Hyperterminal or PuTTY to connect
to the IP address of the SMTCP-2. You will be prompted for a username and password -
this will be the same as the login information via HTTP. Once logged in, the SMTCP-2 is
ready to accept the standard RS-232 commands. For a list of the available commands,
please see the user manual for the matrix you are using. Although the commands are not
echoed to the client display, the commands are being issued to the matrix. Should you
need commands to be echoed, please see the instructions for your TELNET client.
The User Administration menu allows you to
change the user name and password for the
SMTCP-2. The default user name for the SMTCP-2
is Admin and the password is Pass.
Once you modify the login information, press
the Submit button to make the changes.
Upgrading the SMTCP-2
To updgrade the SMTCP-2 with the latest rmware, contact your sales representative to
obtain the rmware upgrade le or visit the SMTCP-2 product page at www.smartavi.com.
The version information is listed on the Main Menu. Once you have the le, use an FTP client,
preferably TFTP, to navigate to the IP address of the SMTCP-2. To upload the le to the SMTCP-2,
navigate to the /var/ director y, and upload the le rmware.img - IMPORTANT: the le MUST
BE NAMED rmware.img for the upgrade to work properly. Again, the full path MUST BE
/var/rmware.img. Once the le has been copied, restart (power o and power on) the
SMTCP-2. Once restarted the rmware update will be installed. To verify the upgrade, see
the version information listed on the Main Menu.
Using the SMTCP module (continued)