
Installation Guide

REV 09/02
Page 2 of 4
REMOTE RECEIVER (Continued)
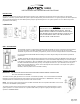
• With the slide switch in the ON position (toward the word TOP), the system will remain on until the slide switch is placed in the OFF or
REMOTE position.
• With the slide switch in the REMOTE position (centered), the system will only operate if the remote receiver receives commands from the
Wall Transmitter. Upon initial use or after an extended period of no use the ON button must be pressed for up to five seconds.
• With the slide switch in the OFF position (away from the word TOP), the system is off.
• It is suggested that the slide switch be placed in the OFF position if you will be away from your home for an extended period of
time. If the remote receiver is mounted out of children’s reach, placing the slide switch in the OFF position also functions as a
safely “lock out” by both turning the system off and rendering the transmitter inoperative.
INSTALLATION
NOTE: When the remote receiver is installed as a wall switch, It is recommended that it be installed
In a PLASTIC switch box. Remote functions may not operate properly if the remote
Receiver is installed in a steel switch box.
Make sure the remote receiver switch is in the OFF position (toward the small hole on the receiver’s face). It is recommended that 18 gauge,
stranded wires (not included) be used for wire installation between the terminal wiring block on the millivolt gas valve or electronic ignition
system and the wire terminals on the remote receiver. For best results, use 18 gauge stranded wire, with no splices, and measuring no longer
than 20 ft.
WALL MOUNT
Install four 1.5V AA-size ALKALINE batteries (included) in the remote receiver. For best performance,
remote receiver batteries should be factory fresh when installed. Very little battery power is required
to operate the remote receiver, but the electronics are turned to operate best when battery output is
greater than 5.3 volts. For new AA batteries should provide an output voltage of 6.0 to 6.2 volts.
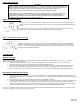
Position the remote receiver so the word TOP is facing up, then install the remote receiver into the
plastic switch box using the two long screws provided. Install the cover plate using the two short
screws provided. Push the remote receiver slide button over the remote receiver slide switch.
Reverse installation of the slide button if it appears off center.
HEARTH MOUNT
The remote receiver can be placed on the fireplace hearth or under the fireplace, behind the control access panel. Position
where the ambient temperature does not exceed 130 degrees F. With the battery compartment on bottom, install the slide-
on cover and receiver slide button. Reverse installation of the slide button if it appears off center.
PROTECTION FROM EXTREME HEAT IS VERY IMPORTANT. Like any piece of electronic equipment, the remote
receiver should be kept away from temperatures exceeding 130 degrees F. Battery life is also significantly shortened if
batteries are exposed to high temperatures.
WALL TRANSMITTER INSTALLATION
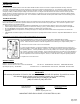
The Wall Transmitter should only be mounted in a PLASTIC switch box. Steel switch boxes will
“absorb” the RF signal reducing the operating distance of the Wall Transmitter’s signal to the
receiver. Mount the receiver into the switch box using #6-32X1” long screws. Purchase a
designer switch plate from your hardware or electrical store that matches your room décor. Mount
switch plate over the Wall Transmitter as shown to the right.
WIRING TERMINALS
This remote control system should be installed by a qualified electrician or a gas technician who is familiar with the gas
appliance and gas valves that will be operated by this remote. Incorrect wiring connections WILL cause damage to the
gas vale or electronic module operating the gas appliance and may also damage the remote receiver.