
Operating Guide

12
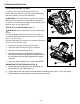
OPERATING INSTRUCTIONS
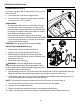
STARTING/STOPPING THE SAW
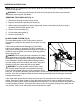
To start the saw: Depress the trigger switch (A).
Always allow the blade to reach the full selected speed,
and then guide the saw into the workpiece.
WARNING: The blade should reach the full selected
speed before it comes into contact with the workpiece.
To stop the saw: Release the trigger switch and allow the
blade to come to a complete stop.
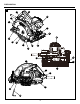
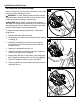
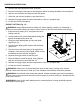
DEPTH-OF-CUT ADJUSTMENT (Fig. 5)
WARNING: Always maintain the correct blade-depth
setting.
The correct blade-depth setting for all cuts should not
exceed the thickness of the material being cut by more
than 1/4 in. (6.5 mm).
Greater blade depth will increase the chance of kickback,
and cause the cut to be rough.
1. Disconnect the plug from the power source.
2. Raise the depth-locking lever (
M
) to release it.
3. Determine the desired depth of cut.
4. Hold the base plate (
J
) at against the workpiece
and raise or lower the saw until the indicator mark on
the saw aligns with the desired depth on the depth
scale (
N
).
5. Lower the depth-locking lever to lock it into position.
ADJUSTING THE CUTTING ANGLE (Fig. 6)
1. Loosen the bevel-locking knob (
E
), located on the
bevel scale (F) on the base plate (J).
2. Tilt the body of the saw until the required angle is reached (refer to the 0°- 56° bevel scale).
3. Tighten the bevel-locking knob to secure the saw and angle.
5
6
J
E
F
A
M
J
N