
User manual

4
LED Worklight 0320
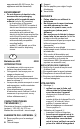
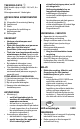
INTRODUCTION
• The worklight is intended for
illumination in dry indoor areas
• This appliance is not intended for
professional use
• Check whether the packaging
contains all parts as illustrated in
drawing 6
• When parts are missing or damaged,
please contact your dealer
• Read this instruction manual carefully
before use and save it for future
reference 2
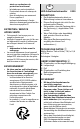
TECHNICAL DATA 1
Dimensions (width x depth x height) :
18.5 x 21.8 x 27.5 cm
Material shielding glass : tempered glass
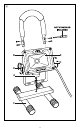
APPLIANCE ELEMENTS 6
A Wing nut for assembly/xation
B Lamp head
C Stand
D Wing nuts for adjusting lighting angle
E Shielding glass
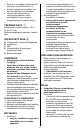
SAFETY
• Handletheworklightwithcare
• Donotdirectthelightbeamat
personsoranimalsanddonot
stareintothelightbeamyourself
(notevenfromadistance)
• Donotcoveroffthelamphead
whileoperatingtheworklight (the
lamp head heats up during operation
and can cause burns when the heat
accumulates)
• Replace damaged shielding glasses
before using the worklight again
• If the power cord is damaged, send
the worklight to a SKIL service station
(addresses are listed on www.skil.
com)
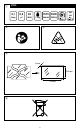
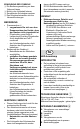
EXPLANATION OF SYMBOLS
2 Read the instruction manual before
use
3 Do not stare into the light beam
4 Replace a cracked shielding glass
5 Do not dispose of the worklight
together with household waste
material
WHEN CONNECTING NEW 3-PIN PLUG
(U.K. ONLY):
• Do not connect the blue (= neutral) or
brown (= live) wire in the cord of this
appliance to the earth terminal of the
plug
• If for any reason the old plug is cut o
the cord of this appliance, it must be
disposed of safely and not left
unattended
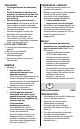
USE
• Assembly 6
! ensurethattheplugis
disconnectedfromthepower
sourcebeforeassemblingthe
appliance
- rst unscrew wing nut A
- assemble lamp head B on stand C
with wing nut A as illustrated
- lock the worklight in place by
tightening wing nut A
• Operating the appliance 6
- connect plug to power source
! connectthisearthedappliance
onlytoaproperlyearthed
powersupplysystem;ensure
thatsocketandextensioncable
haveafunctionalprotective
conductor
- the worklight is continuously
horizontally adjustable within its
pivoting range
- lock the worklight in place by
tightening wing nut A
- tilt the worklight into the desired
angle by loosening/tightening both
wing nuts D
MAINTENANCE / SERVICE
• This appliance is not intended for
professional use
• Clean the appliance with a dry or
slightly moist cloth (do not use any
abrasive or solvent-based cleaners)
! disconnecttheplugbefore
cleaning
• The light source of this appliance
cannot be replaced (if the LED-light
reaches the end of its service life after