
Manual


11
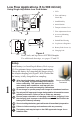
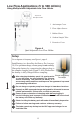
Setting or Verifying Flow Rate
For a diagram of the pump, see Figure 1, page 5.
Before use, allow pump to equilibrate after moving it from one
temperature extreme to another.
Ensure pump has run for fi ve minutes before proceeding with
calibration.
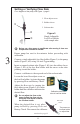
Connect a single adjustable low fl ow holder (Figure 3) to the pump
intake (Figure 2, #9) using 1/4-inch Tygon tubing.
Insert an opened sorbent tube (Figure 3, #3) into the rubber sleeve
(Figure 3, #2) of the low fl ow holder with the arrow on the tube
pointing toward the holder.
Connect a calibrator to the exposed end of the sorbent tube.
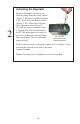
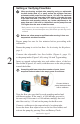
Loosen the brass fl ow adjust screw on
the low fl ow holder. Activate the pump
by pressing Flow and Battery Check.
Adjust the fl ow rate by turning the
fl ow adjust screw (Figure 3, #1) on the
holder until the calibrator indicates the
desired fl ow.
Do not adjust the fl ow on the
pump. Adjust the fl ow only by
using the fl ow adjust screw on
the low fl ow holder.
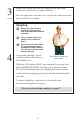
When the desired fl ow is set, place
pump in Hold by pressing Flow and
Battery Check. Disconnect the calibrator.
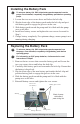
Figure 3
Single Adjustable
Low Flow Holder
with sample tube
1 Flow adjust screw
2 Rubber sleeve
3 Sorbent tube
Airfl ow
Calibration train with
tube in low fl ow holder
Flow adjust
screw
Turn screw on
low fl ow holder
to adjust fl ow.
continued on page 12
3